Fast, reliable, productive - Pick three | Rust's slogan
Rust is a systems programming language that runs blazingly fast, prevents segfaults, and guarantees thread safety. Coupled with Actix, I should be able to build a fast REST API elegantly.
The idea behind this article is to see how performant a Rust API can be. I am going to create an API that saves and reads data from/to a PostgreSQL database.
This article is separate in two parts, in this first part you will learn how to:
- Create a blazingly fast REST API in Rust
- Connect it to a PostgreSQL database
In the second part, we will compare the performance of our application to a Go application.
Twitter clone
Twitter is a "microblogging" system that allows people to send and receive short posts called tweets.
Let's create a small part of the Twitter API to be able to post, read, and like tweets. The goal is to be able to use our Twitter clone with a massive number of simultaneous fake users.
Before you begin, this page assumes the following:
- You have installed Cargo (Rust package manager)
API design
Our REST API needs to have three endpoints :
- /tweets
- GET: list last 50 tweets
- POST: create a new tweet
- /tweets/:id
- GET: find a tweet by its ID
- DELETE: delete a tweet by its ID
- /tweets/:id/likes
- GET: list all likes attached to a tweet
- POST: add +1 like to a tweet
- DELETE: add -1 like to a tweet
Implementation
Even though implementing an HTTP server could be fun, I choose to use Actix, which is ranked as the most performant framework ever by Techempower.
Actix Web
Actix is an actor framework prevalent in the Rust ecosystem. I am using it as an HTTP server to build our REST API.
Let's code
Three files structured our application.
main.rsto route HTTP requests to the right endpointtweet.rsto handle requests on /tweetslike.rsto handle requests on /tweets/:id/likes
- main.rs
- tweet.rs
- like.rs
#[actix_rt::main]async fn main() -> io::Result<()> {env::set_var("RUST_LOG", "actix_web=debug,actix_server=info");env_logger::init();HttpServer::new(|| {App::new()// enable logger - always register actix-web Logger middleware last.wrap(middleware::Logger::default())// register HTTP requests handlers.service(tweet::list).service(tweet::get).service(tweet::create).service(tweet::delete).service(like::list).service(like::plus_one).service(like::minus_one)}).bind("0.0.0.0:9090")?.run().await}
With only these three files, our application is ready to receive HTTP requests. In a couple of lines, we have a fully operational application. Actix takes care of the low level boilerplate for us.
#[get("/tweets")]
Annotation is a very convenient way to bind a route to the right path.
Validation
Let's run our application:
# Go inside the root project directory$ cd twitter-clone-rust# Run the application$ cargo run
And validate that each endpoint with no errors:
# list tweetscurl http://localhost:9090/tweets# get a tweet (return status code: 204 because there is no tweet)curl http://localhost:9090/tweets/abc# create a tweetcurl -X POST -d '{"message": "This is a tweet"}' -H "Content-type: application/json" http://localhost:9090/tweets# delete a tweet (return status code: 204 in any case)curl -X DELETE http://localhost:9090/tweets/abc# list likes from a tweetcurl http://localhost:9090/tweets/abc/likes# add one like to a tweetcurl -X POST http://localhost:9090/tweets/abc/likes# remove one like to a tweetcurl -X DELETE http://localhost:9090/tweets/abc/likes
At this stage, our application works without any database. Let's go more in-depth and connect it to PostgreSQL.
PostgreSQL
Diesel
Diesel is the most popular ORM in Rust to connect to a PostgreSQL database. Combined with Actix, it's a perfect fit to persist in our data. Let's see how we can make that happen. However, Diesel does not support tokio (the asynchronous engine behind Actix), so we have to run it in separate threads using the web::block function, which offloads blocking code (like Diesel's) to do not block the server's thread.
table! {likes (id) {id -> Uuid,created_at -> Timestamp,tweet_id -> Uuid,}}table! {tweets (id) {id -> Uuid,created_at -> Timestamp,message -> Text,}}joinable!(likes -> tweets (tweet_id));allow_tables_to_appear_in_same_query!(likes,tweets,);
Diesel uses a macro table!... and an internal DSL to declare the structure of our tables. There is no magic here. The code is compiled and statically linked at the compilation.
- main.rs
- tweet.rs
- like.rs
#[actix_rt::main]async fn main() -> io::Result<()> {env::set_var("RUST_LOG", "actix_web=debug,actix_server=info");env_logger::init();// set up database connection poollet database_url = env::var("DATABASE_URL").expect("DATABASE_URL");let manager = ConnectionManager::<PgConnection>::new(database_url);let pool = r2d2::Pool::builder().build(manager).expect("Failed to create pool");HttpServer::new(move || {App::new()// Set up DB pool to be used with web::Data<Pool> extractor.data(pool.clone())// enable logger - always register actix-web Logger middleware last.wrap(middleware::Logger::default())// register HTTP requests handlers.service(tweet::list).service(tweet::get).service(tweet::create).service(tweet::delete).service(like::list).service(like::plus_one).service(like::minus_one)}).bind("0.0.0.0:9090")?.run().await}
Deployment
Qovery is going to help you to deploy your application in a few seconds. Let's deploy our Twitter Clone now.
- Web
- CLI
Sign in to the Qovery web interface.
Deploying the app
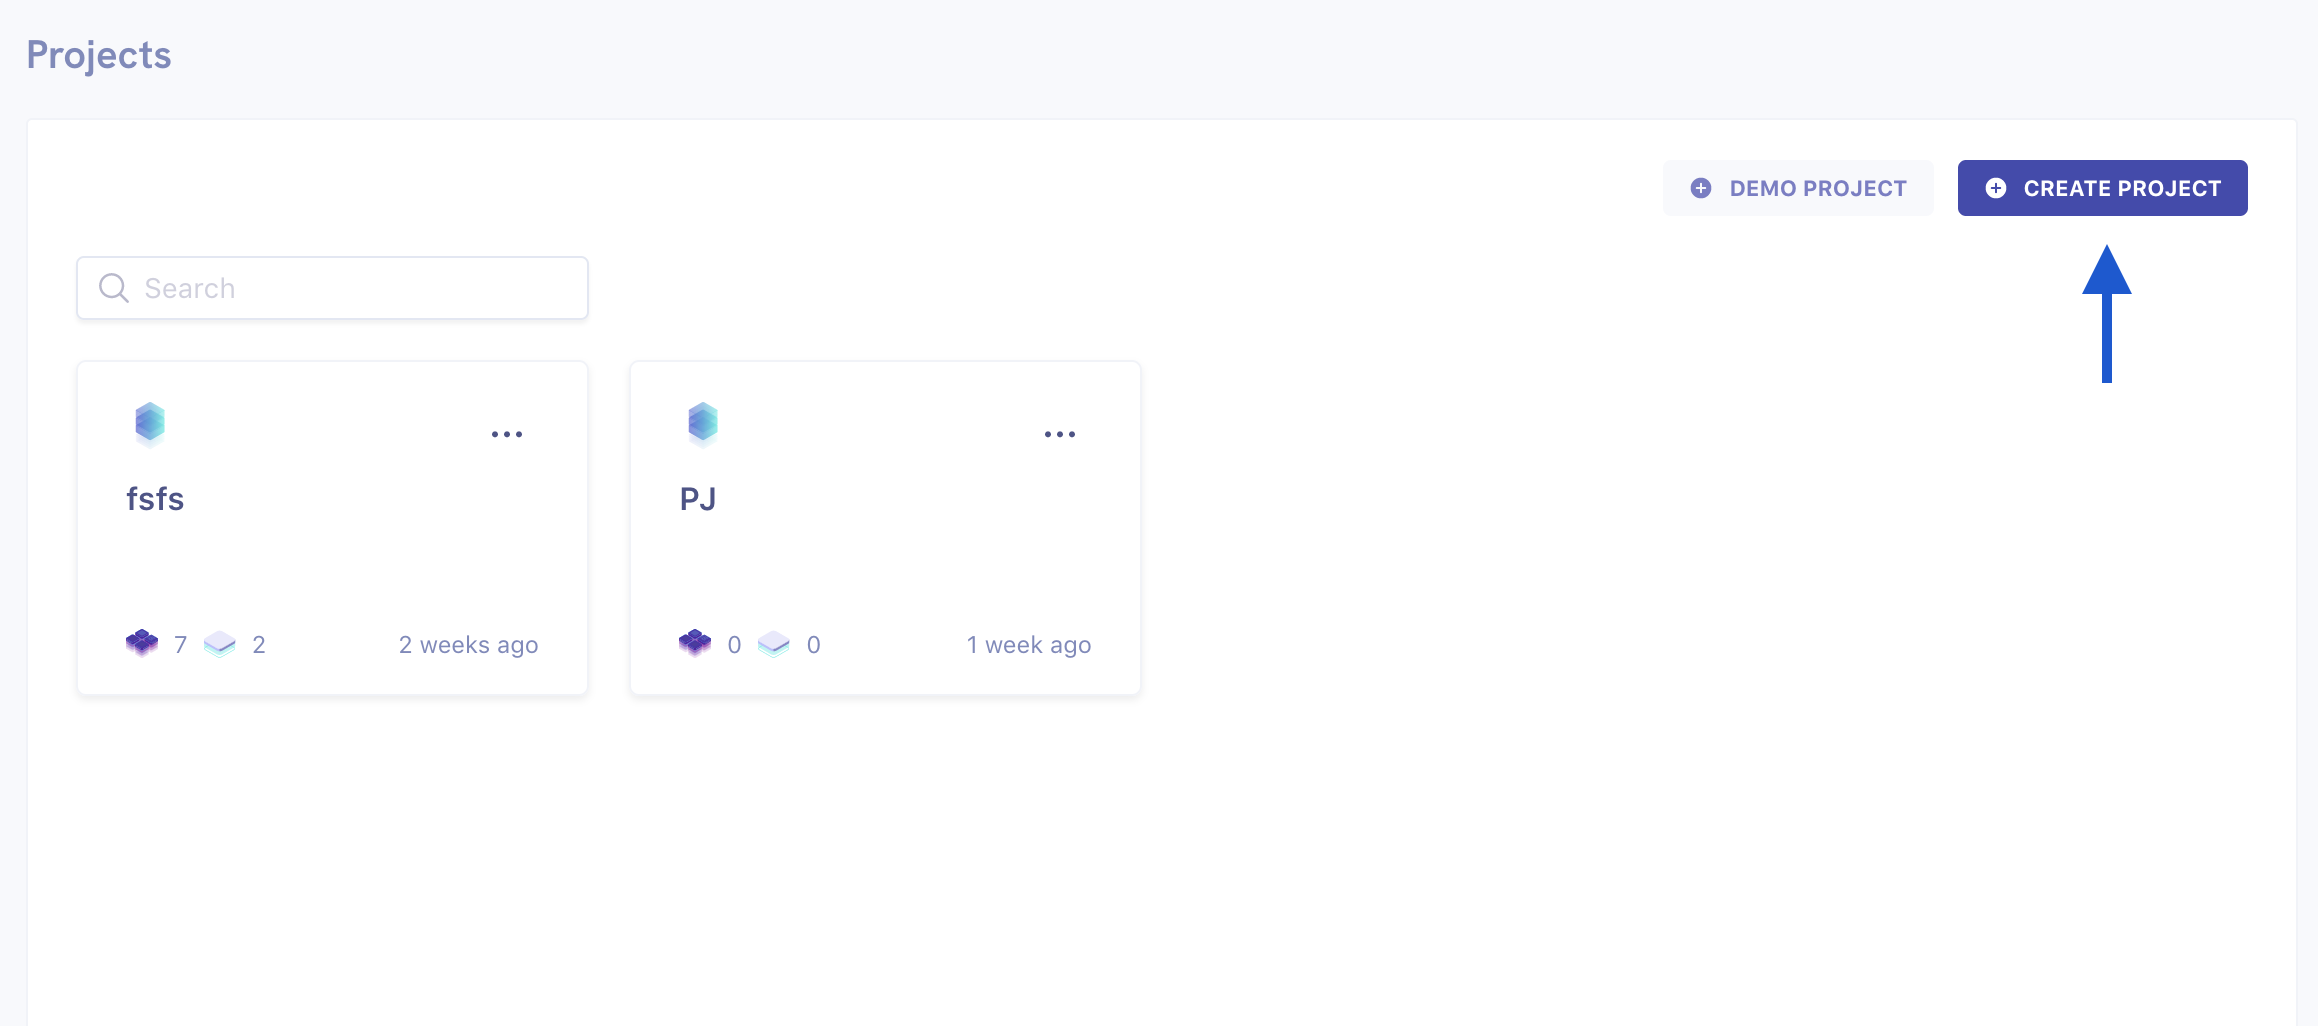
Create a new project
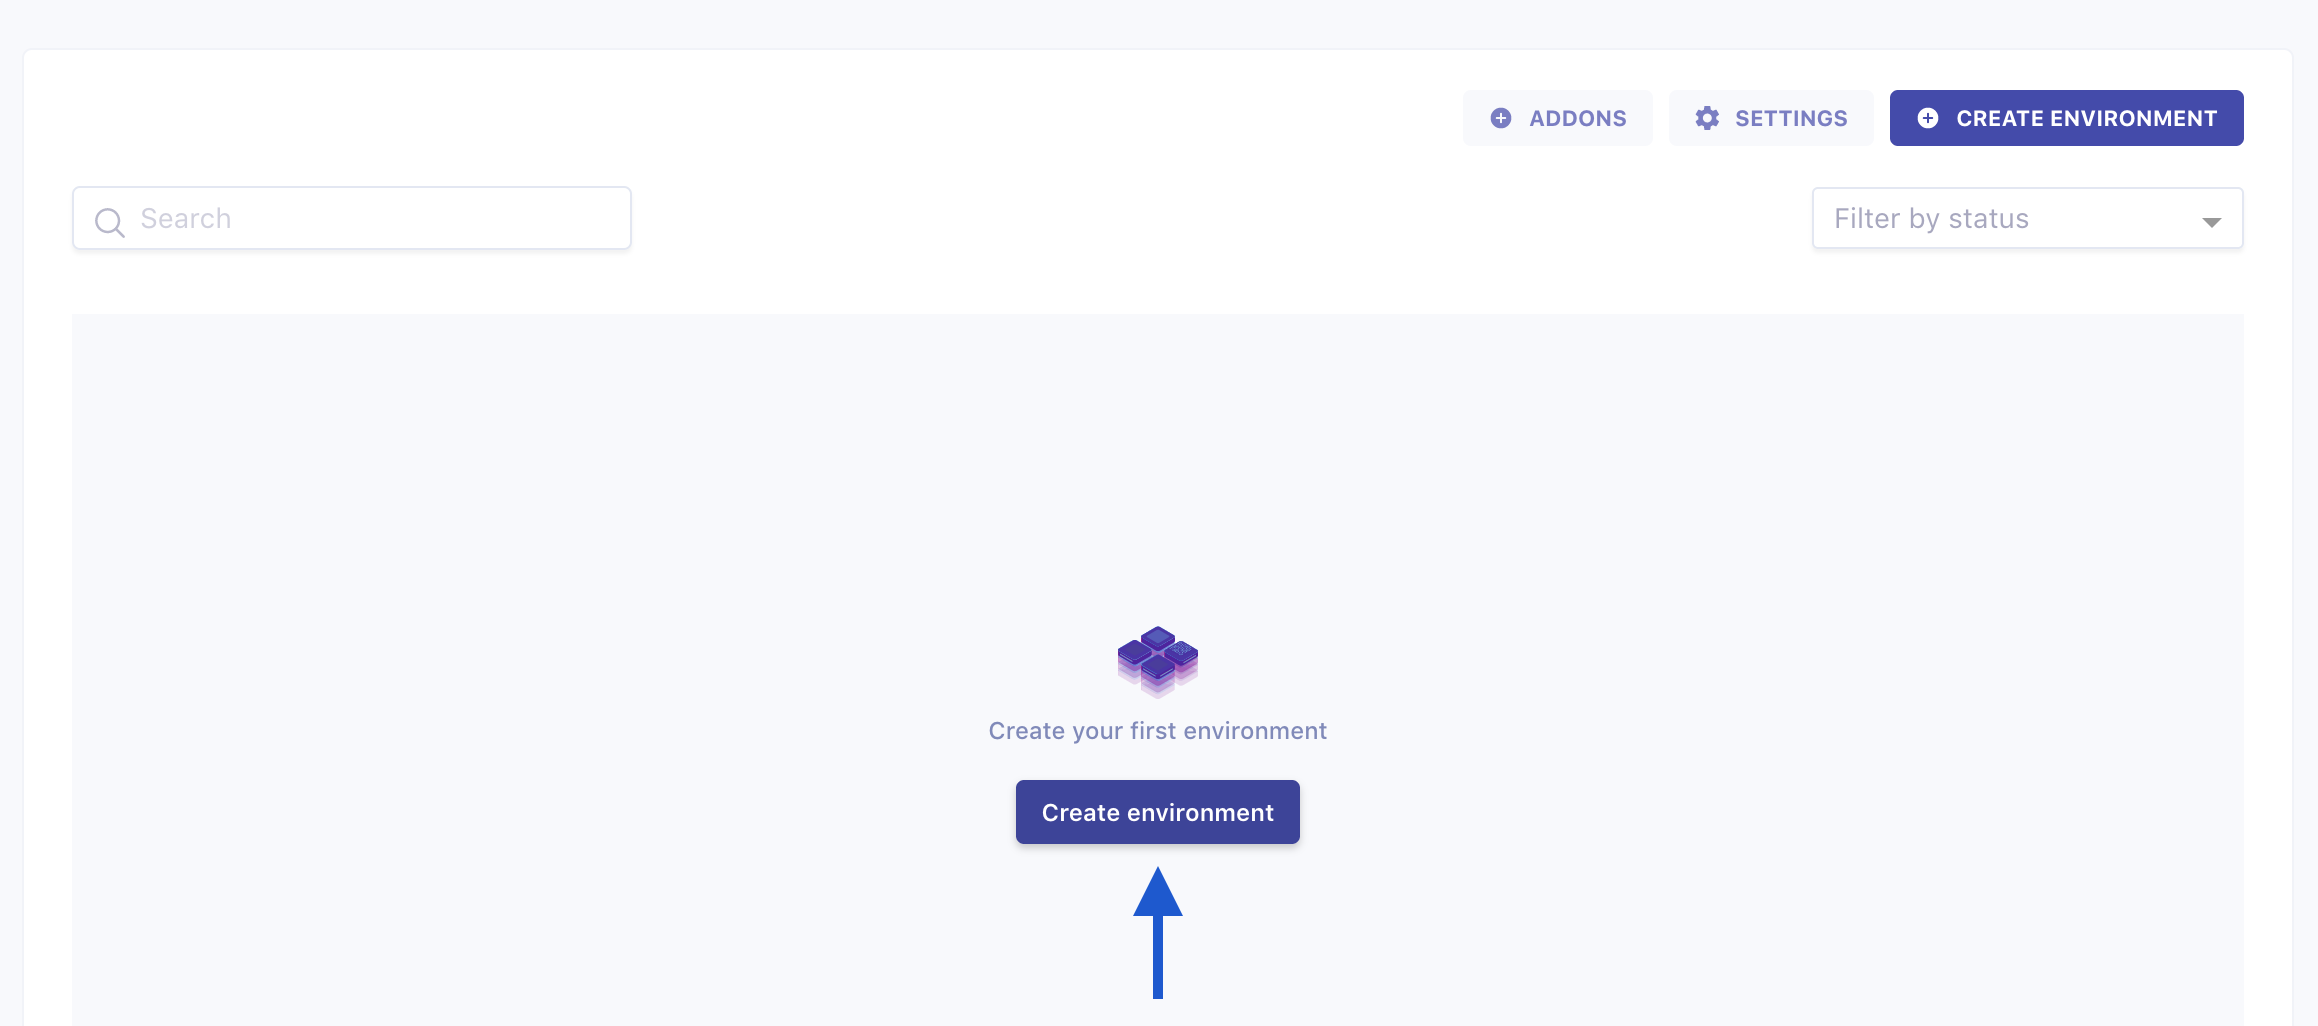
Create a new environment
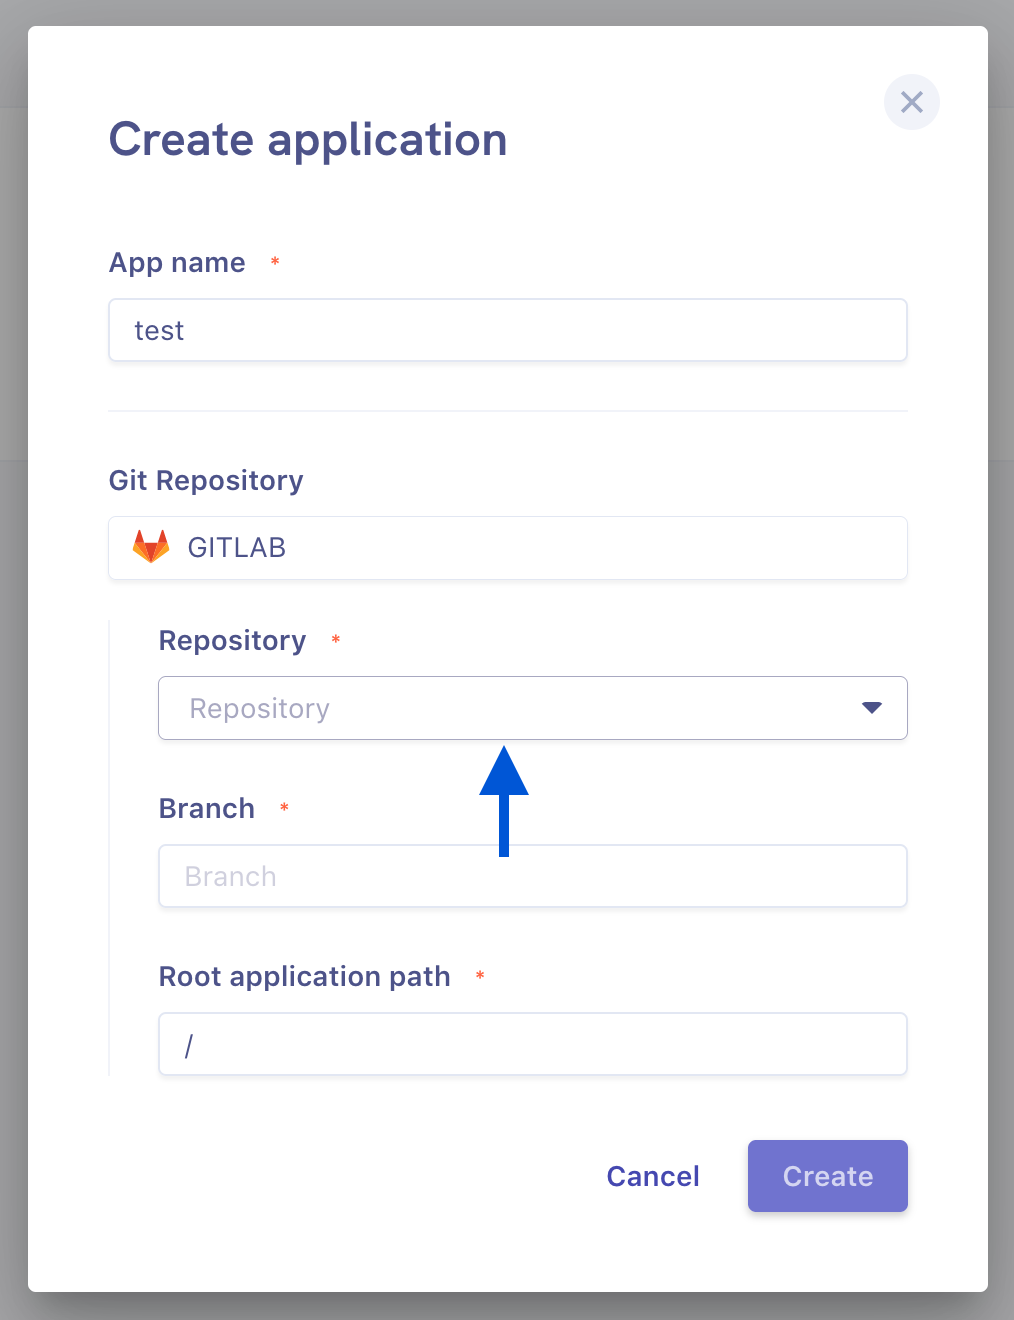
Create a new application
To follow the guide, you can fork and use our repository
Use the forked repository (and branch master) while creating the application in the repository field:
After the application is created:
- Navigate application settings
- Select Port
- Add port 9090

Deploy a database
Create and deploy a new database
To learn how to do it, you can follow this guide
Configure the connection to the database
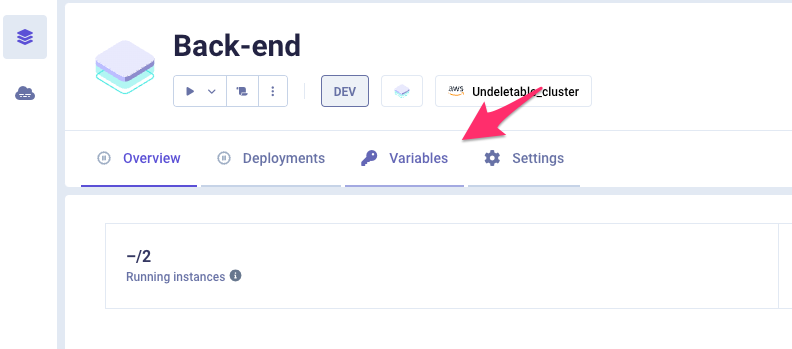
In application overview, open the Variables tab
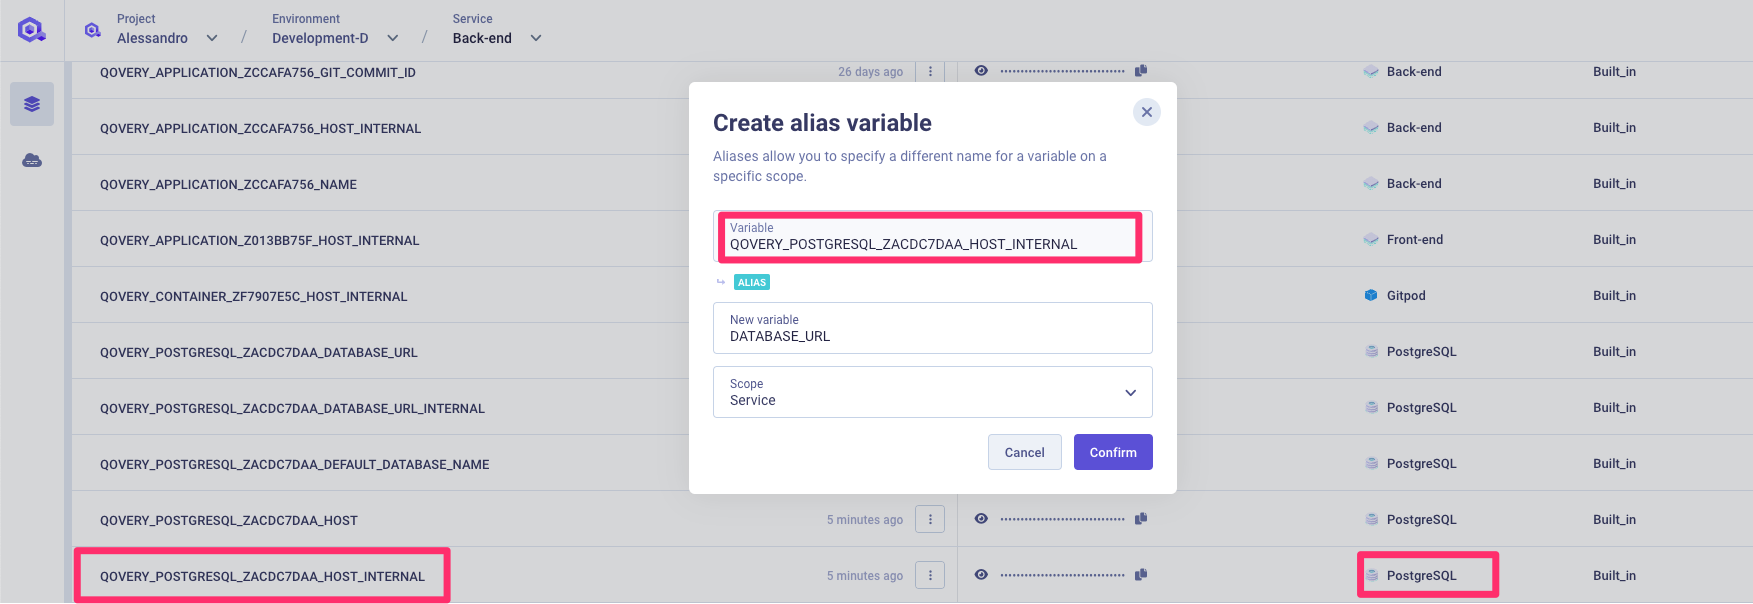
Configure the alias for each built_in environment variable to match the one required within your code
Have a look at this section to know more on how to connect to a database.
Deploy your application
All you have to do now is to navigate to your application and click Deploy button
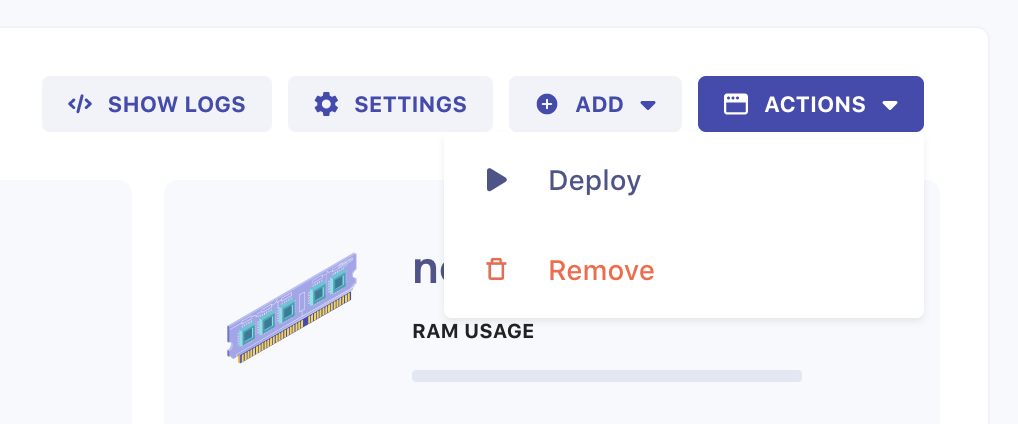
That's it. Watch the status and wait till the app is deployed.
Congratulations, you have deployed your application!
Live test
To open the application in your browser, click on Action and Open buttons in your application overview:
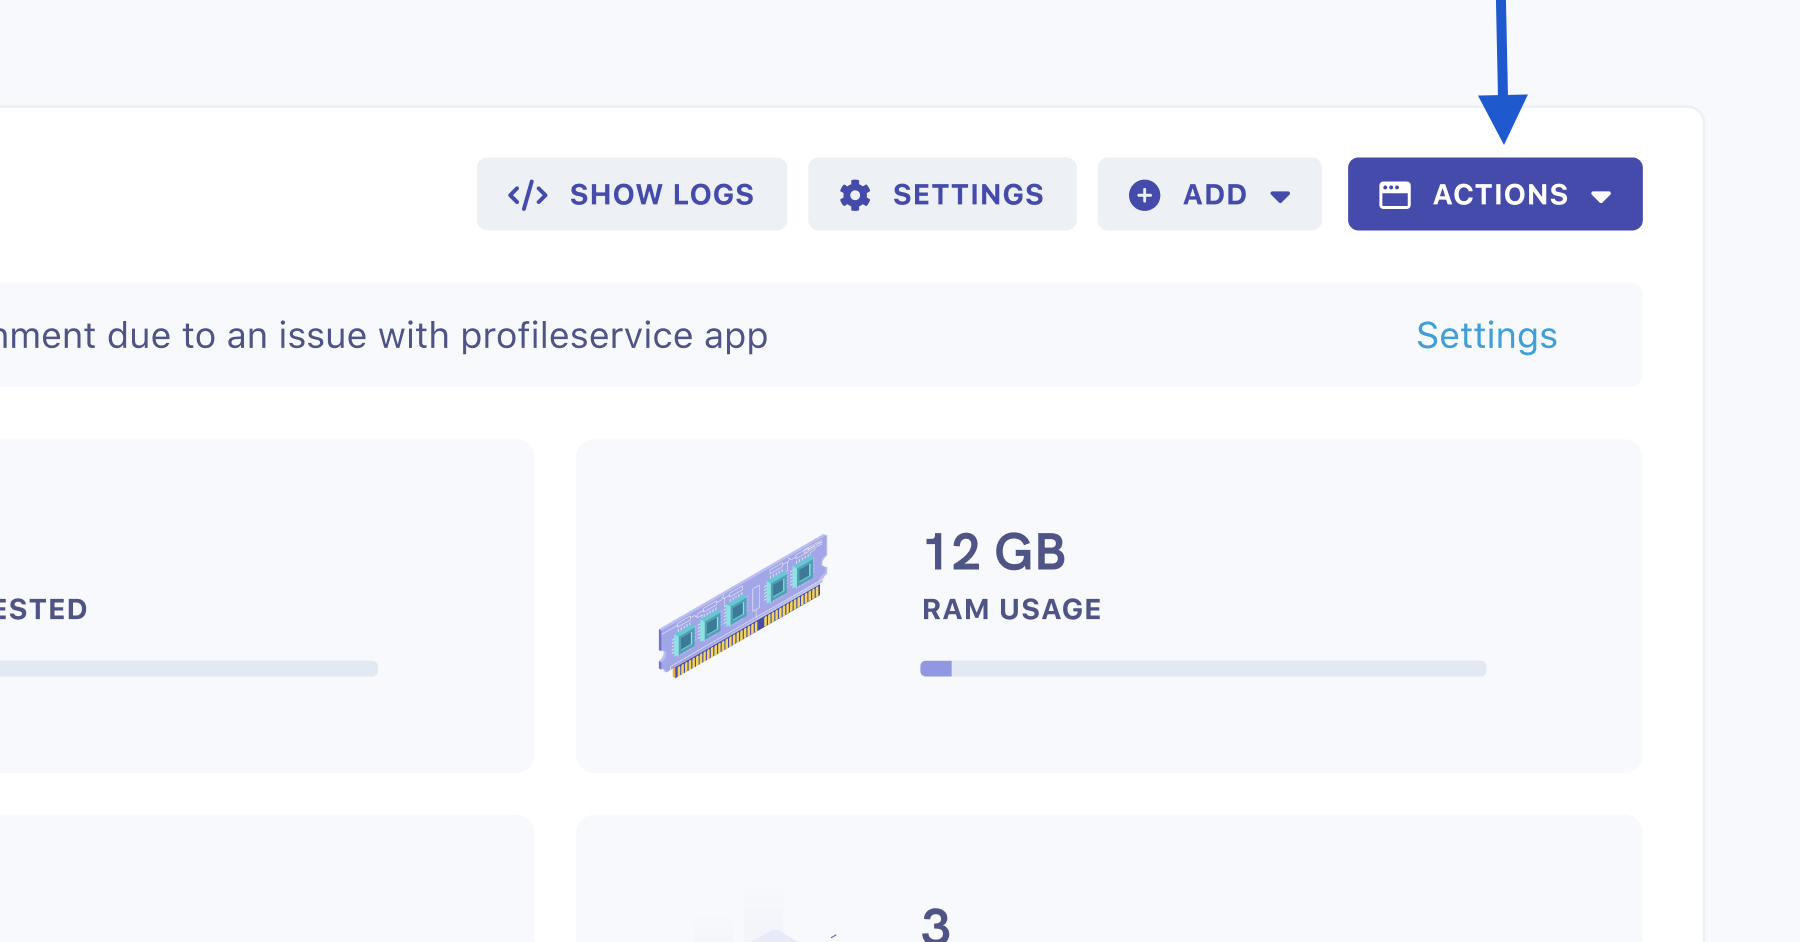
Then, we can test it with the following CURL commands (replace the app URL with your own):
# create a tweetcurl -X POST -d '{"message": "This is a tweet"}' -H "Content-type: application/json" https://main-gxbuagyvgnkbrp5l-gtw.qovery.io/tweets# list tweetscurl https://main-gxbuagyvgnkbrp5l-gtw.qovery.io/tweets# get a tweetcurl https://main-gxbuagyvgnkbrp5l-gtw.qovery.io/tweets/<change_with_a_valid_id># list likes from a tweetcurl https://main-gxbuagyvgnkbrp5l-gtw.qovery.io/tweets/<change_with_a_valid_id>/likes# add one like to a tweetcurl -X POST https://main-gxbuagyvgnkbrp5l-gtw.qovery.io/tweets/<change_with_a_valid_id>/likes# remove one like to a tweetcurl -X DELETE https://main-gxbuagyvgnkbrp5l-gtw.qovery.io/tweets/<change_with_a_valid_id>/likes# delete a tweetcurl -X DELETE https://main-gxbuagyvgnkbrp5l-gtw.qovery.io/tweets/<change_with_a_valid_id>
What's next
In this first part we saw how to create a Rust API with Actix and Diesel. In the second part we will compare its performance with a Go application to see which one is the most performant.
Special thanks to Jason and Kokou for your reviews
Useful resources
Do you want to know more about Rust?
- A great blog to follow along with Rust development
- Jon Gjengset - PhD student at MIT in distributed systems and Rust live-coder
- The Rust programming language book (Free)
- My first service in Rust (French video - François T.)
