Before you begin, this guide assumes the following:
- You have a Qovery cluster ready
Goal
In this tutorial we will deploy a typical Rails 6 application, using PostgreSQL as a database and Sidekiq as an ActiveJob backend for background tasks.
Prepare your Rails application
Web application Dockerfile
Add a
Dockerfilefile at the root of your application with the following content:FROM ruby:3.0.2-alpine3.13 AS builder# Minimal requirements to run a Rails appRUN apk add --no-cache --update build-base \linux-headers \git \postgresql-dev=~13 \# Rails SQL schema format requires `pg_dump(1)` and `psql(1)`postgresql=~13 \# Install same version of pg_dumppostgresql-client=~13 \nodejs \yarn \# Needed for nodejs / node-gyppython2 \tzdataENV BUNDLER_VERSION 2.2.24ENV BUNDLE_JOBS 8ENV BUNDLE_RETRY 5ENV BUNDLE_WITHOUT development:testENV BUNDLE_CACHE_ALL trueENV RAILS_ENV productionENV RACK_ENV productionENV NODE_ENV productionENV APP_PATH /workWORKDIR $APP_PATH# Gems installationCOPY Gemfile Gemfile.lock ./RUN gem install bundler -v $BUNDLER_VERSIONRUN bundle config --global frozen 1 && \bundle install && \rm -rf /usr/local/bundle/cache/*.gem && \find /usr/local/bundle/gems/ -name "*.c" -delete && \find /usr/local/bundle/gems/ -name "*.o" -delete# NPM packages installationCOPY package.json yarn.lock ./RUN yarn install --frozen-lockfile --non-interactive --productionADD . $APP_PATHRUN SECRET_KEY_BASE=`bin/rake secret` rails assets:precompile --trace && \yarn cache clean && \rm -rf node_modules tmp/cache vendor/assets testFROM ruby:3.0.2-alpine3.13RUN mkdir -p /workWORKDIR /workENV RAILS_ENV productionENV NODE_ENV productionENV RAILS_SERVE_STATIC_FILES true# Some native extensions required by gems such as pg or mysql2.COPY --from=builder /usr/lib /usr/lib# Timezone data is required at runtimeCOPY --from=builder /usr/share/zoneinfo/ /usr/share/zoneinfo/# Ruby gemsCOPY --from=builder /usr/local/bundle /usr/local/bundleCOPY --from=builder /work /workCOPY docker-entrypoint.sh ./ENTRYPOINT ["./docker-entrypoint.sh"]EXPOSE 3000CMD ["rails", "server", "-p", "3000", "-b", "0.0.0.0"]Sidekiq Dockerfile
We'll use a similar Dockerfile for our Sidekiq worker. Create a
Dockerfile.sidekiqat the root of your repository with the following content:FROM ruby:3.0.2-alpine3.13 AS builderLABEL maintener='[email protected]'# Minimal requirements to run a Rails appRUN apk add --no-cache --update build-base \linux-headers \git \postgresql-dev=~13 \# Rails SQL schema format requires `pg_dump(1)` and `psql(1)`postgresql=~13 \# Install same version of pg_dumppostgresql-client=~13 \nodejs \yarn \# Needed for nodejs / node-gyppython2 \tzdataENV BUNDLER_VERSION 2.2.24ENV BUNDLE_JOBS 8ENV BUNDLE_RETRY 5ENV BUNDLE_WITHOUT development:testENV BUNDLE_CACHE_ALL trueENV RAILS_ENV productionENV RACK_ENV productionENV NODE_ENV productionENV APP_PATH /workWORKDIR $APP_PATH# Gems installationCOPY Gemfile Gemfile.lock ./RUN gem install bundler -v $BUNDLER_VERSIONRUN bundle config --global frozen 1 && \bundle install && \rm -rf /usr/local/bundle/cache/*.gem && \find /usr/local/bundle/gems/ -name "*.c" -delete && \find /usr/local/bundle/gems/ -name "*.o" -delete# NPM packages installationCOPY package.json yarn.lock ./RUN yarn install --frozen-lockfile --non-interactive --productionADD . $APP_PATHRUN SECRET_KEY_BASE=`bin/rake secret` rails assets:precompile --trace && \yarn cache clean && \rm -rf node_modules tmp/cache vendor/assets testFROM ruby:3.0.2-alpine3.13RUN mkdir -p /workWORKDIR /workENV RAILS_ENV productionENV NODE_ENV productionENV RAILS_SERVE_STATIC_FILES true# Some native extensions required by gems such as pg or mysql2.COPY --from=builder /usr/lib /usr/lib# Timezone data is required at runtimeCOPY --from=builder /usr/share/zoneinfo/ /usr/share/zoneinfo/# Ruby gemsCOPY --from=builder /usr/local/bundle /usr/local/bundleCOPY --from=builder /work /workCOPY docker-entrypoint.sh ./CMD ["bundle", "exec", "sidekiq"]Dockerignore
In order to avoid unneeded files being copied to your Docker image, you can add a
.dockerignorefile to the root of your project, with the following content:# See https://help.github.com/articles/ignoring-files for more about ignoring files.## If you find yourself ignoring temporary files generated by your text editor# or operating system, you probably want to add a global ignore instead:# git config --global core.excludesfile '~/.gitignore_global'# Ignore bundler config./.bundle# Ignore all logfiles and tempfiles./log/*/tmp/*!/log/.keep!/tmp/.keep# Ignore pidfiles, but keep the directory./tmp/pids/*!/tmp/pids/!/tmp/pids/.keep# Ignore uploaded files in development./storage/*!/storage/.keep/public/assets.byebug_history# Ignore master key for decrypting credentials and more./config/master.key/public/packs/public/packs-test/node_modules/yarn-error.logyarn-debug.log*.yarn-integrityDocker entrypoint
Finally we will add an entrypoint script that will be called at the start of the application. We'll use it to run the database setup and migration commands.
You can read more about why this entrypoint is needed here.
Add a
docker-entrypoint.shfile at the root of your project with the following content:#! /bin/shbundle exec rake db:migrateif [[ $? != 0 ]]; thenechoecho "== Failed to migrate. Running setup first."echobundle exec rake db:setupfi# Execute the given or default command:exec "$@"Make this script executable:
chmod +x docker-entrypoint.sh
Deploy your application to Qovery
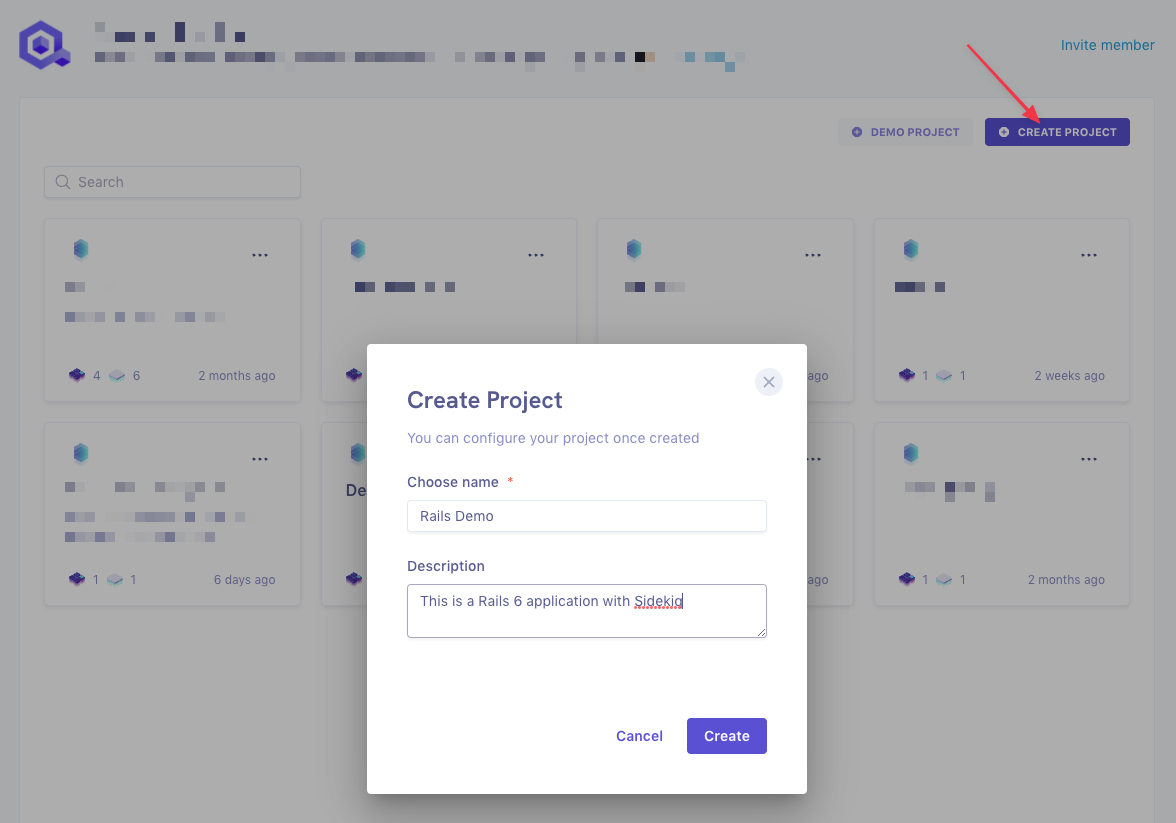
Create a project
Now that your Rails application is ready to be dockerized, we can create a project on the Qovery console:
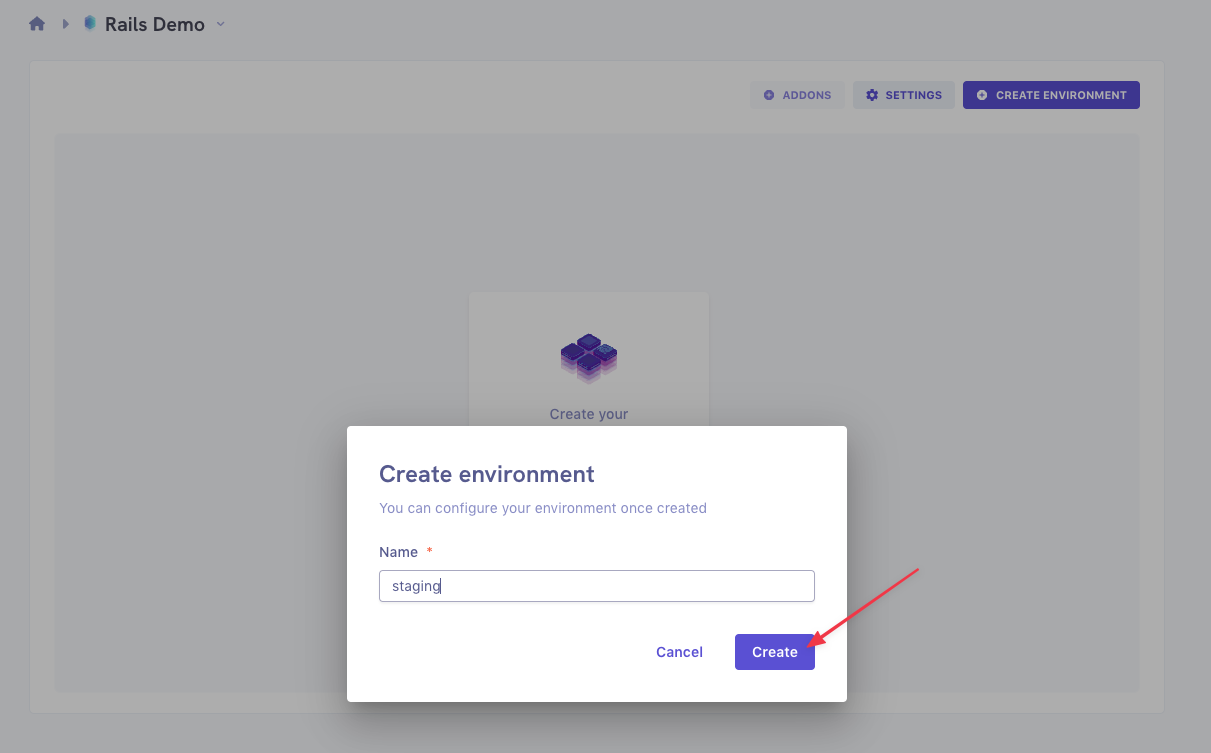
Create an environment
Now we'll create an environment. Let's start with our
stagingenvironment: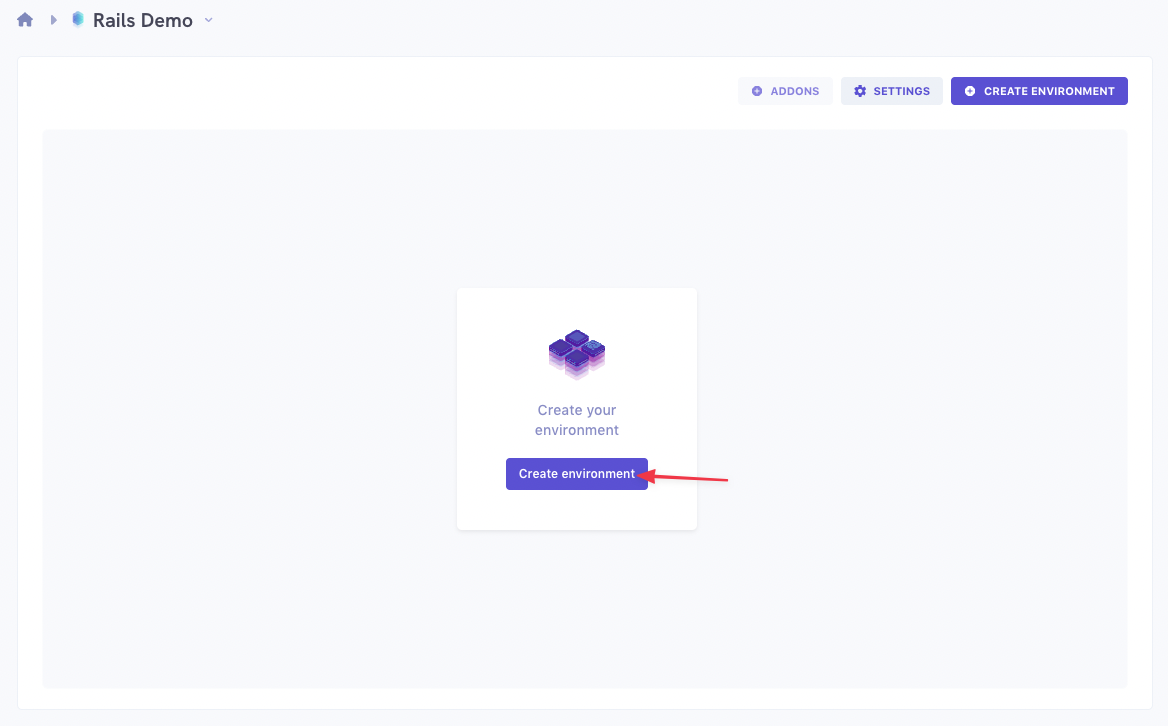
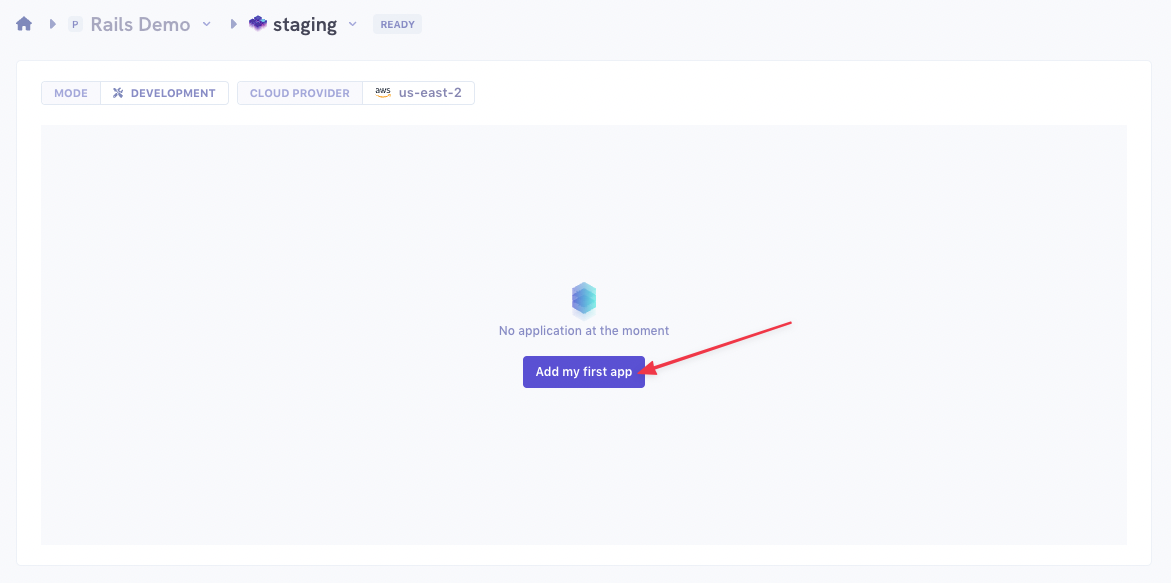
Add your Rails app
We'll now add our Rails app to the environment:
On the form you'll need to enter the following information:
- The app name: it can be whatever you want. Here
web. - Pick your Git privider, then the repository for your application
- The branch you want to deploy for this application. We chose
main - The Root application path. In case your application is not at the root of your repository (e.g. you have a monorepo), otherwise it will be
/. - For the Build mode, pick
Dockerfile. - Enter the path to your Dockerfile.
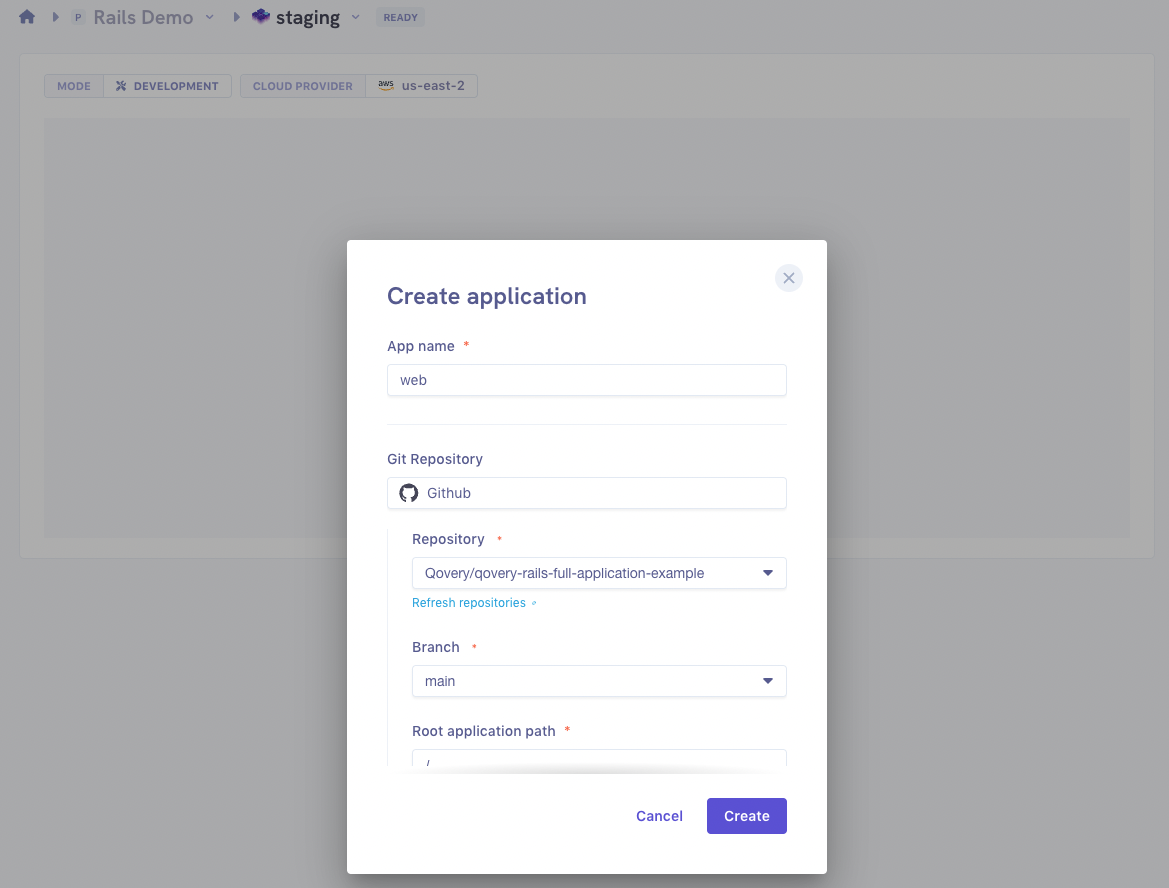
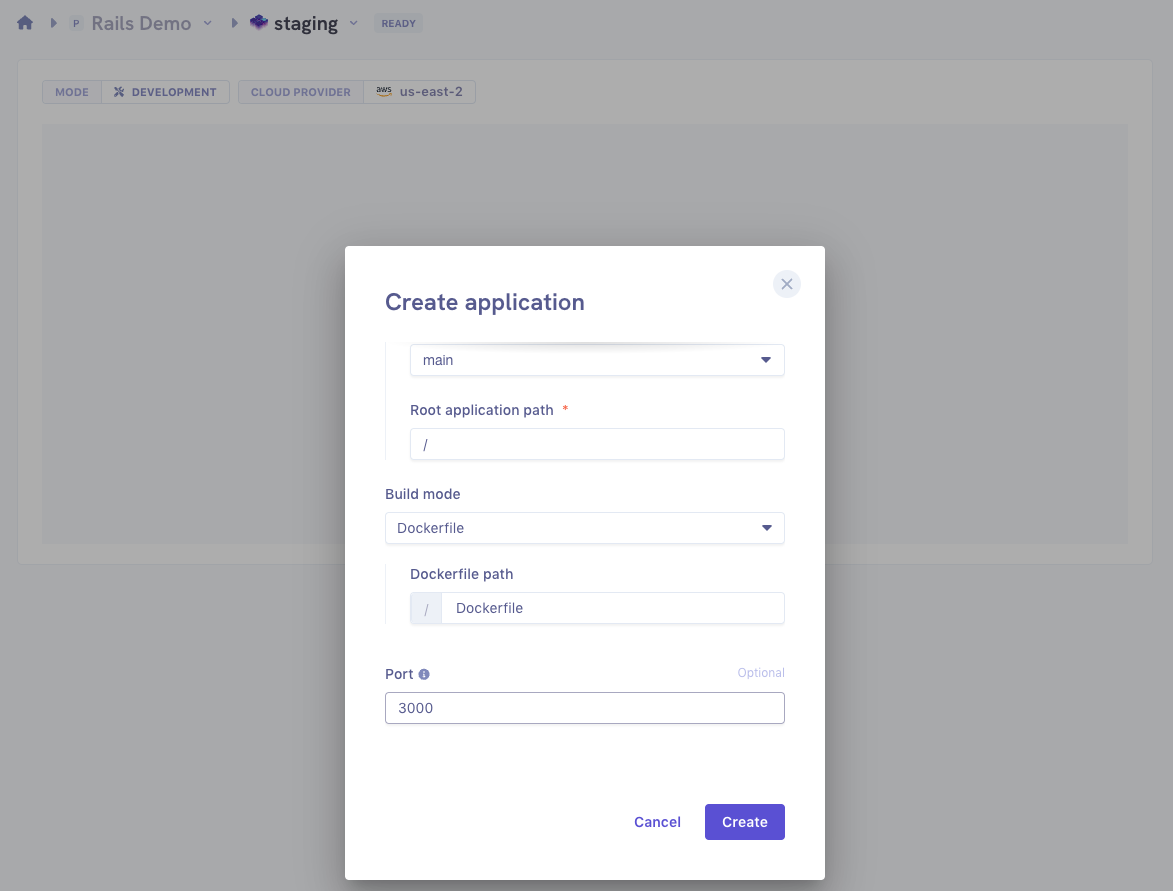
You can then click
Create. You'll be redirected to your application dashboard.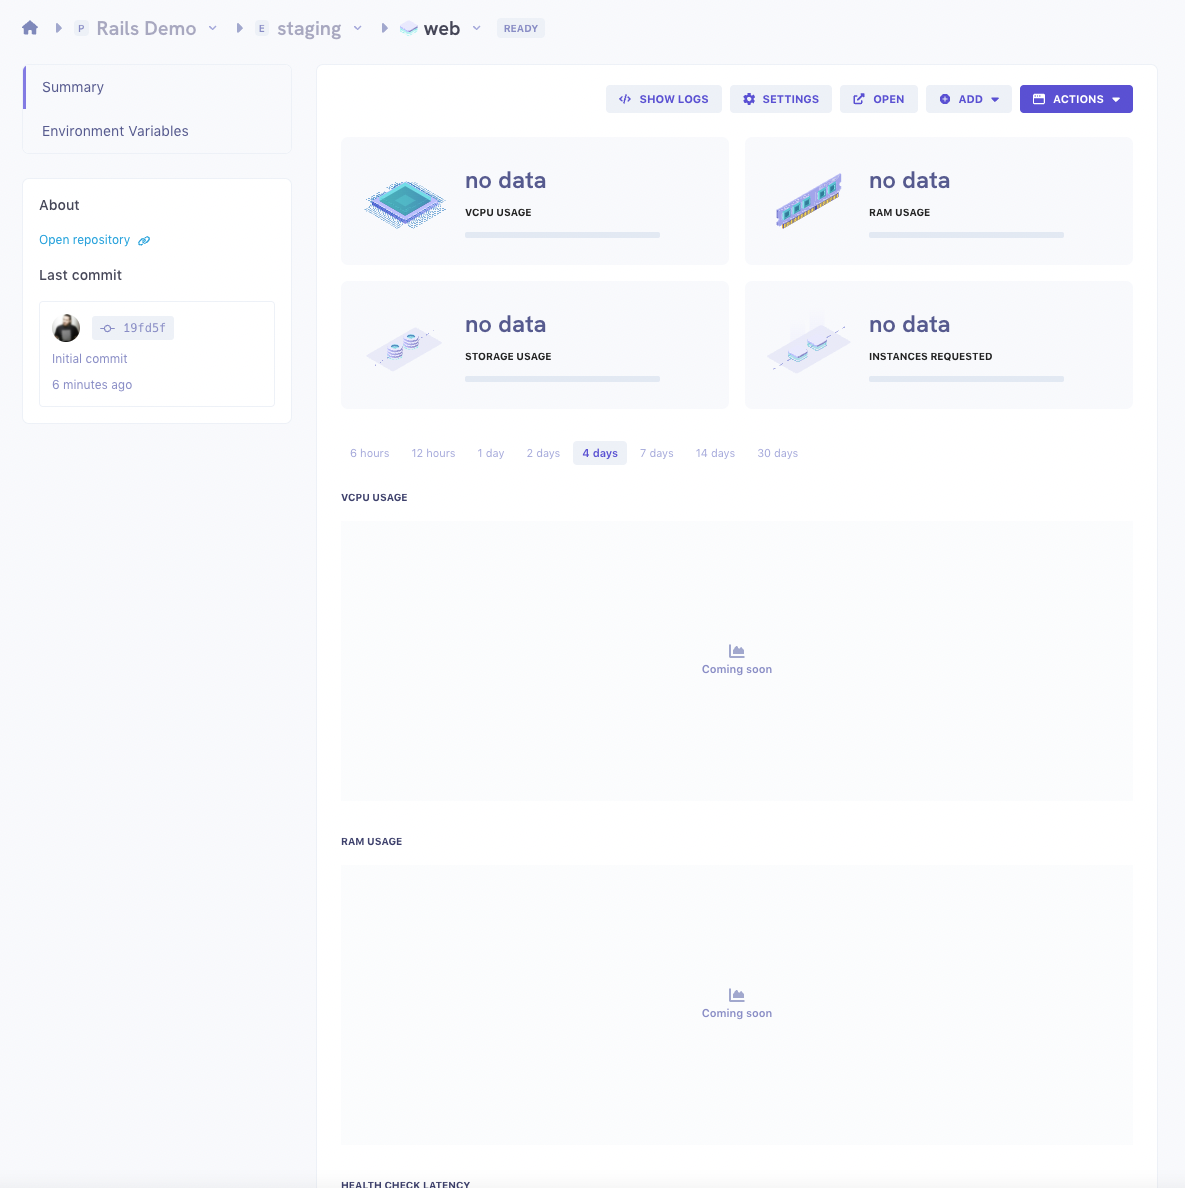
- The app name: it can be whatever you want. Here
Add a PostgreSQL database
Our application will use a PostgreSQL database. Let's add one to our environment:
Click on
ADD, thenDatabase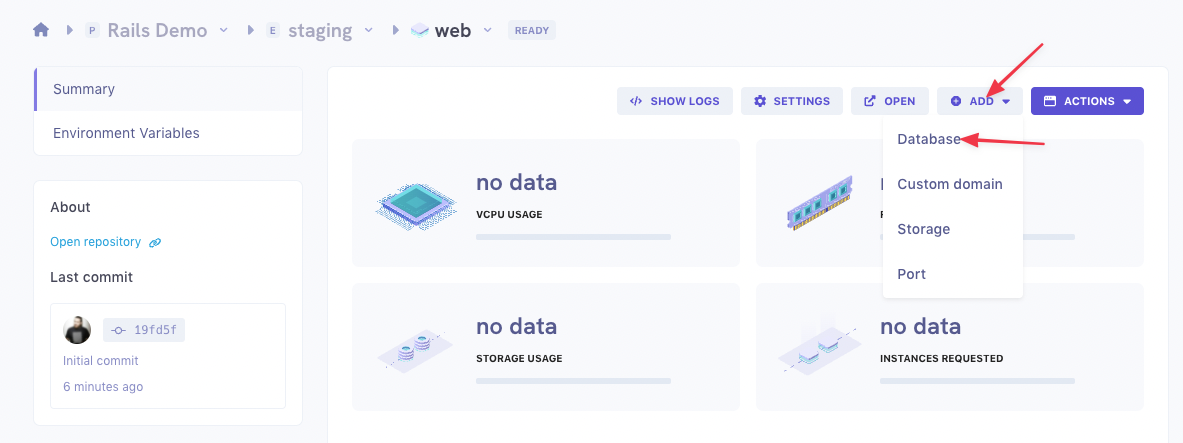
- Give a name to your database.
- For the Type, select
POSTGRESQL. - For the Mode, we'll pick
CONTAINER. - Chose the Version you need.
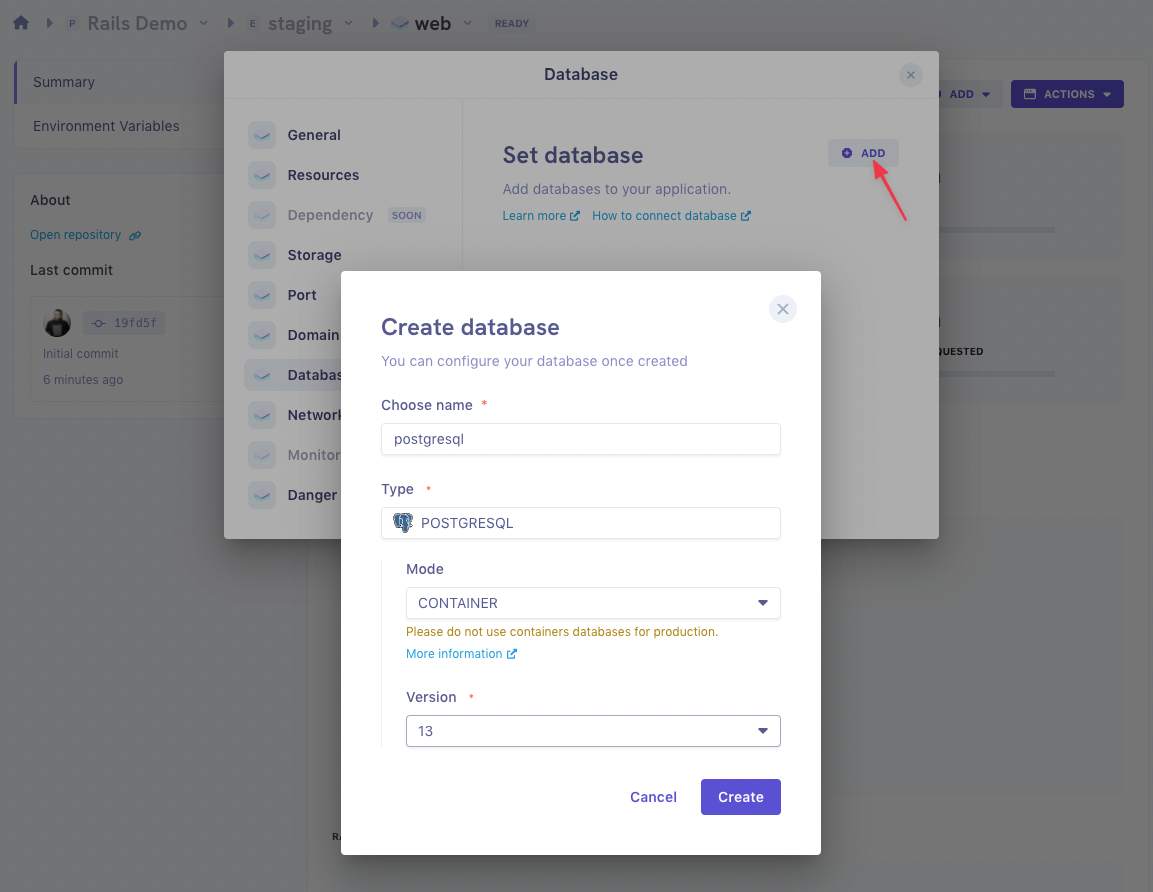
You can then click
CreateAdd a Redis database
Since we're using Sidekiq, we'll also need a Redis database as a backend.
If you didn't close the
Databasemodal, you can click theADDbutton, then in the dropbox forDatabase 2clickCreate database.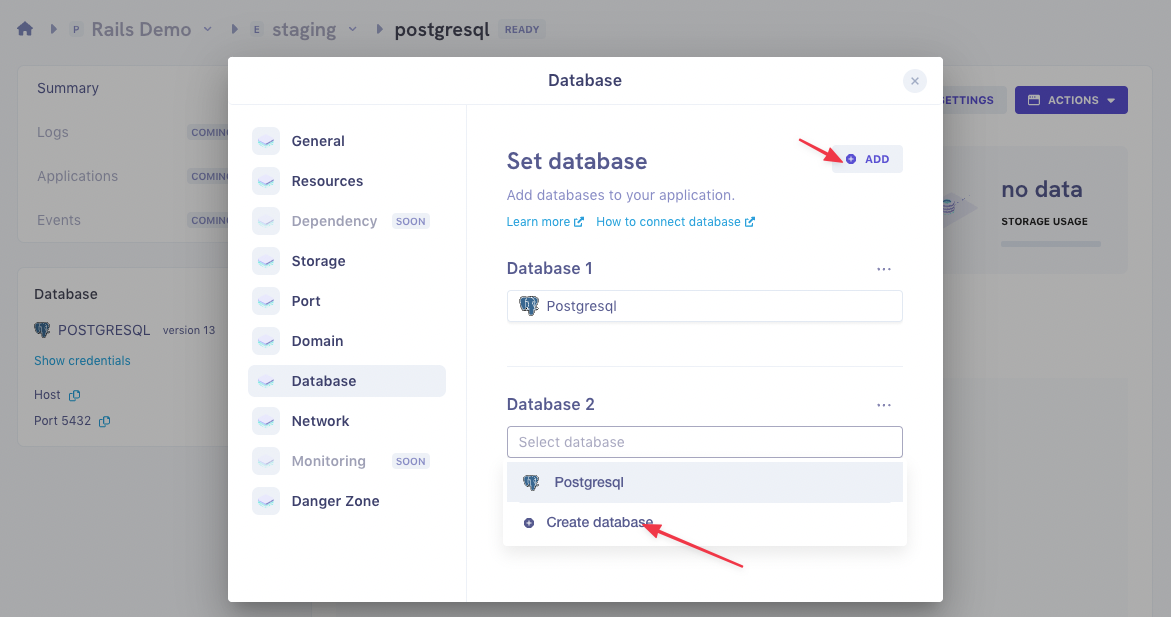
Fill the form the same way you did for PostgreSQL:
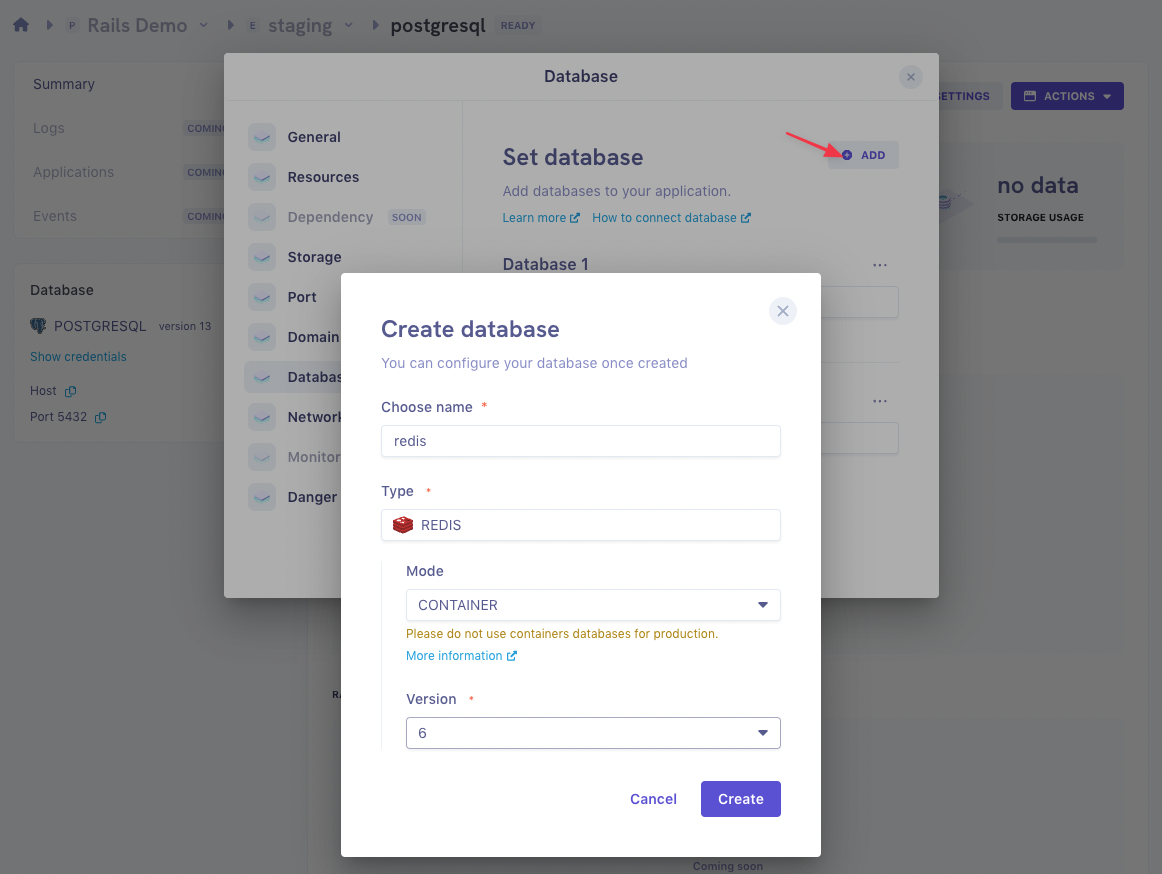
Click
Createand close the Databases modal.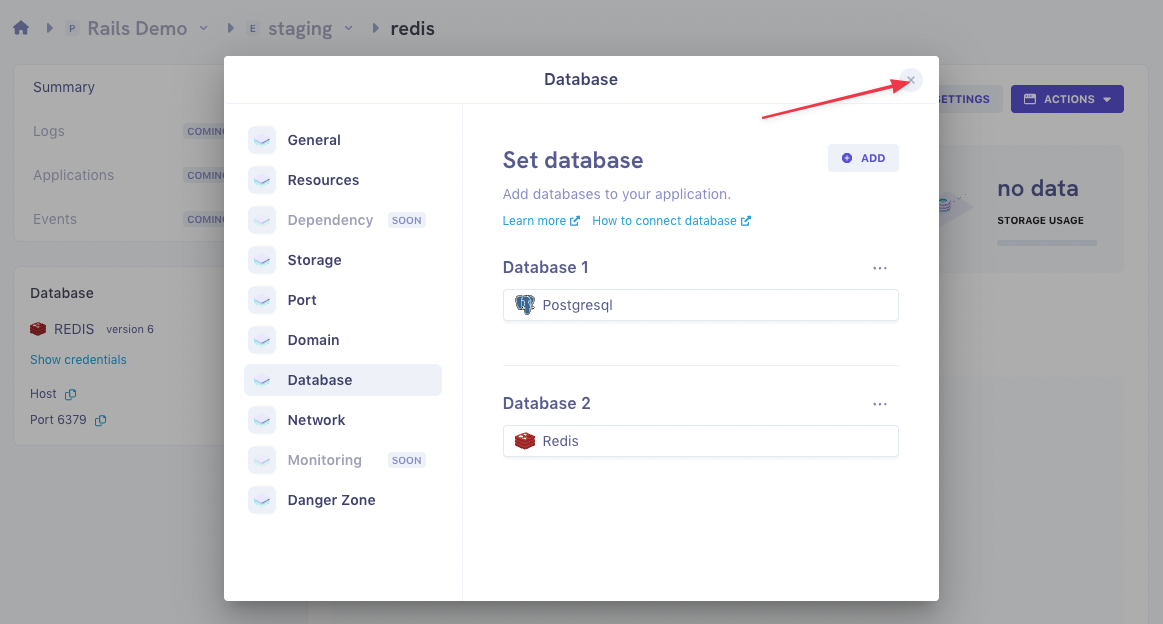
Configure your application ENV variables
Go back to your environment view:

Then click on your application:
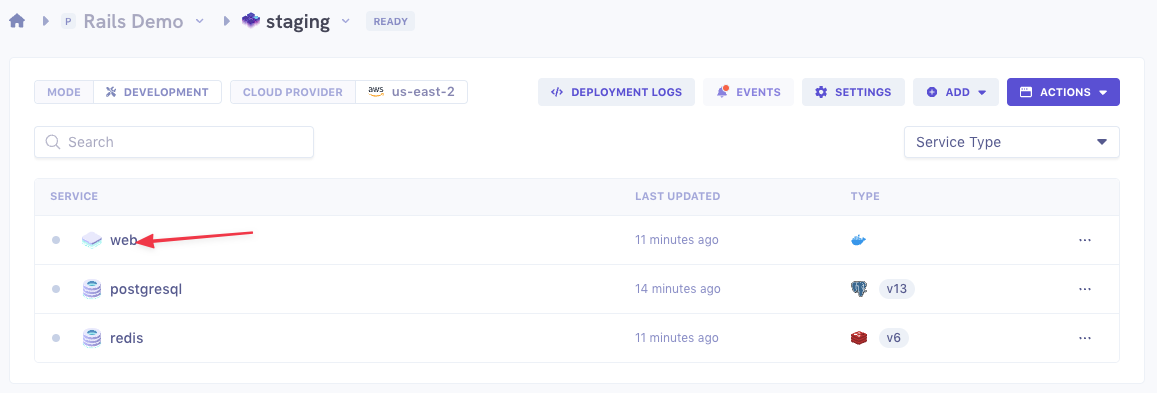
On your application dashboard, go to
Environment variables: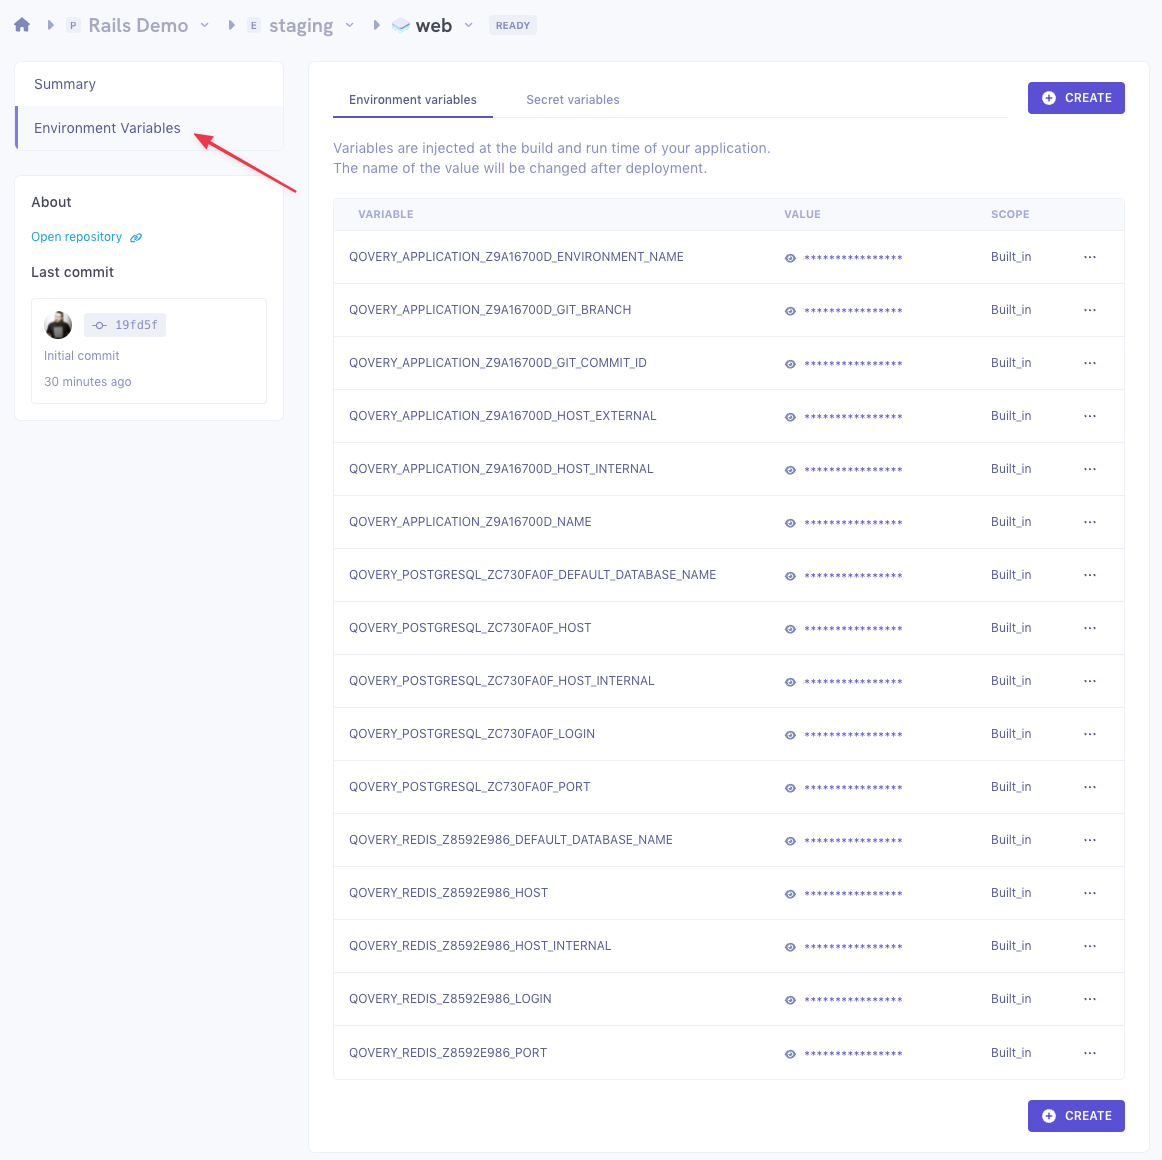
Here you can add any environment variable your application needs.
We'll now configure a few secrets for our application. Click on the
Secret variablestab: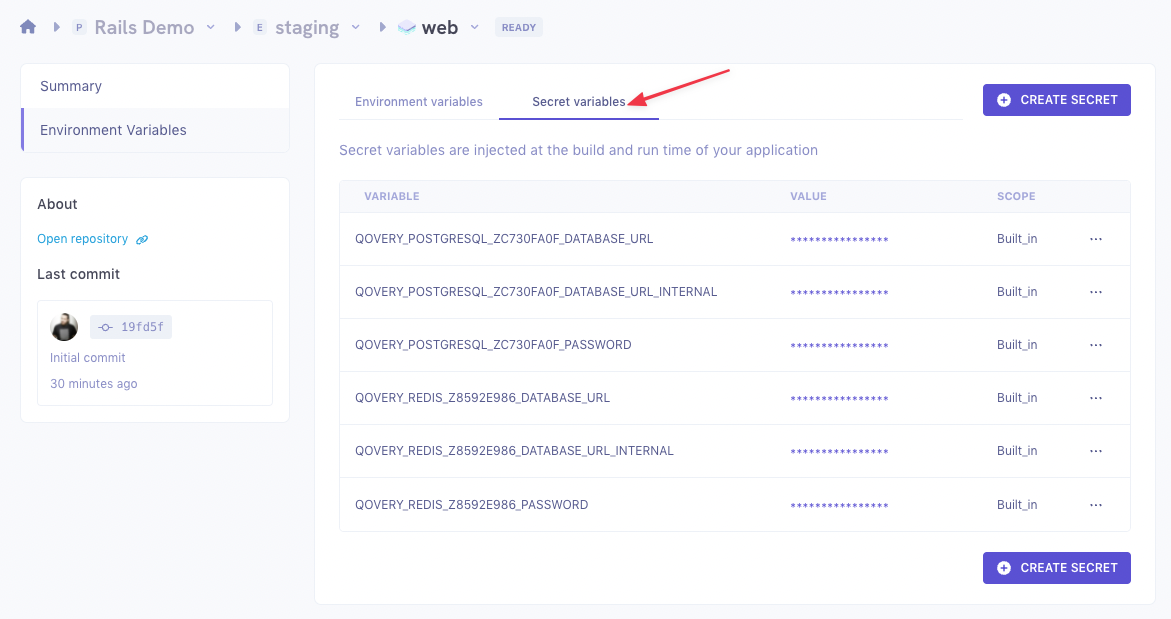
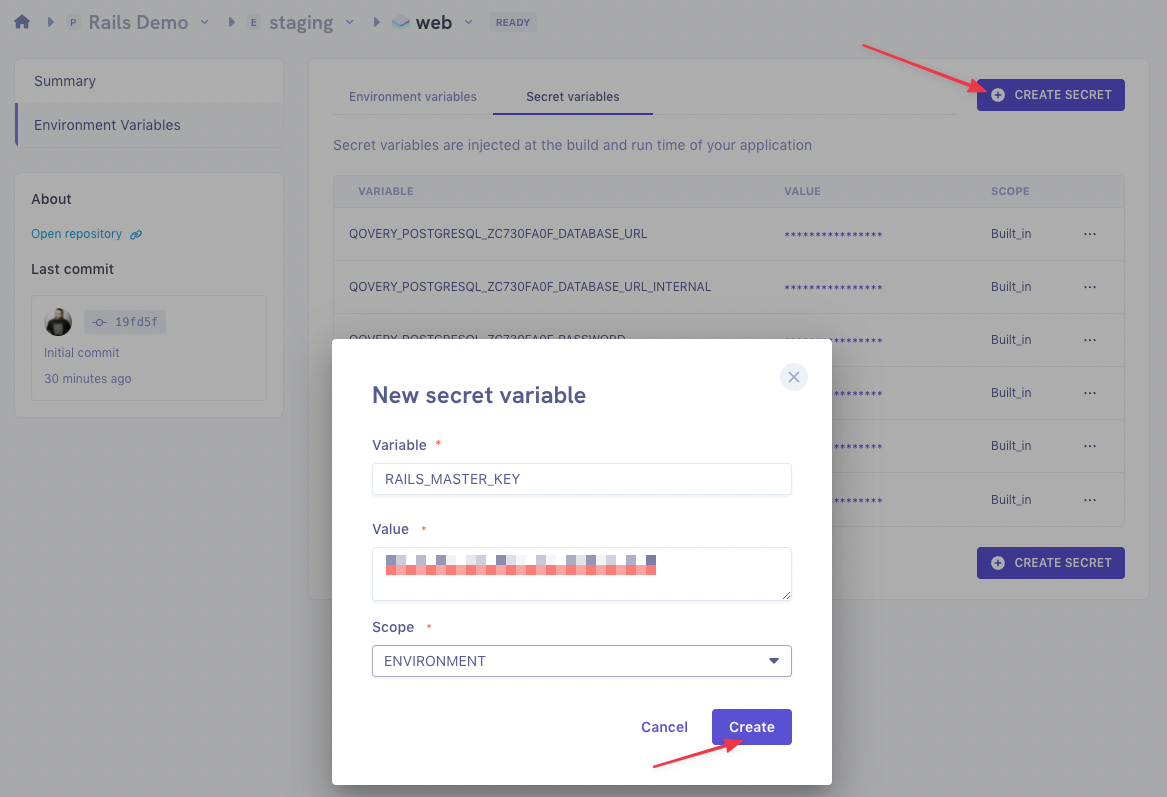
First since our Demo application uses the Rails Encrypted Secrets, we'll add the
RAILS_MASTER_KEYsecret Click onCREATE SECRET, then fill the form:- Variable: enter the variable name,
RAILS_MASTER_KEY. - Value: enter the actual value for your
RAILS_MASTER_KEY. - Scope: chose
ENVIRONMENTsince the secret will be used by our Sidekiq worker too.
Now we'll need to add the
DATABASE_URLandREDIS_URL, that Rails will use to connect to PostgreSQL and Redis. Those are secrets as well, since the URLs contain passwords.But instead of creating new secrets like we did for the
RAILS_MASTER_KEY, we'll use aliases. Aliases are just a way of giving a different name to an existing ENV variable or secret. Since Qovery provides us with the secrets corresponding to the two databases we created earlier, we can alias them.First, create an alias to the
QOVERY_POSTGRESQL_ZXXXXXXXX_DATABASE_URL_INTERNAL: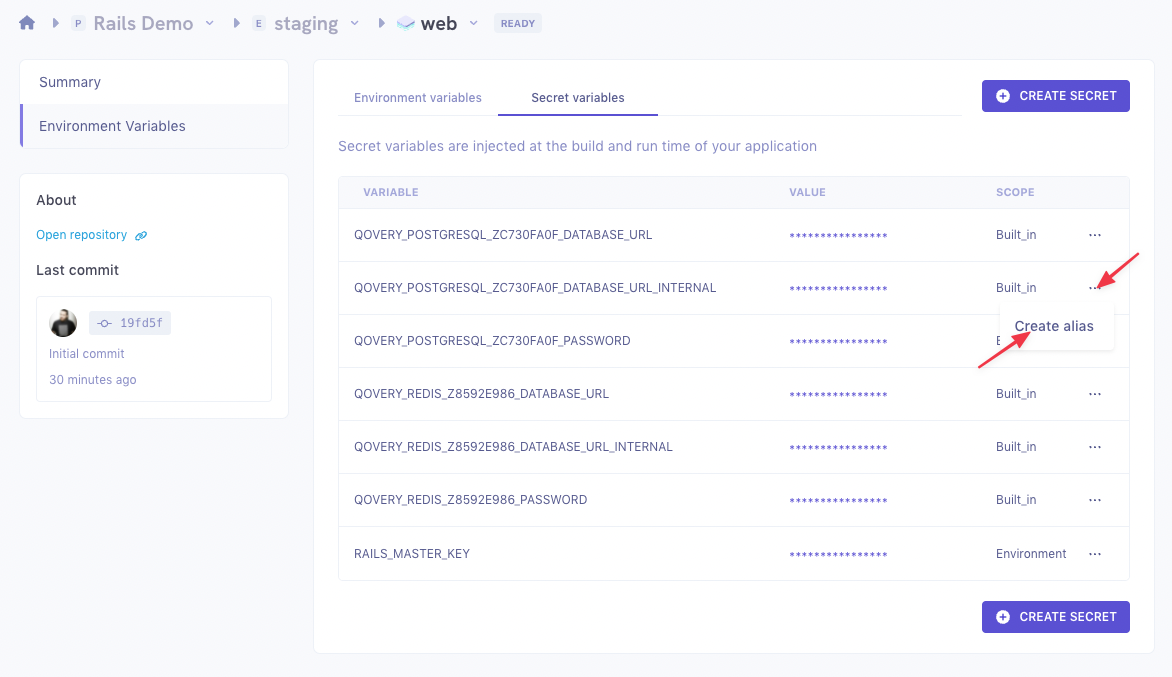
In the form, chose
DATABASE_URLfor the alias name and set it at theENVIRONMENTlevel: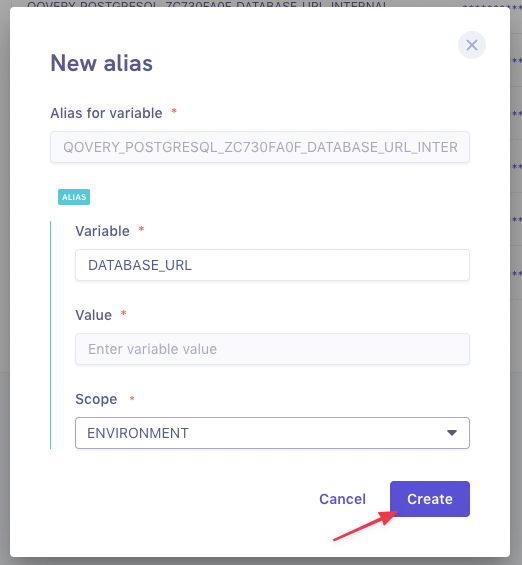
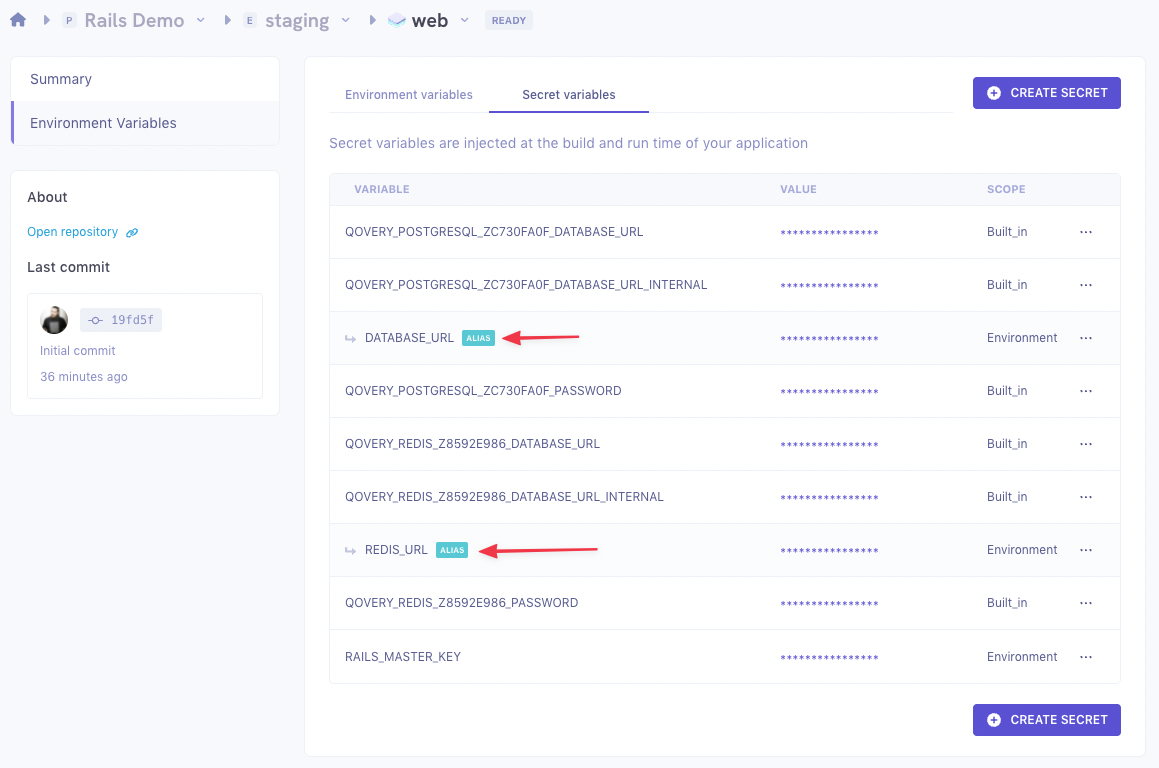
Click
Createthen do the same thing with aREDIS_URLalias to theQOVERY_REDIS_ZXXXXXXXX_DATABASE_URL_INTERNAL.You should see your two aliases created:
- Variable: enter the variable name,
Deploy the environment
Go back to the
stagingenvironment view and deploy it: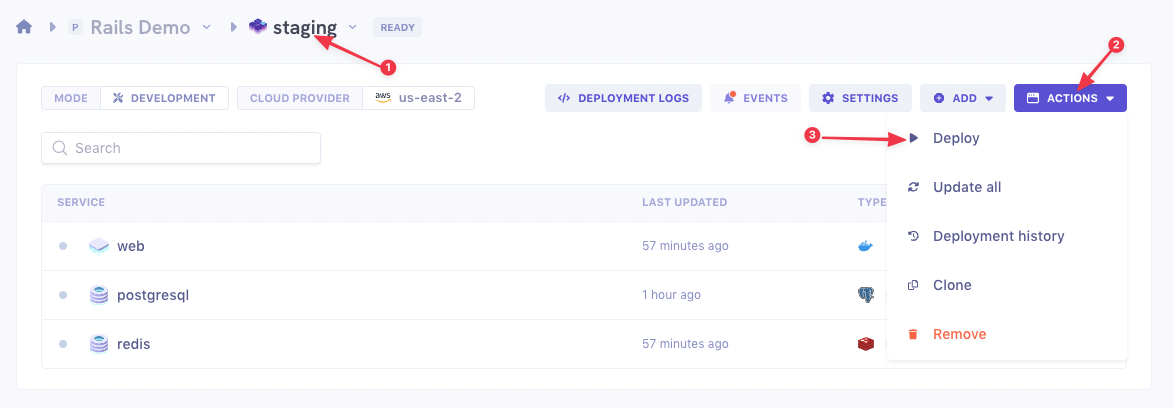
You should see it switch to the
DEPLOYINGstatus. Wait until the status turns toRUNNING.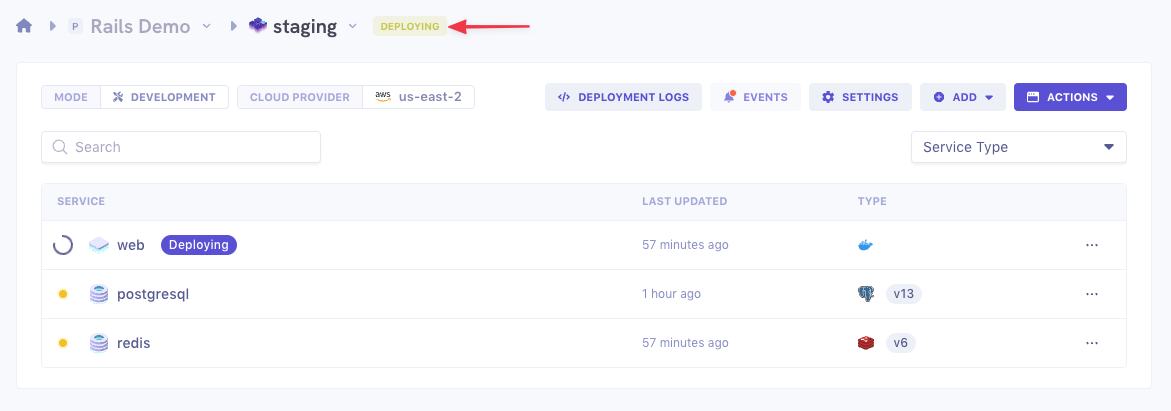
Once your environment is
RUNNING, open thewebapplication to see if it works. It will open a new tab showing your application.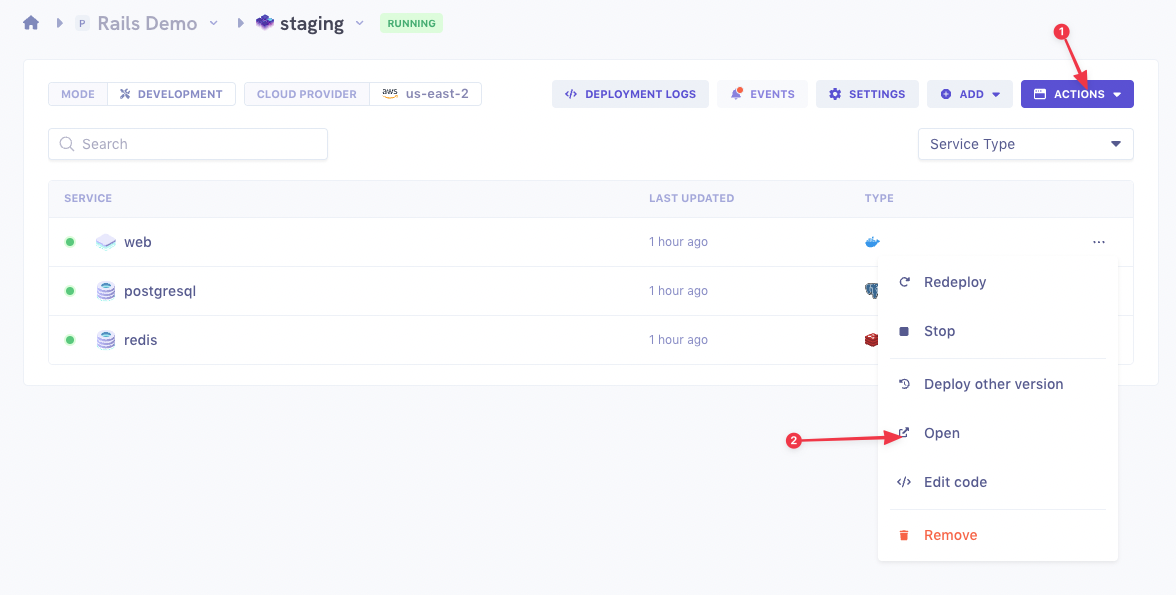
Add the Sidekiq worker
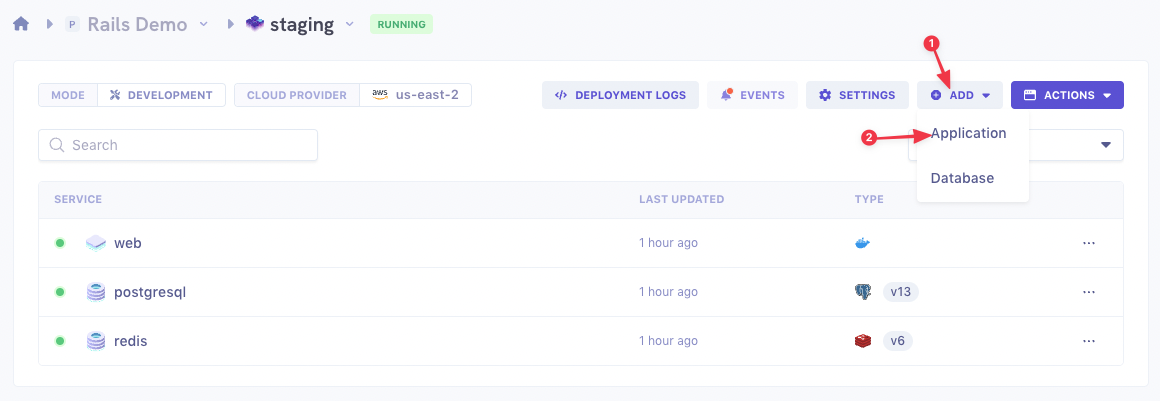
The last step is to add your Sidekiq Worker. We'll follow the same steps as in the
Add your Rails appsection with a few differences:Add a new application:
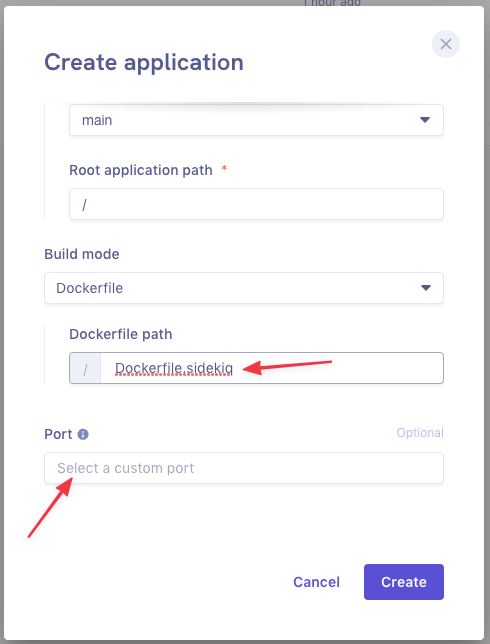
The settigs are the same as for the Rails application, except:
- We use the
Dockerfile.sidekiqDockerfile this time - We don't declare a port since our worker is not a web service but communicates with our application through Redis.

Click
Create.If we check the ENV variables and secrets, we notice that it directly inherited the ones we set at the
Environmentlevel. So we don't need to do the configuration again.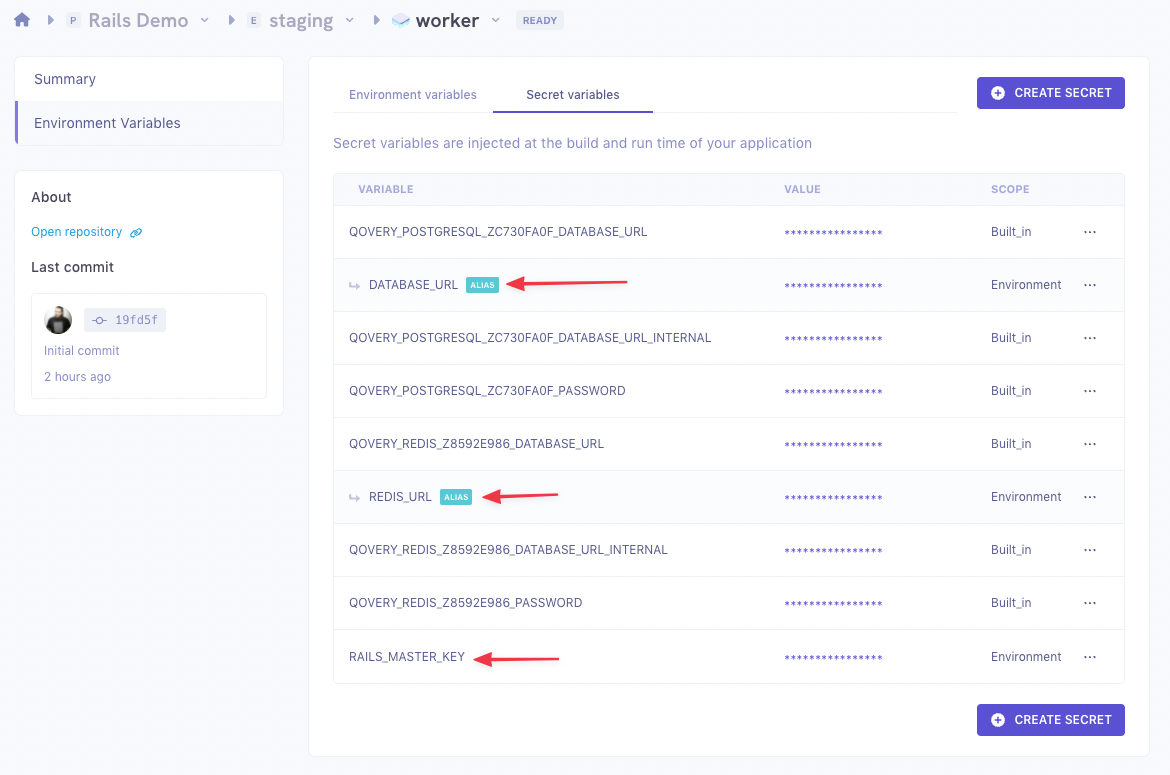
You can now deploy your
workerapplication: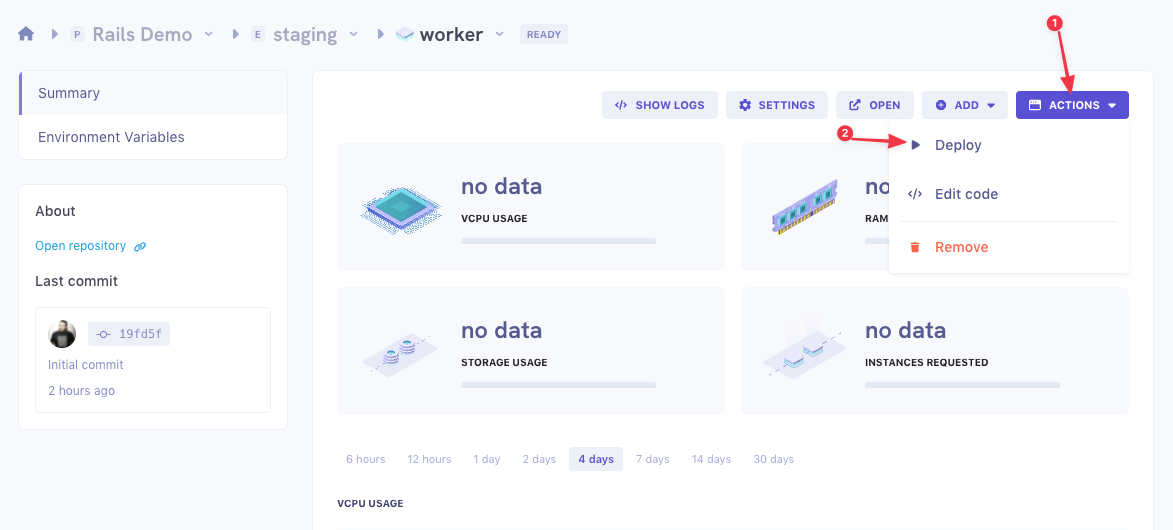
Wait for it to switch to the
RUNNINGstatus.- We use the
Conclusion
You now have a Rails application with PostgreSQL and Sidekiq running on Qovery.