Before you begin, this guide assumes the following:
- You have a Qovery cluster ready
Goal
In this tutorial we will deploy Temporal.io on Qovery directly through the Qovery console. We will first do a staging / preview env deployment then a multi-services deployment allowing to scale the different Temporal parts independently.
You can find the official documentation for production deployment here: https://docs.temporal.io/docs/server/production-deployment.
Create the Qovery project and staging environment
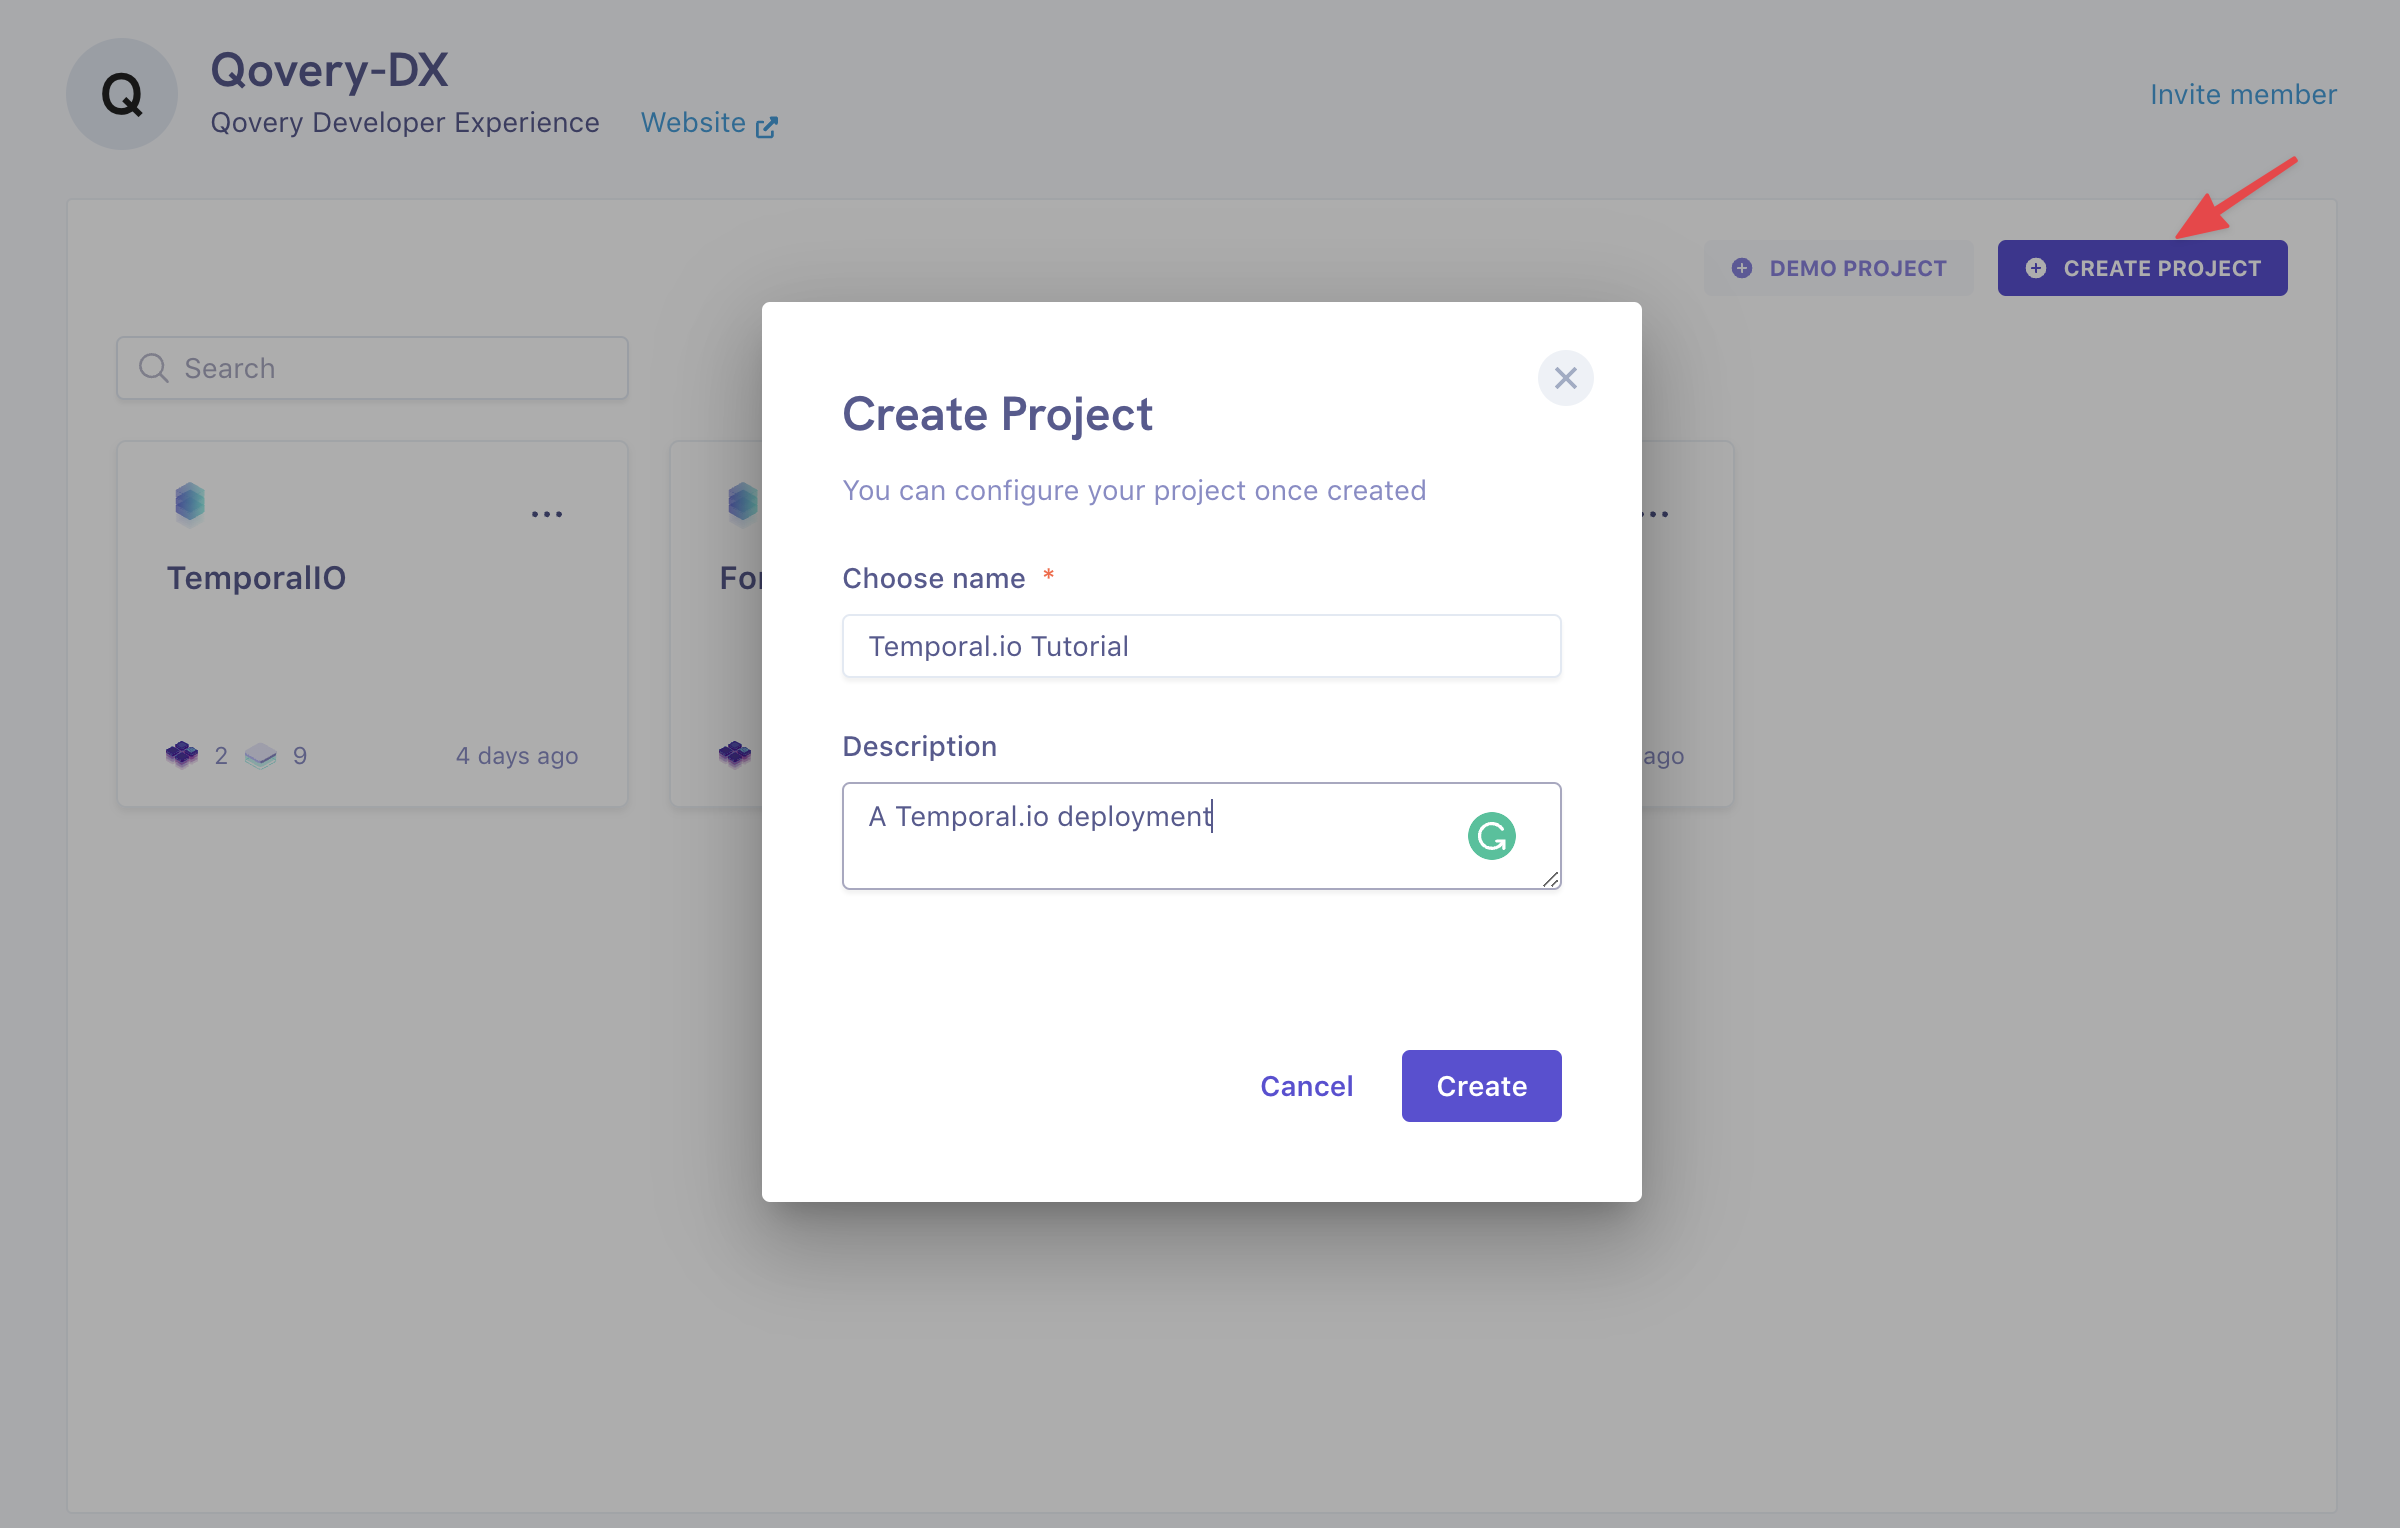
Create Qovery project
Head to the Qovery console and create a project:
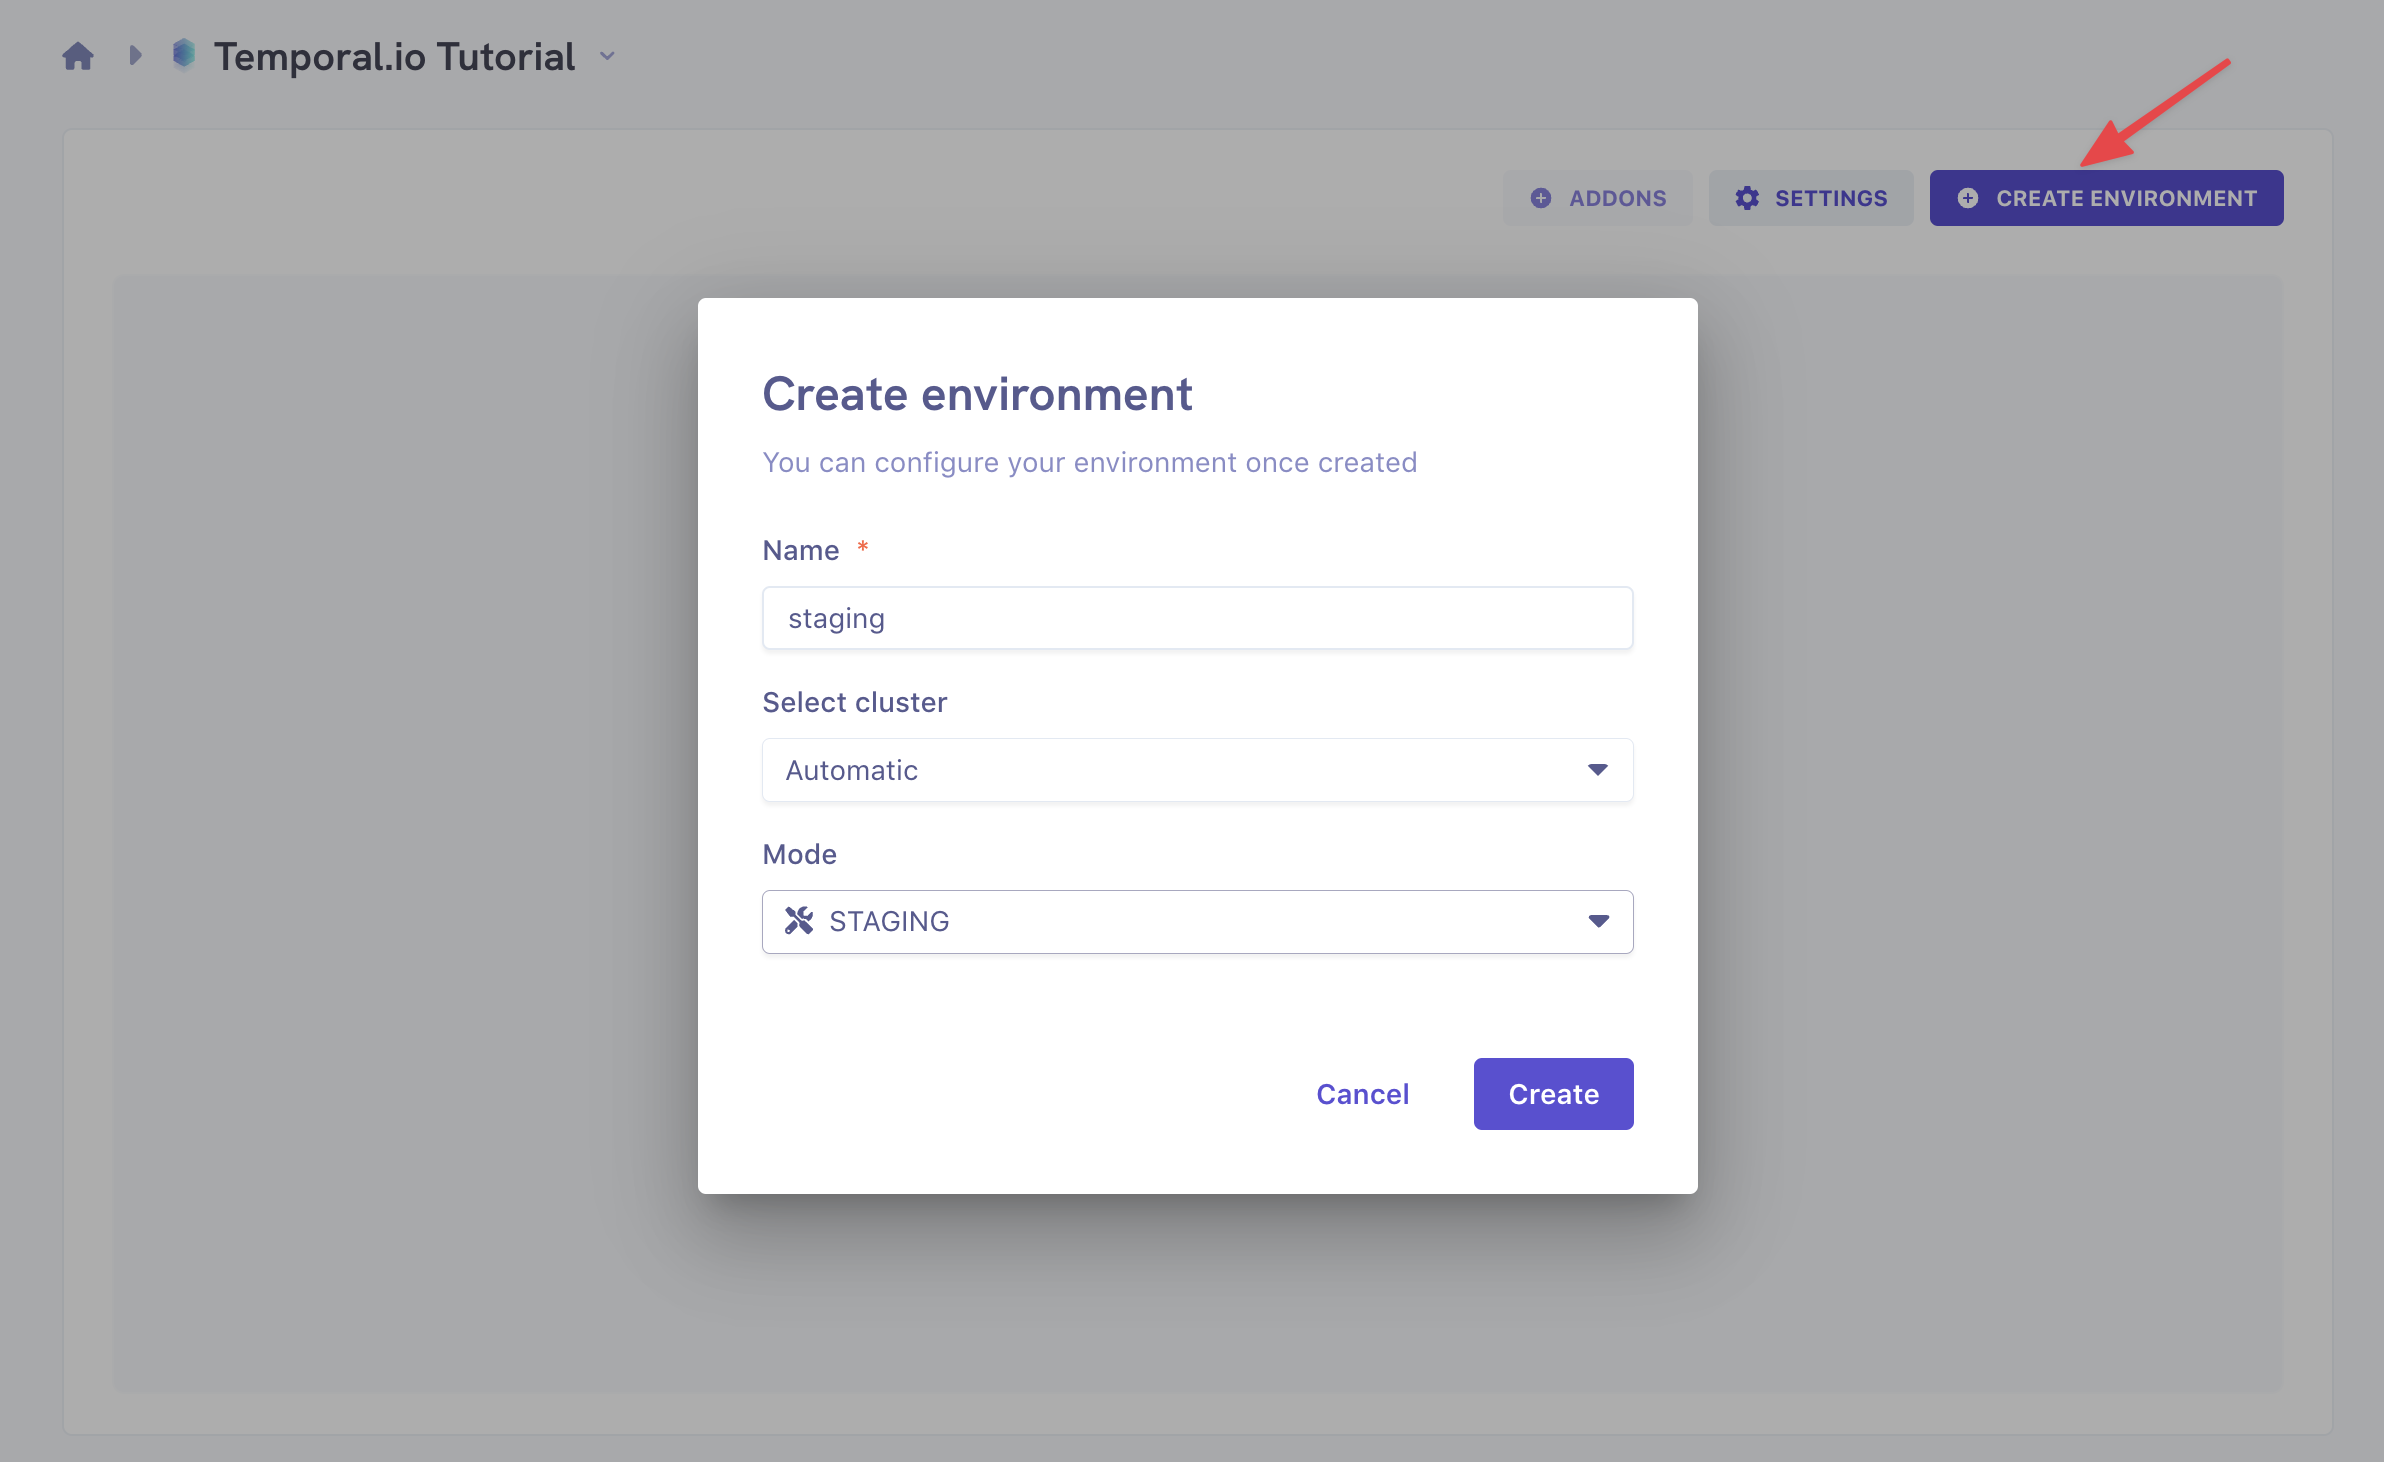
Create staging environment
Next create your staging environment:
Deploy Temporal server
Fork the example GitHub repository
Go to https://github.com/Qovery/qovery-temporalio-example and fork the repository.
You can edit the tags in the Dockerfiles to match the latest versions. Check the latest tags here:
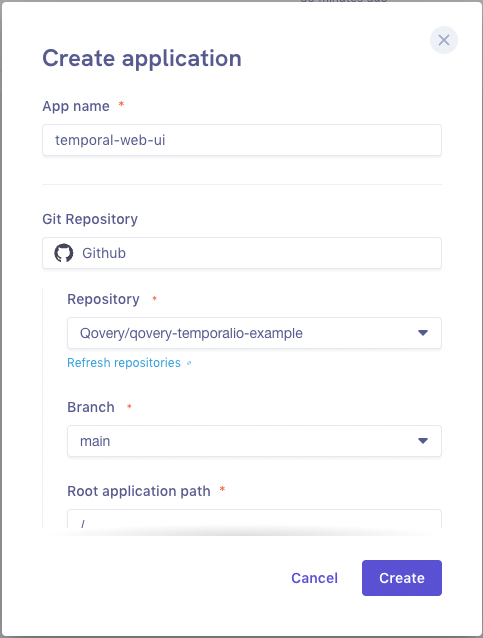
Create the Temporal server application
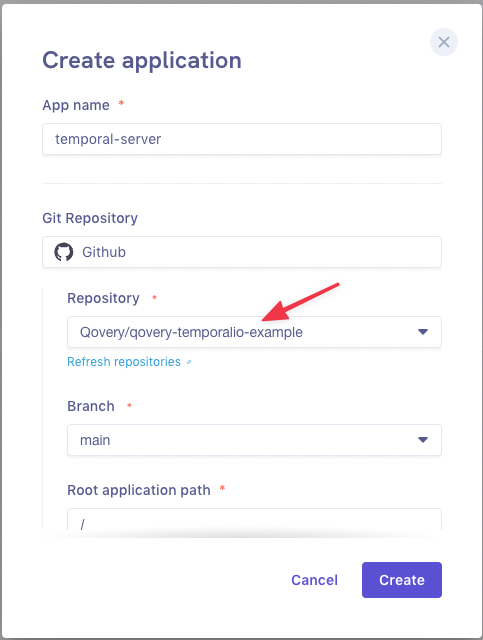
Click on
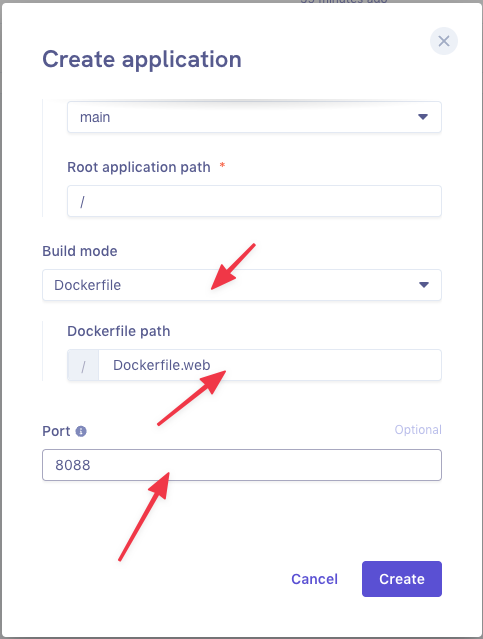
Create Applicationthen fill the form:- Select your forked GitHub repository.
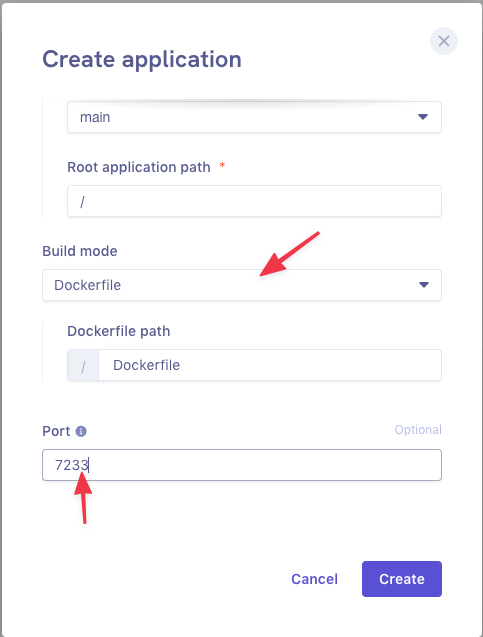
- Select
Dockerfileas the build mode. - Put
7233as a port. - Click
Create.
Your application is created:
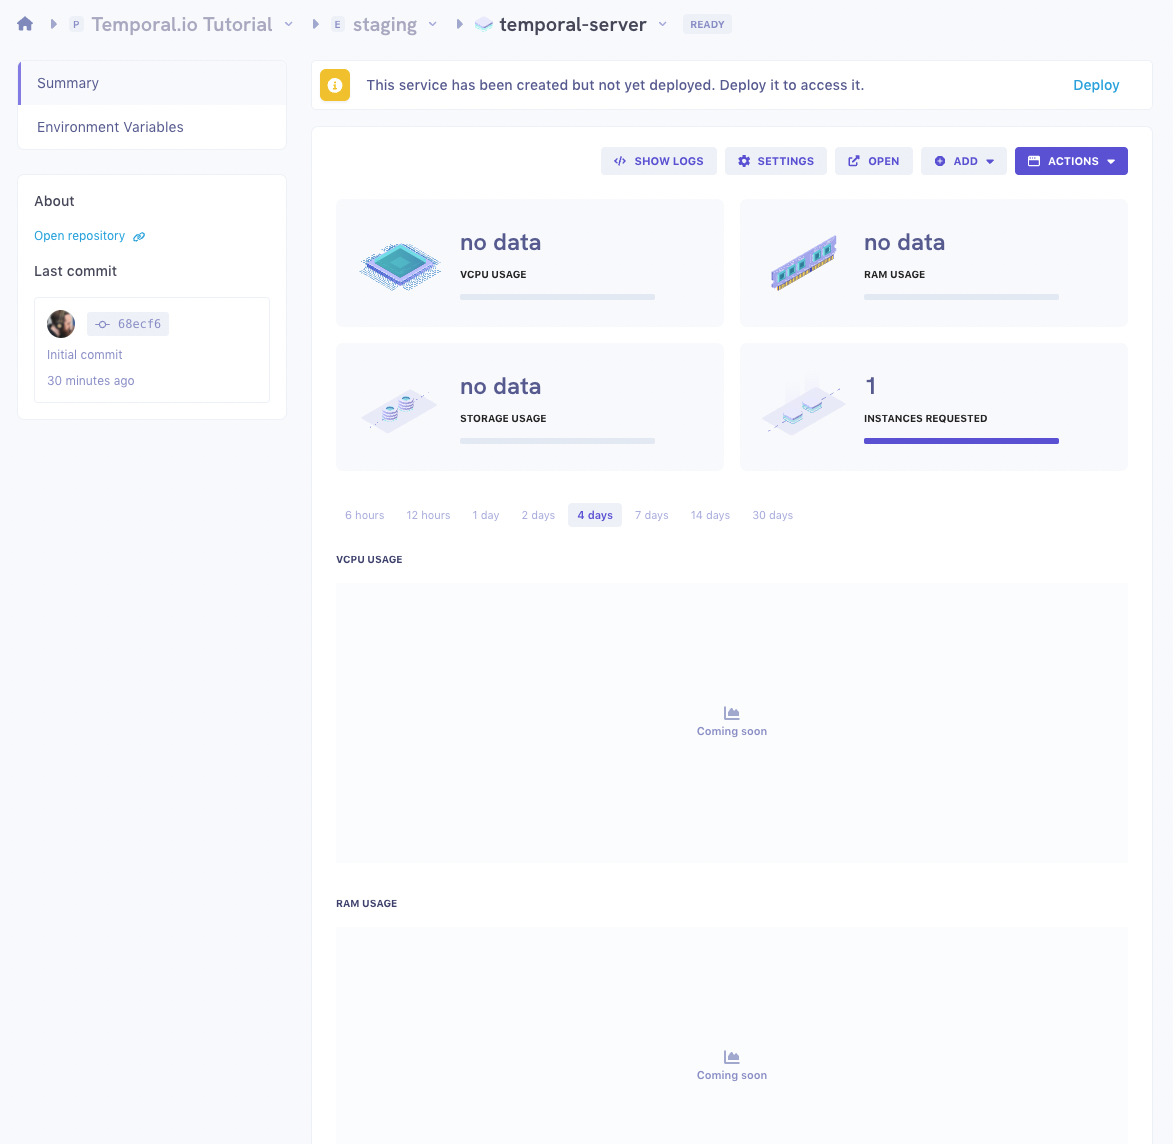
Don't deploy it yet though. We still have a few steps to accomplish before.
Update the port settings
First we will disable the public endpoint to the port.
Click on
Settings > Port, then on...,Advanced settingsand uncheckPublicly. Save the settings and close the modal.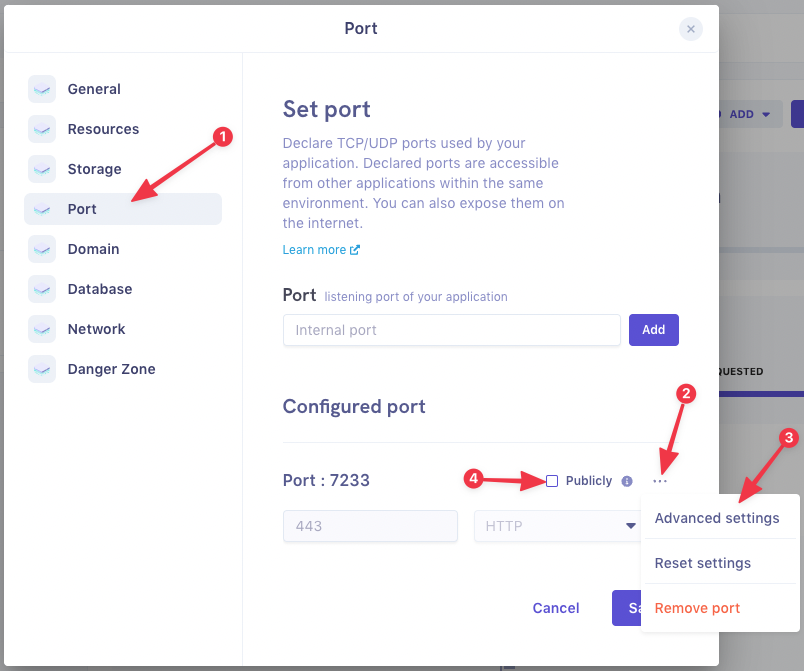
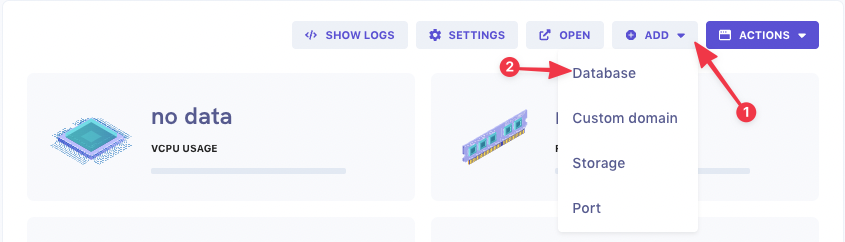
Add a PostgreSQL database
We will now add a PostgreSQL database to serve as a persistence layer to our Temporal server.
Click on
AddthenDatabasethen fill the form:- Pick a name for your DB.
- Type: PostgreSQL
- Mode: Container (less expensive than Managed for non-production environments)
- Version: 13
- Accessibility: Private
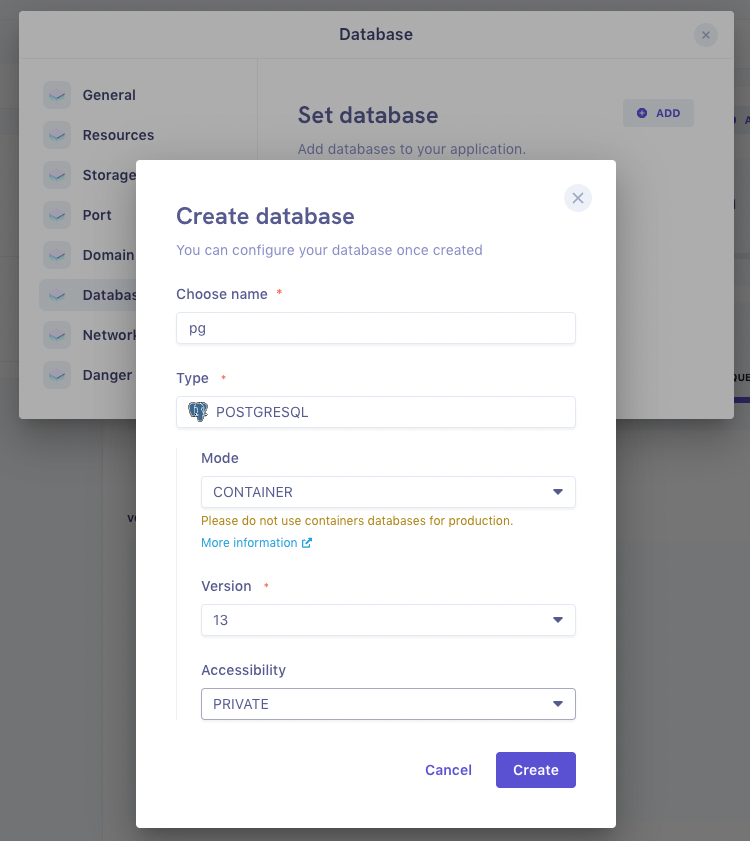
Your database is created:
Don't deploy it. We're not done setting-up our environment.
Set the environment variables
Now we need to set a bunch of environment variables. Go back to your Temporal server app and click on
Environment variables:Add the following environment variables:
DB=postgresqlLOG_LEVEL=debug,info
Now create the following aliases on environment variables:
QOVERY_POSTGRESQL_Z[DB ID]_HOST_INTERNAL:POSTGRES_SEEDSQOVERY_POSTGRESQL_[DB ID]_LOGIN:POSTGRES_USERQOVERY_POSTGRESQL_[DB ID]_PORT:DB_PORT
On an alias on secrets:
QOVERY_POSTGRESQL_[DB ID]_PASSWORD:POSTGRES_PWD
Deploy the Web UI
Create the Temporal UI application
Now go to the environment level, and click on
Add. Similar to what you did for the server:- Select your forked GitHub repository.
- Select
Dockerfileas the build mode. - Put
Dockerfile.webfor the Dockerfile path. - Put
8088as a port. - Click
Create.
Get the application ID of the Temporal server
To get the application ID of the Temporal server, go back to the corresponding app, and note the first part of the UUID in the browser URL.

Copy this ID somewhere.
Set the environment variables
Add the following environment variable:
TEMPORAL_SERVER_PORT:7233
Now create the following alias on environment variables:
QOVERY_APPLICATION_Z[SERVER APPLICATION ID]_HOST_INTERNAL:TEMPORAL_SERVER_HOST
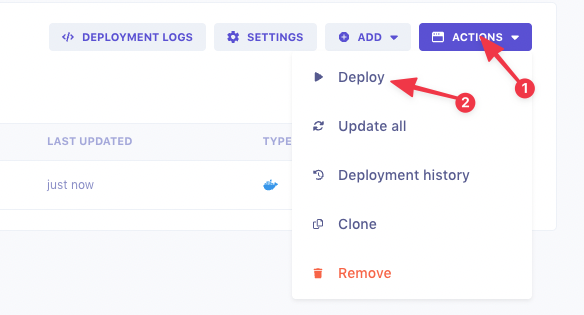
Deploy your environment
You can now deploy your environment. Go back to your environment view and click DEPLOY.
Once it's deployed and the status is RUNNING, you can go to the Web UI application and open it.
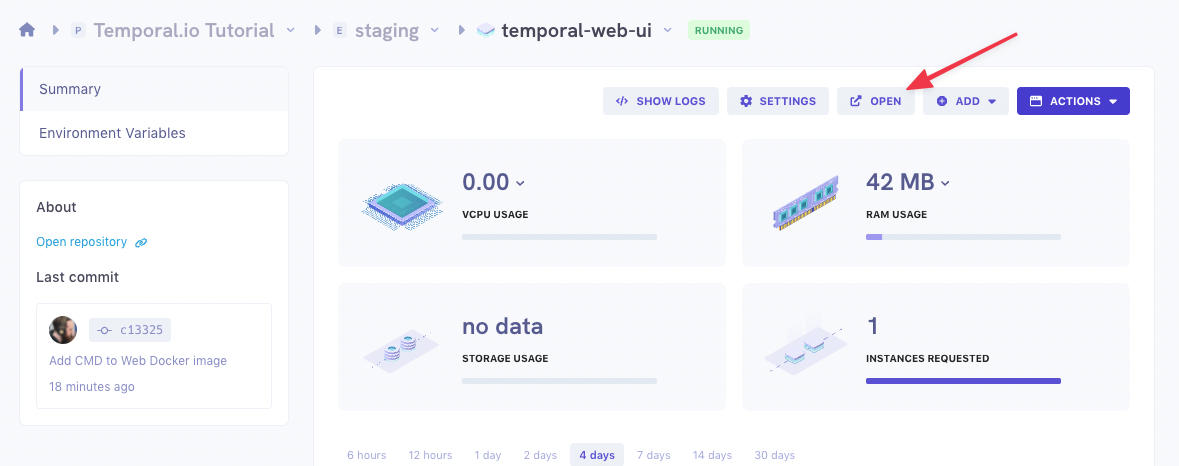
If you see the Temporal Web UI with no error, well done. Your server is deployed!
Split the temporal services for independent scaling.
Temporal server is composed of four different services. By default, they will all be running in the same process. But if you would like to scale them independently, you still have the option to deploy them separately.
See the Temporal docs for more information on the architecture: https://docs.temporal.io/docs/concepts/what-is-a-temporal-cluster
Clone your environment
We could start again from scratch or edit the running environment (which would require resetting the DB), but instead we will leverage the clone feature of Qovery, to start with an identical, clean environment.
On your environment page, click
ActionsthenClone.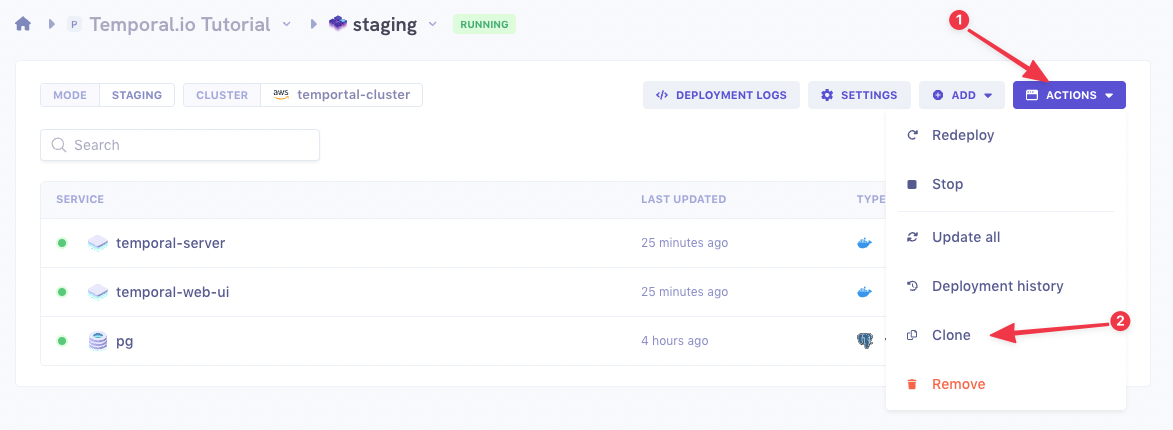
Pick a name and click
Create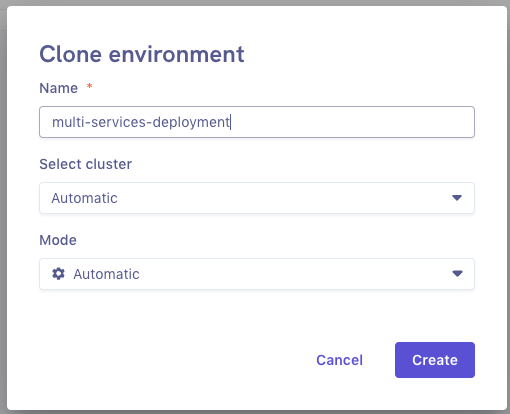
You will land in an identical environment, not deployed yet. Don't deploy it right away, we will first split our services.
Switch your server service to frontend gateway
First we will rename the server application to call it
temporal-frontend. Go to the server application and clickSettings. Then change the name and save.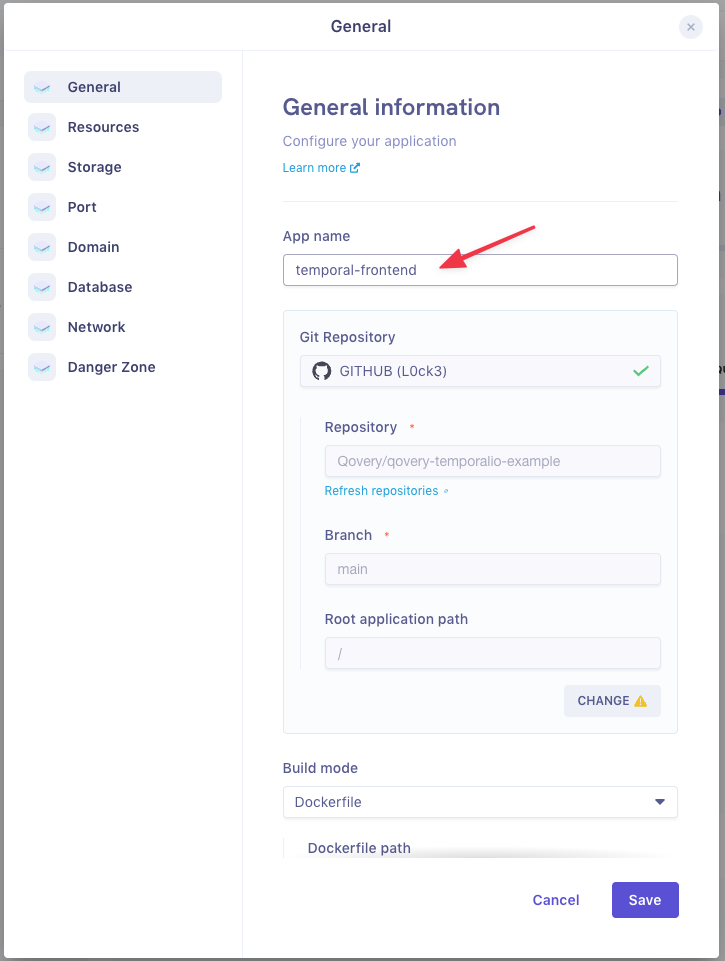
Add an env variable to flag the service
In order to tell our application that it should only start the frontend service, we'll add an env variable with the
APPLICATIONscope:SERVICES=frontend
Create the other services
Create three new application, following the steps you did for the server initially:
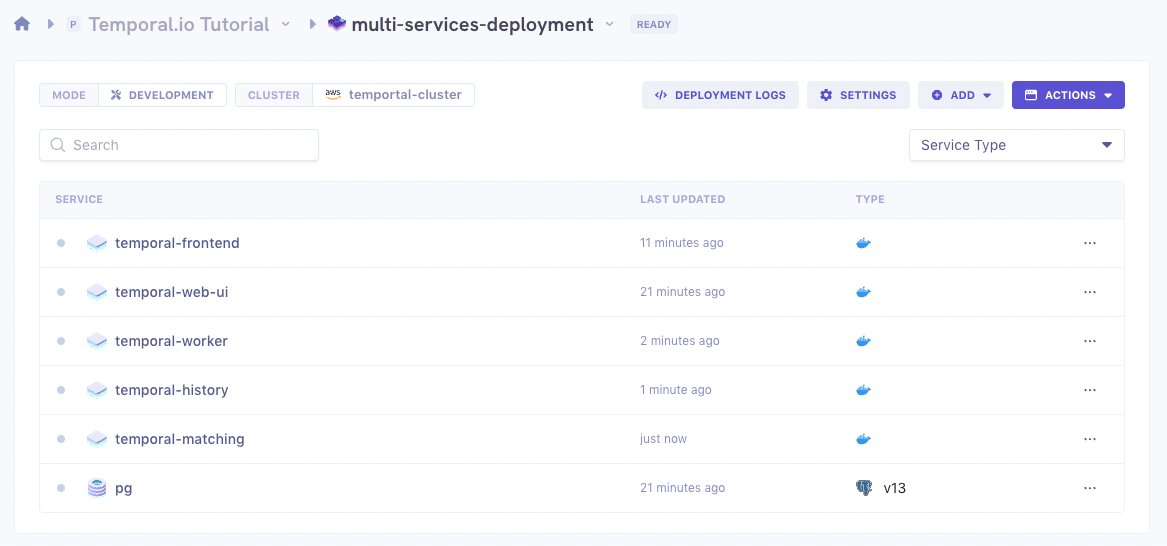
temporal-historywith an env variableSERVICES=history.temporal-matchingwith an env variableSERVICES=matching.temporal-workerwith an env variableSERVICES=worker.
Each time set the port to
7233and disable the public endpoint.You should end up with something like this:
Deploy your environment
You can now deploy your environment. Once it is
RUNNING, you can open the UI again and check everything is ok.
Conclusion
We have successfully deployed Temporal on Qovery. It can be useful for Staging or Preview environments but this is a very minimal deployment and we would not advise doing it for production.
There is no one-size-fits-all configuration for this type of products.
You would probably like to setup authentication on your Web UI as well. We include the config file in the GitHub repository. You can edit it to your needs, following this documentation.
For deploying on your Kubernetes cluster, check the documentation and the following article: https://docs.temporal.io/blog/temporal-and-kubernetes. The first video is worth watching.