In the second part of the Case Study with AppWrite, we will create the backend part of our AppWrite Cloud. The backend will communicate with Qovery API to request the infrastructure (AppWrite instances and their dependencies, i.e. MariaDB and Redis) for AppWrite Cloud users. Qovery will take care of provisioning, managing, and running AppWrite instances and databases, while AppWrite Cloud will take care of providing a nice UI and other utilities for the users wanting to deploy AppWrite on a cloud-managed solution.
Architecture
The backend of AppWrite Cloud will make use of a low-code tool Hasura. Hasura is an open-source project that allows building backend apps with minimal effort while still providing fast performance. It also allows executing custom business logic using cloud functions. Our Hasura backend will use PostgreSQL as its data store. In the first stage, the AppWrite Cloud backend will contain information about users and their projects. For all tasks related to running and managing the underlying infrastructure, it will call Qovery API and delegate those tasks to Qovery so that AppWrite Cloud can stay focused on delivering to their users what they really want - an excellent experience AppWrite, instead of wasting time on reinventing the wheel of managing the infrastructure.
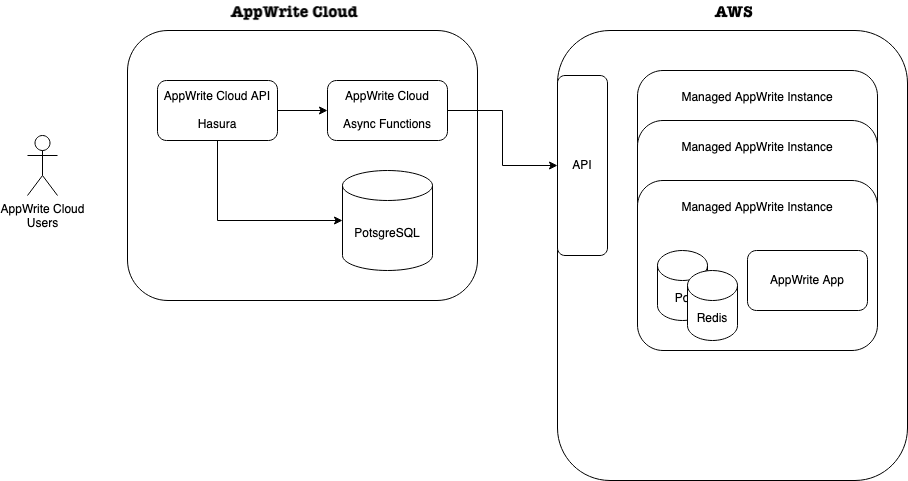
For all business logic, we will use the Async Actions feature of Hasura. In this approach, the Hasura backend calls external functions over the network and lets them perform any business logic required. The async functions can be hosted anywhere, as long as they conform to the contract required by Hasura.
Hosting AppWrite Cloud
Besides, hosting all the managed AppWrite projects of AppWrite Cloud users, Qovery can also host the whole AppWrite Cloud backend itself. Indeed, in this case study, we'll go through all the steps required to deploy AppWrite Cloud on Qovery.
Deploying AppWrite Cloud on Qovery
To deploy the AppWrite Cloud, we need to deploy a Hasura backend, a PostgreSQL database for Hasura, and our Go server for handling the custom business logic.
Postgres
First, let's deploy our database. To do so, use Qovery Console to create a new project and environment, then click Add Database button and choose PostgreSQL v12.
Hasura
To deploy Hasura, fork this repository https://github.com/Qovery/hasura. Use DOCKER build mode and Port 8080. Then, in the Environment Variables section, add the following variables:
HASURA_GRAPHQL_ENABLE_CONSOLE- trueHASURA_GRAPHQL_ADMIN_SECRET- your Hasura admin secret (value up to you)HASURA_GRAPHQL_JWT_SECRET
{"type": "HS256","key": "$KEY"}
- where
$KEYis a minimum 32 character long string HASURA_GRAPHQL_DATABASE_URL- an alias to your previously created PostgreSQL URL
Functions
Now, let's deploy our Go server. To do so, you can fork this repository https://github.com/pjeziorowski/appwrite-functions.
Create a new app using DOCKER build mode and Port 3000.
Now, we need to set up a few environment variables:
ORGANIZATION_ID_QOVERY- organization ID used as your AppWrite Cloud on QoveryAPI_TOKEN_QOVERY- API token to use to interact with Qovery APIHASURA_API_URL- location of your Hasura backend instanceSECRET- key to sign tokens, use the same value as inHASURA_GRAPHQL_JWT_SECRETkey sectionHASURA_API_TOKEN- admin secret token of your Hasura instance
Deploy the environment
After your project is set up as described above, deploy the whole environment, and your AppWrite Cloud backend will be ready to play and test.
Database Structure
All we need to store in the AppWrite Cloud database at the moment is users and their projects. For this, we will create a user table and project table that will contain AppWrite URLs and project names.
To import the structure of the tables into the Hasura backend, you can use the metadata file located here hasura/appwrite-cloud-metadata.json at main · Qovery/hasura
The user table contains sign-in information (email and hashed password):

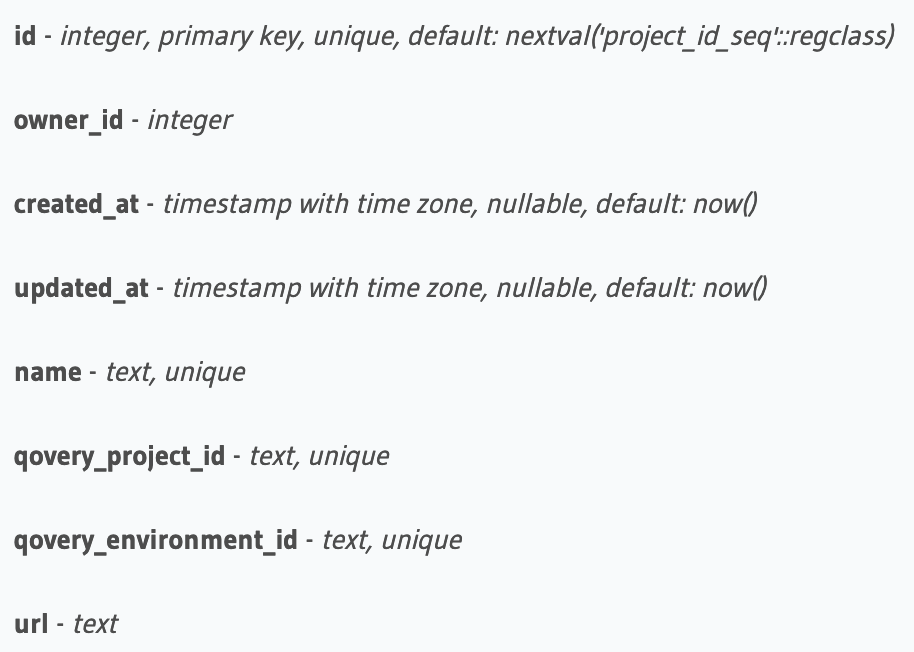
whereas the project table contains basic information about the project in AppWrite Cloud, URL to AppWrite instance as well as its mapping to a project in Qovery:
AppWrite Cloud API
The initial version of the API will allow to:
SignupSigninCreate/Start/Stop/Delete AppWrite Instances
The API will be exposed using Hasura Actions. Actions delegate the custom logic to handler functions we deployed in our Go server. Hasura will delegate the work of contacting the Qovery API to those functions.
All the Actions were already imported into Hasura using the same metadata file as we used to import the structure of the tables.
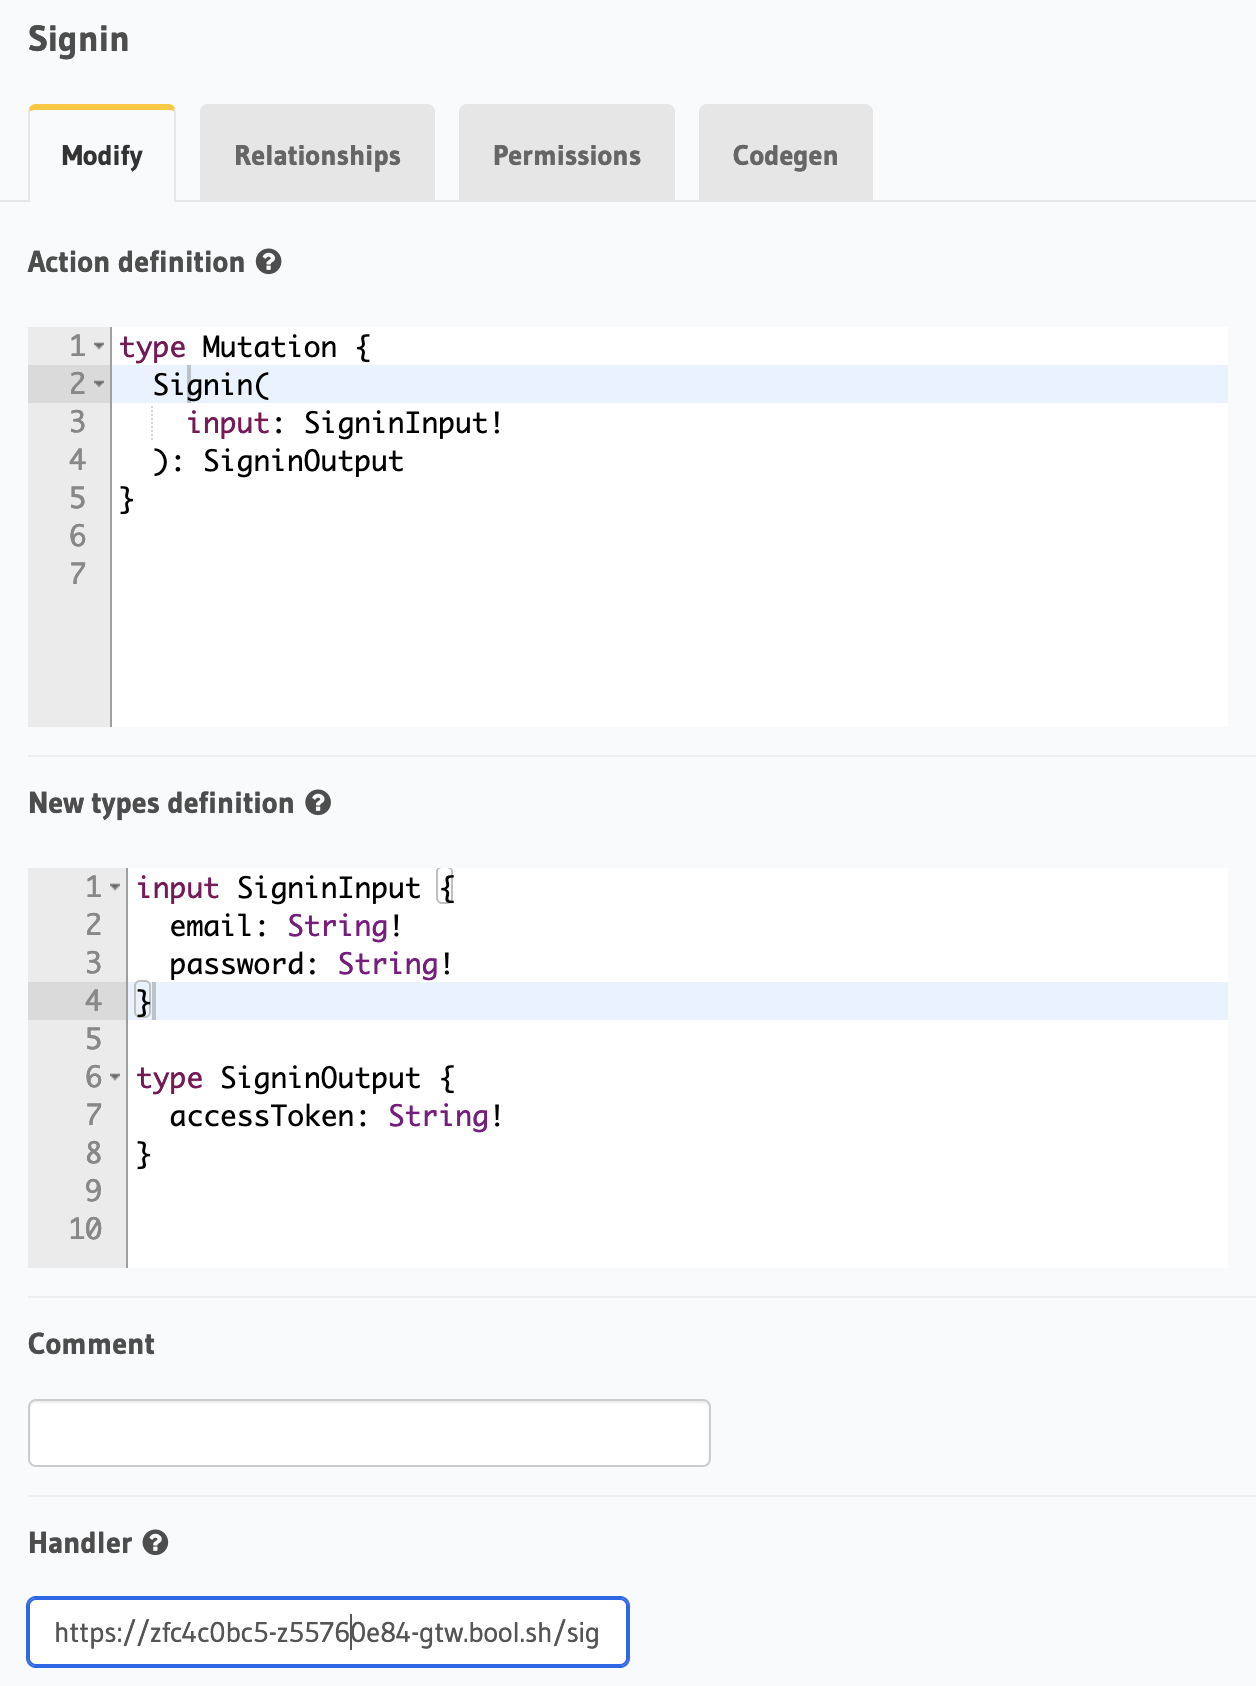
When you navigate to Actions section in Hasura, you'll see actions definition similar to this one:
The functions serving those actions in our Golang app look more or less like this:
func stopProject(args StopProjectArgs, userId string) (response StopProjectOutput, err error) {log.Printf("received stop project request %v", args)response = StopProjectOutput{Ok: false,}// try to stop a project using Qovery APIerr = callQoveryApi(args.Input.Id)if err != nil {return response, err}response.Ok = truereturn response, nil}
You can see the whole code in your forked repository on Github.
Testing AppWrite Cloud Backend
Signup
After a few minutes of deployment, the first version of our managed cloud solution should be ready. Let's use the Hasura GraphQL API to create a new user.
To do so, open your Hasura by clicking the Open button in your Hasura application. Then, run the following mutation in the GraphQL explorer:
You'll end up with a response like this:
{"data": {"Signup": {"accessToken": "eyJhbGciOiJIUzI1NiIsInR5cCI6IkpXVCJ9.eyJodHRwczovL2hhc3VyYS5pby9qd3QvY2xhaW1zIjp7IngtaGFzdXJhLXVzZXItaWQiOiIyIiwieC1oYXN1cmEtZGVmYXVsdC1yb2xlIjoiYWRtaW4iLCJ4LWhhc3VyYS1hbGxvd2VkLXJvbGVzIjpbImFkbWluIl19LCJleHAiOjE2Mzc0ODAxNDR9.aNv72YwjWXkKItDPxQOe5bB7LPo8ZCZ0Gqb3mR6_KQI"}}}
Great! We have just created our first user and received a token to interact with AppWrite Cloud API.
Create Project
Now, let's create our first managed AppWrite instance. In headers, include Authorization header with the Bearer token received when signing up:
mutation {CreateProject(input: {name: "myproject"}) {idnameurl}}
You should see a response similar to this one:
{"data": {"CreateProject": {"id": 10,"name": "myproject","url": "<https://zf3f05b5a-zab0fb2f8-gtw.oom.sh>"}}}
Great! In the response, we have received the URL we can use to access our managed AppWrite instance.
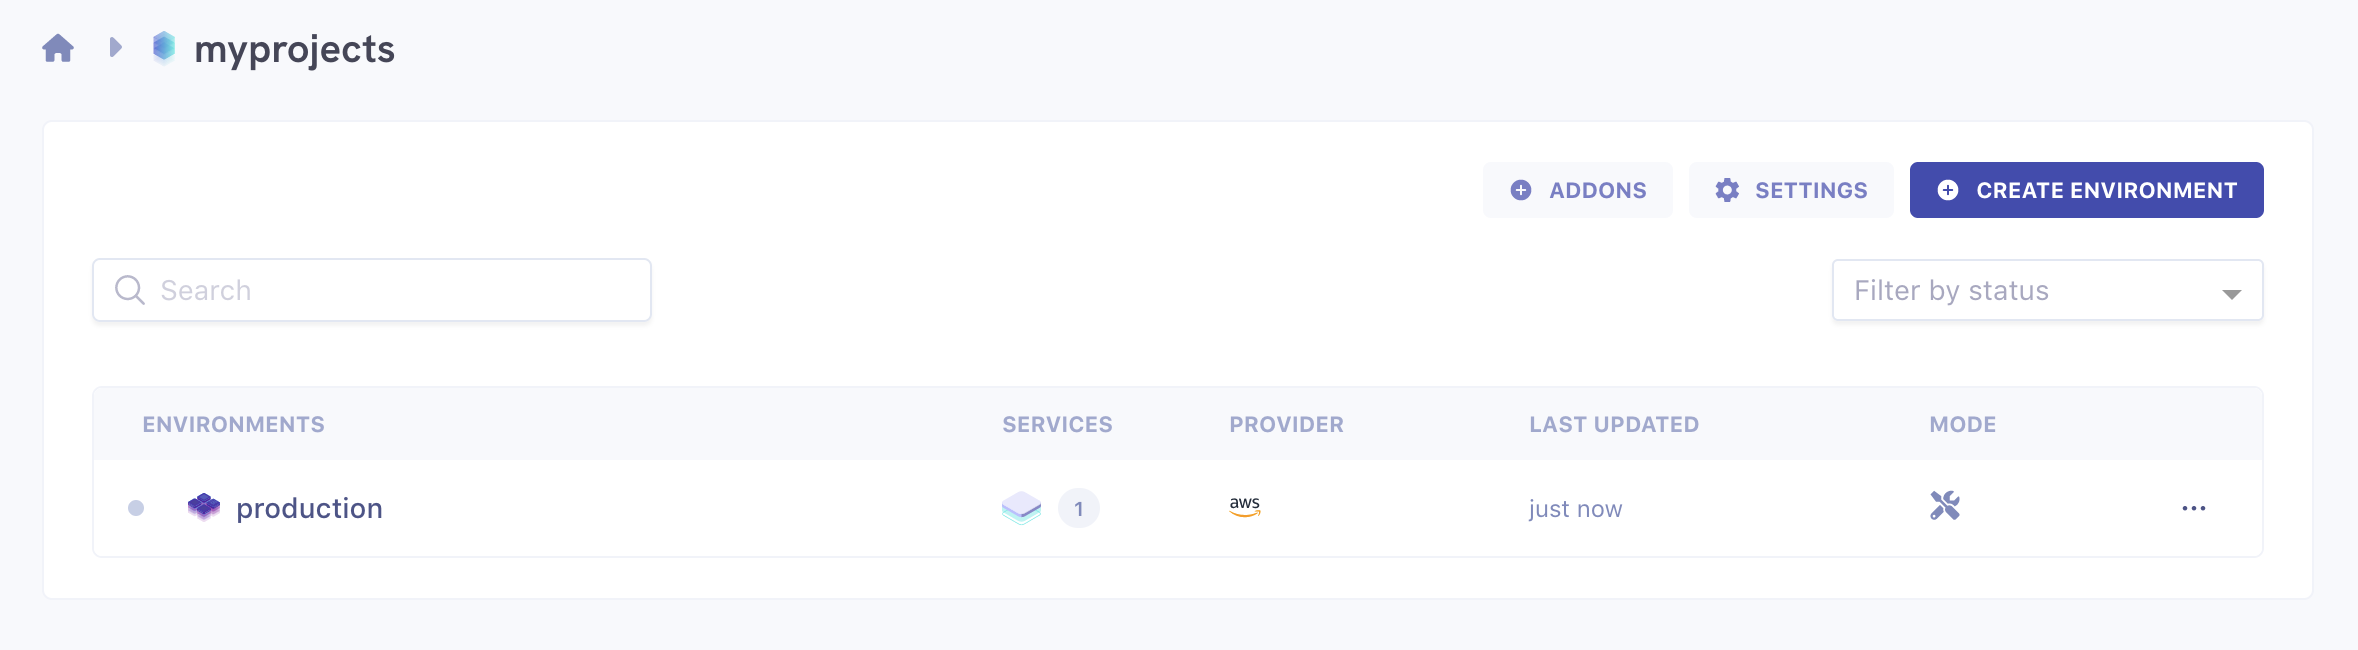
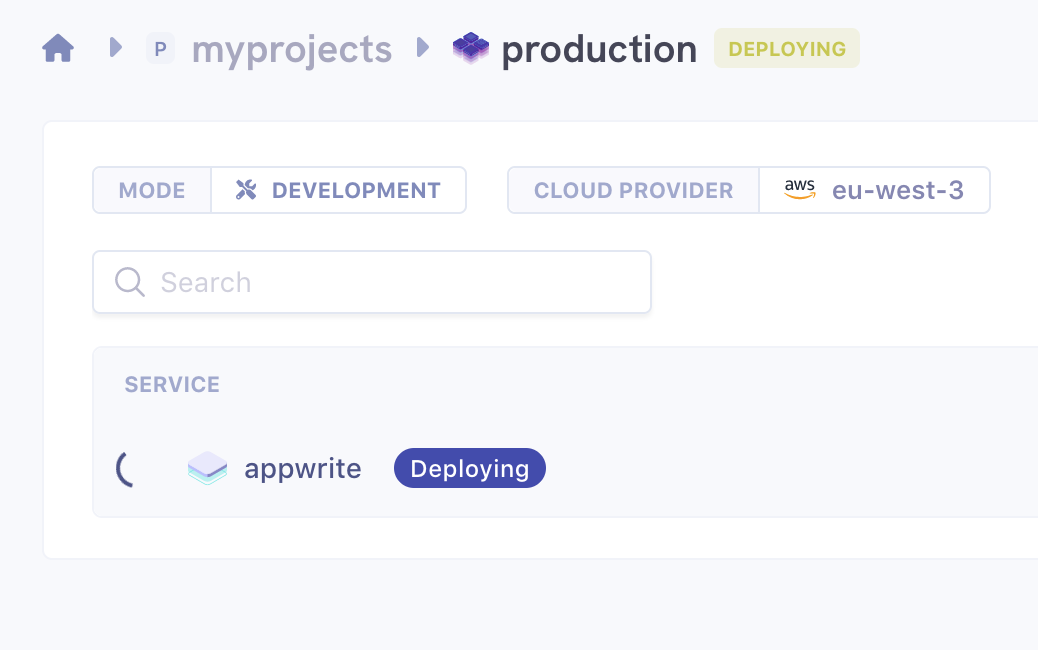
When we peek into Qovery UI, we see the created project for our managed AppWrite:
Start / Stop Project
It's the time to start our project. To do so, run the following mutation:
mutation {StartProject(input: {id: 10}) {ok}}
We should get this response:
{"data": {"StartProject": {"ok": true}}}
And looking into Qovery, we'll see our environment is starting:
After a few minutes, our AppWrite instance should be available up and running using the URL from the previous response. We can also list our projects to get all projects' URLs:
{project(where: {user: {id: {_eq: 1}}}) {idnameurl}}
Response:
{"data": {"project": [{"id": 9,"name": "appwrite1","url": "https://zd3da7904-z24aae066-gtw.oom.sh"},{"id": 10,"name": "myproject","url": "https://zf3f05b5a-zab0fb2f8-gtw.oom.sh"}]}}
AppWrite Cloud API domain
Now, as the last step of this part of tutorial, let's set up a custom domain for our AppWrite Cloud.
To do so, all we need to do is to follow a few simple steps:
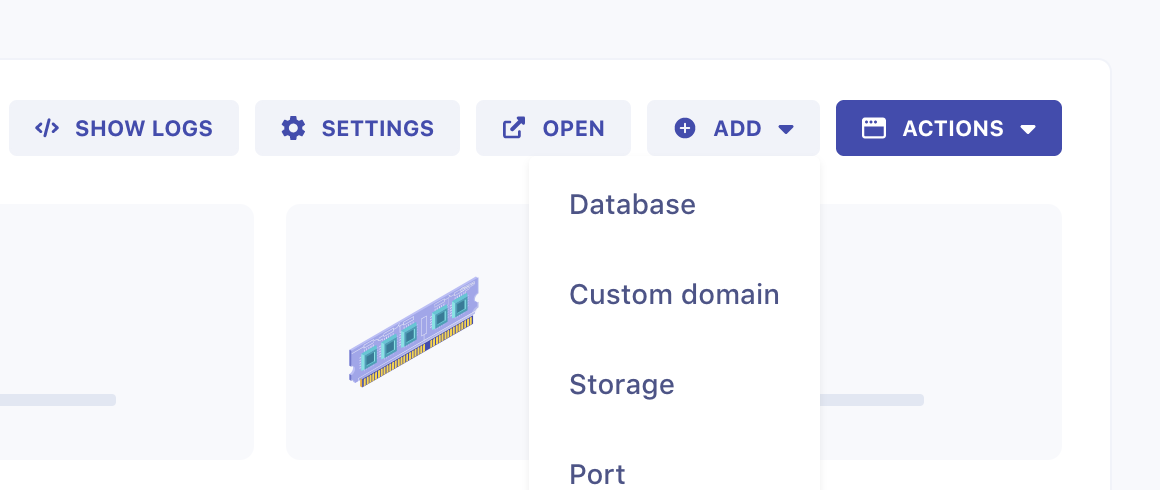
- Navigate to the Hasura GraphQL API application in Qovery Console
- Click
Addbutton and selectCustom Domain
- Type the name of desired domain, click
Addand copy theValuedisplayed in the box below
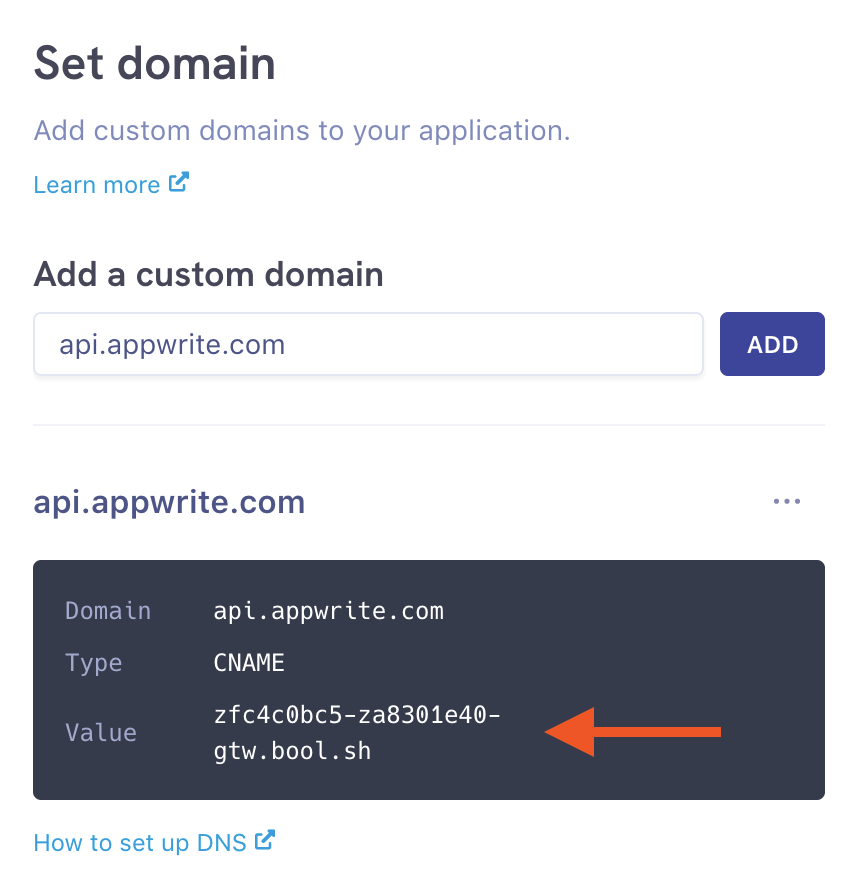
- Add a
CNAMErecord with value copied in the previous step in your domain provider DNS management settings

- Restart
Hasuraapplication
Congratulations, your AppWrite Cloud API will be exposed using your custom domain shortly.
Conclusion
In this tutorial, we have managed to bootstrap the backend for our AppWrite Cloud solution. Users can register, log in, create and deploy managed AppWrite projects. In the following steps, we will add more functionalities to our AppWrite Cloud offering, set up a nice to use web User Interface and continue adding new features to AppWrite Cloud on top of Qovery.