Getting started with Qovery is easy. Just plug your Git repository, and you can deploy your application directly. But in some cases you will want a more advanced CI workflow where some steps need to happen before deployment.
One of the CI tools you can use for that matter is GitHub Actions.
Before you begin, this guide assumes the following:
- You have a Qovery cluster running.
- You are using GitHub Actions as a CI server.
- You have a Qovery application deployed.
- You have the Qovery CLI installed and configured.
If you don't have an application running on Qovery yet, check the documentation to create one.
Goal
In this tutorial, we will deploy an application with GitHub Actions by using the Qovery CLI.
Get your application ready
The first thing we need to do, is to disable automatic deployments. By default, Qovery applications get re-deployed whenever you push some code to the configured branch. Since we want to trigger the deployment through GitHub Actions, we need to disable this behavior.
Go to your application page, then click Settings:
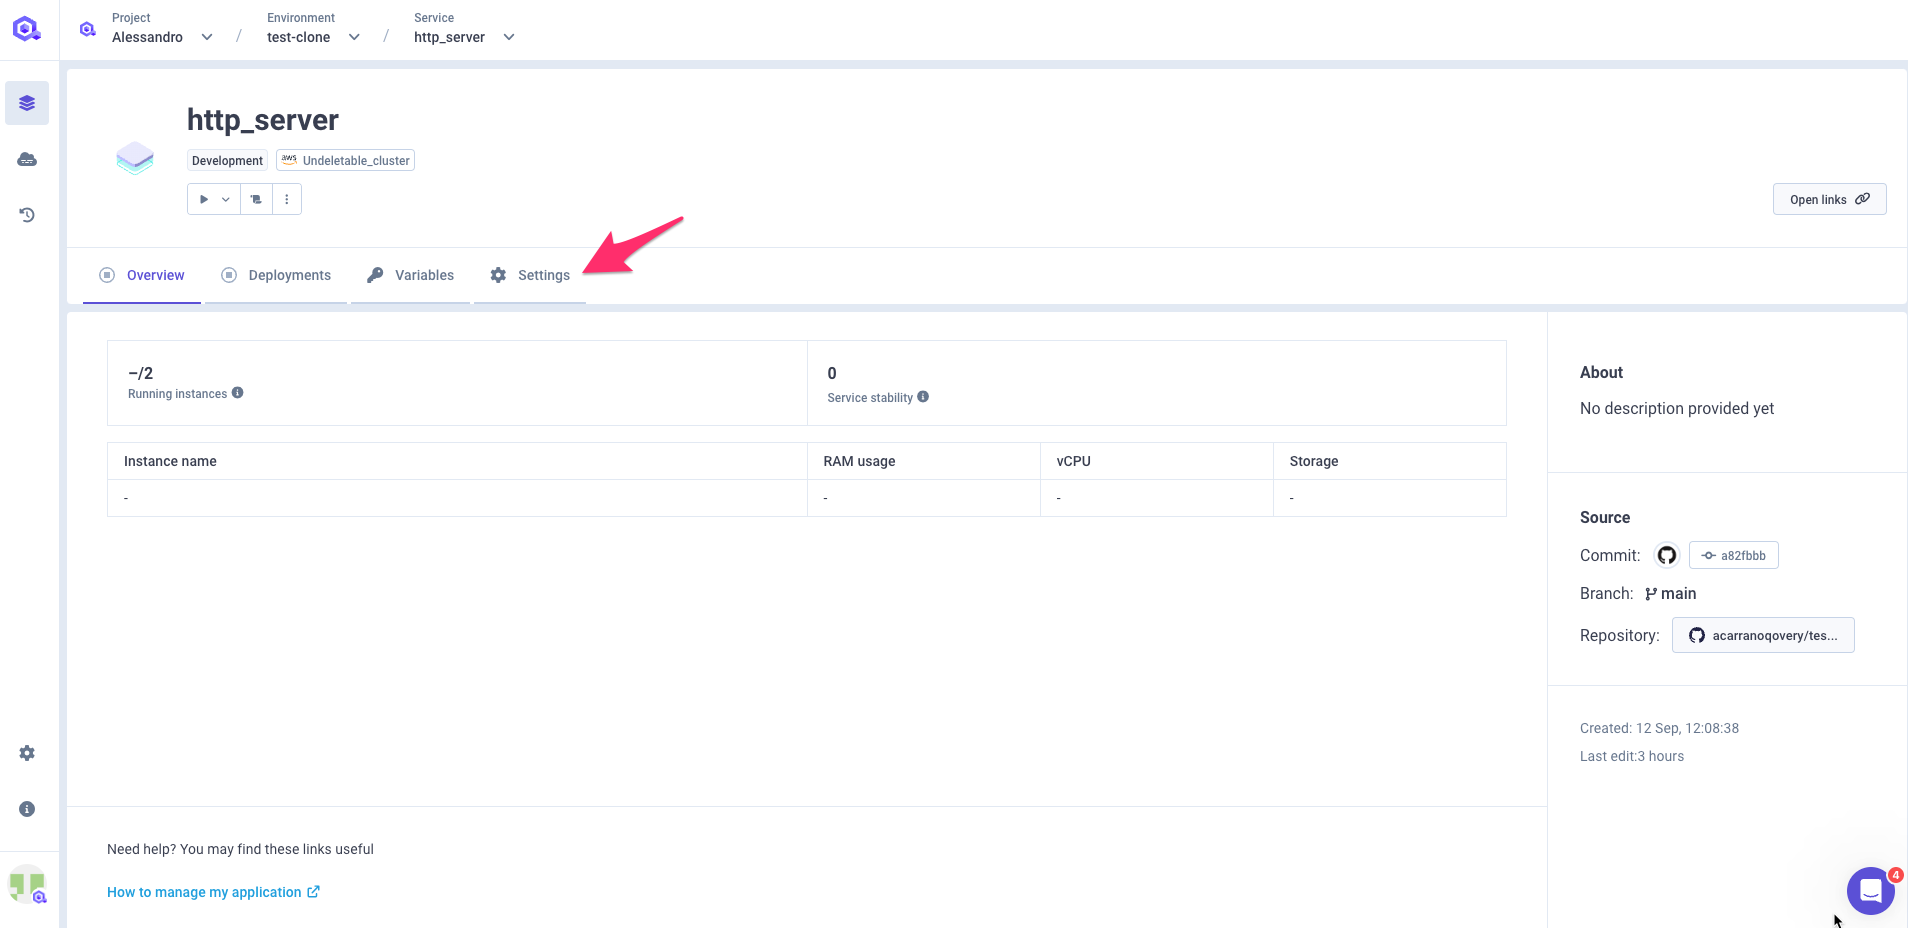
Then on the General section go to the Auto-deploy field, select Off:
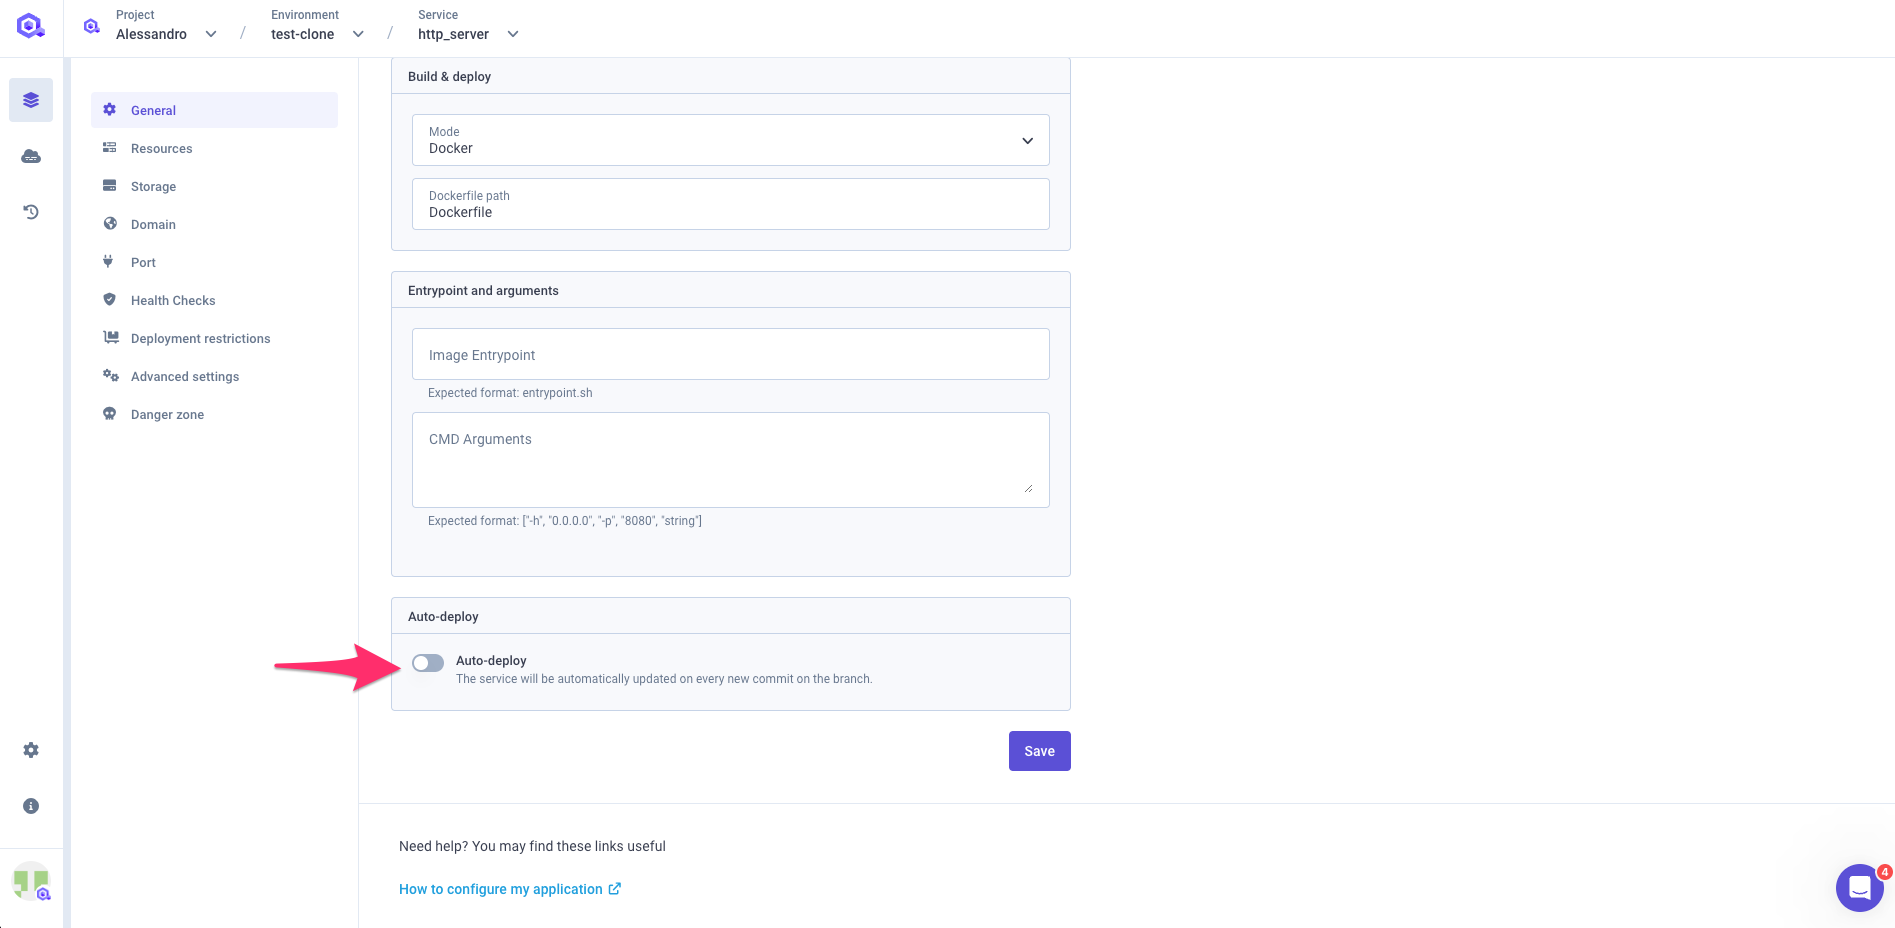
Click save.
Add your GitHub Actions Workflow
We will now add a GitHub Actions workflow to your application. Workflow are defined with YAML configuration files that are placed in the code directory of your application. As an example we will define a workflow for a NodeJS application. We will first run our unit tests, then launch the Qovery deployment if the tests pass.
You can adapt those steps for your own stack and needs. Read the GitHub Actions documentation to learn more.
Create the Workflows directory
All your workflows files must be stored in a specific
.github/workflowsdirectory. Create this directory at the root of your project.Add a Test and Deploy workflow
In your Workflows folder, create a
test-and-deploy.yamlfile with the following content:.github/workflows/test-and-deploy.yamlname: Test And Deploy to Qoveryon:workflow_call:secrets:api-token:required: truejobs:test:runs-on: ubuntu-lateststeps:- uses: actions/checkout@v2- name: Install modulesrun: yarn- name: Run testsrun: yarn testdeploy:needs: testruns-on: ubuntu-latestname: Deploy on Qoverysteps:- name: Deploy with Qoveryuses: actions/checkout@v3env:QOVERY_CLI_ACCESS_TOKEN: ${{ secrets.QOVERY_CLI_ACCESS_TOKEN }}shell: bashrun: |# Download and install Qovery CLIcurl -s https://get.qovery.com | bashqovery application deploy \--organization <your_org_name> \--project <your_project_name> \--environment <your_environment_name> \--application <your_qovery_app_name> \--commit-id ${{ github.sha }} \--watch- The
onsection contains aworkflow_calldirective. It means that this workflow will be triggered when called from another workflow. We're doing this because we won't use this workflow directly. Since we might have several environments to deploy to Qovery depending on the branch, we could have one workflow per environment, and we want to avoid repeating all the steps. - The
inputsandsecretssections are defining the values that we will need to pass to our workflow - The
jobssection lists thejobsand thestepsthat in needs to accomplish. Here we have two jobs and five steps:testwhere we check out the code, we install Yarn modules, and we run tests through Jestdeploywhere we check out the code and deploy to Qovery.
Several things worth noting:
- The organization / project / environment / application are case-sensitive.
- Our
deployjob has aneedsinstructions, telling GitHub Actions that this job can only run when thetestjob succeeds. - The
withsection of our lastdeploystep contains interpolated strings: ${{ inputs.xxxx }}. Those are values passed to our workflow, that our Qovery action needs. They will be passed from the calling workflow.
- The
Get a Qovery API token
To get an API token, use the Qovery CLI:
qovery token- Select your organization. (tokens are valid for only one organization).
- Enter a name for your token.
- Enter a description for your token.
You will get an output like this one:
qovery token Qovery: ---- Never share this authentication token and keep it secure ----Qovery: qov_xxx....Qovery: ---- Never share this authentication token and keep it secure ----Add your token to your GitHub repository secrets
Go to your GitHub repository then to the
Settings:
Got to the
Secrets/Actionssection and click onNew repository secret: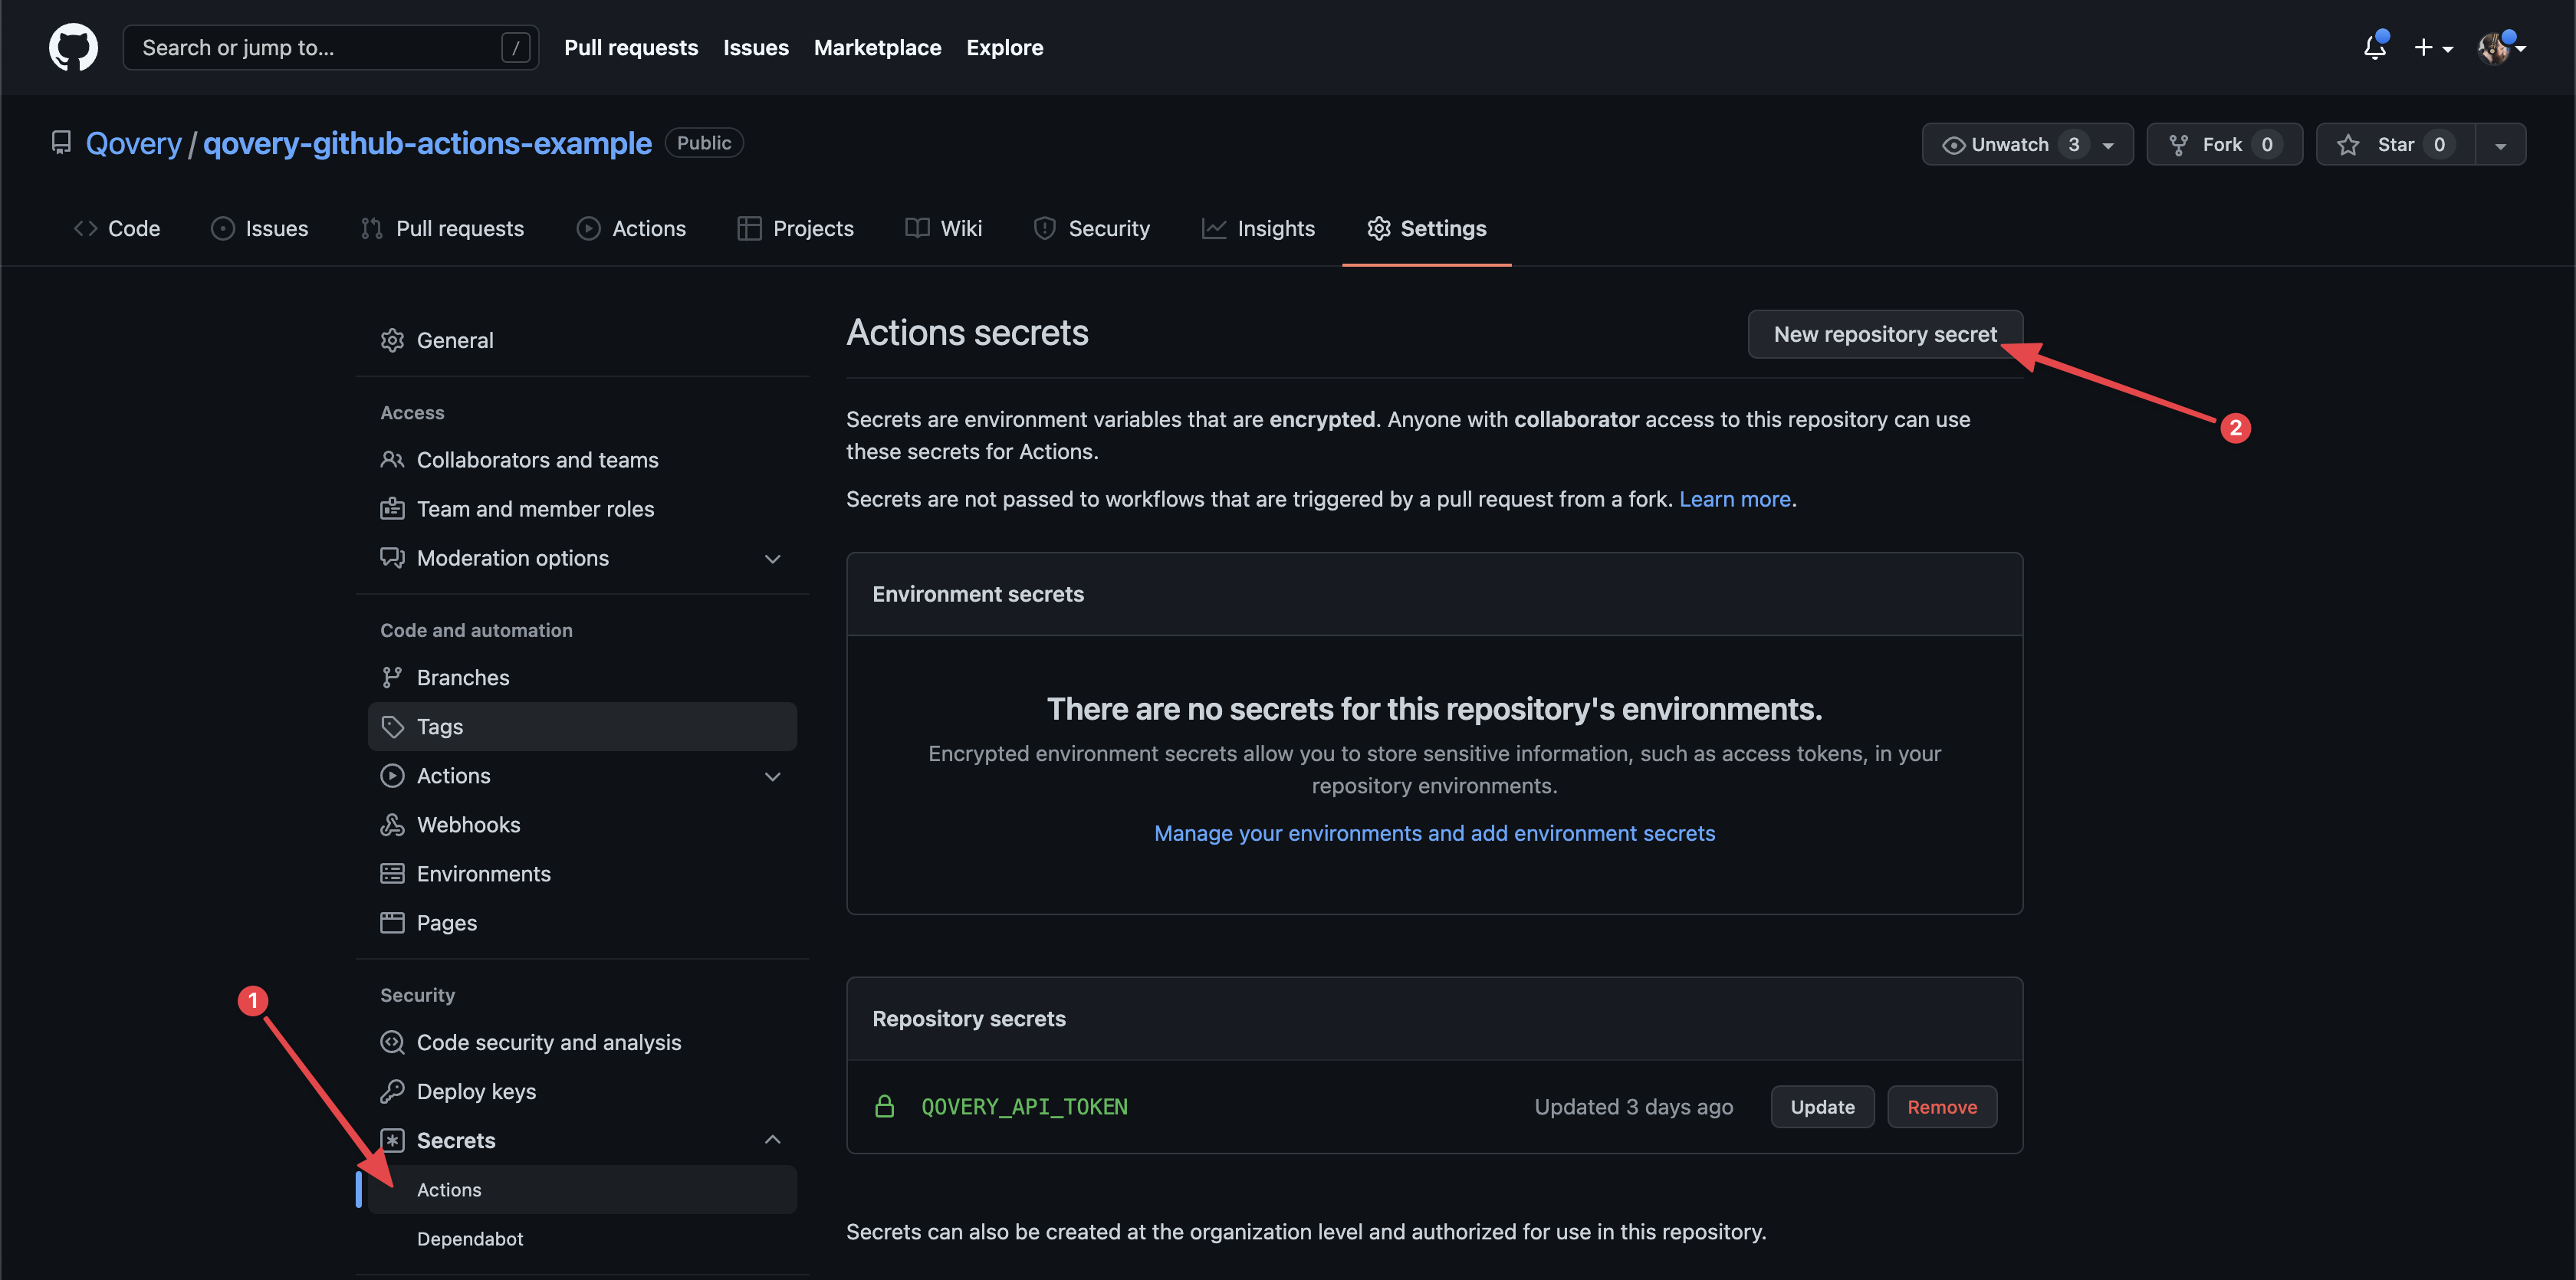
Add your secret with the name
QOVERY_API_TOKENand save: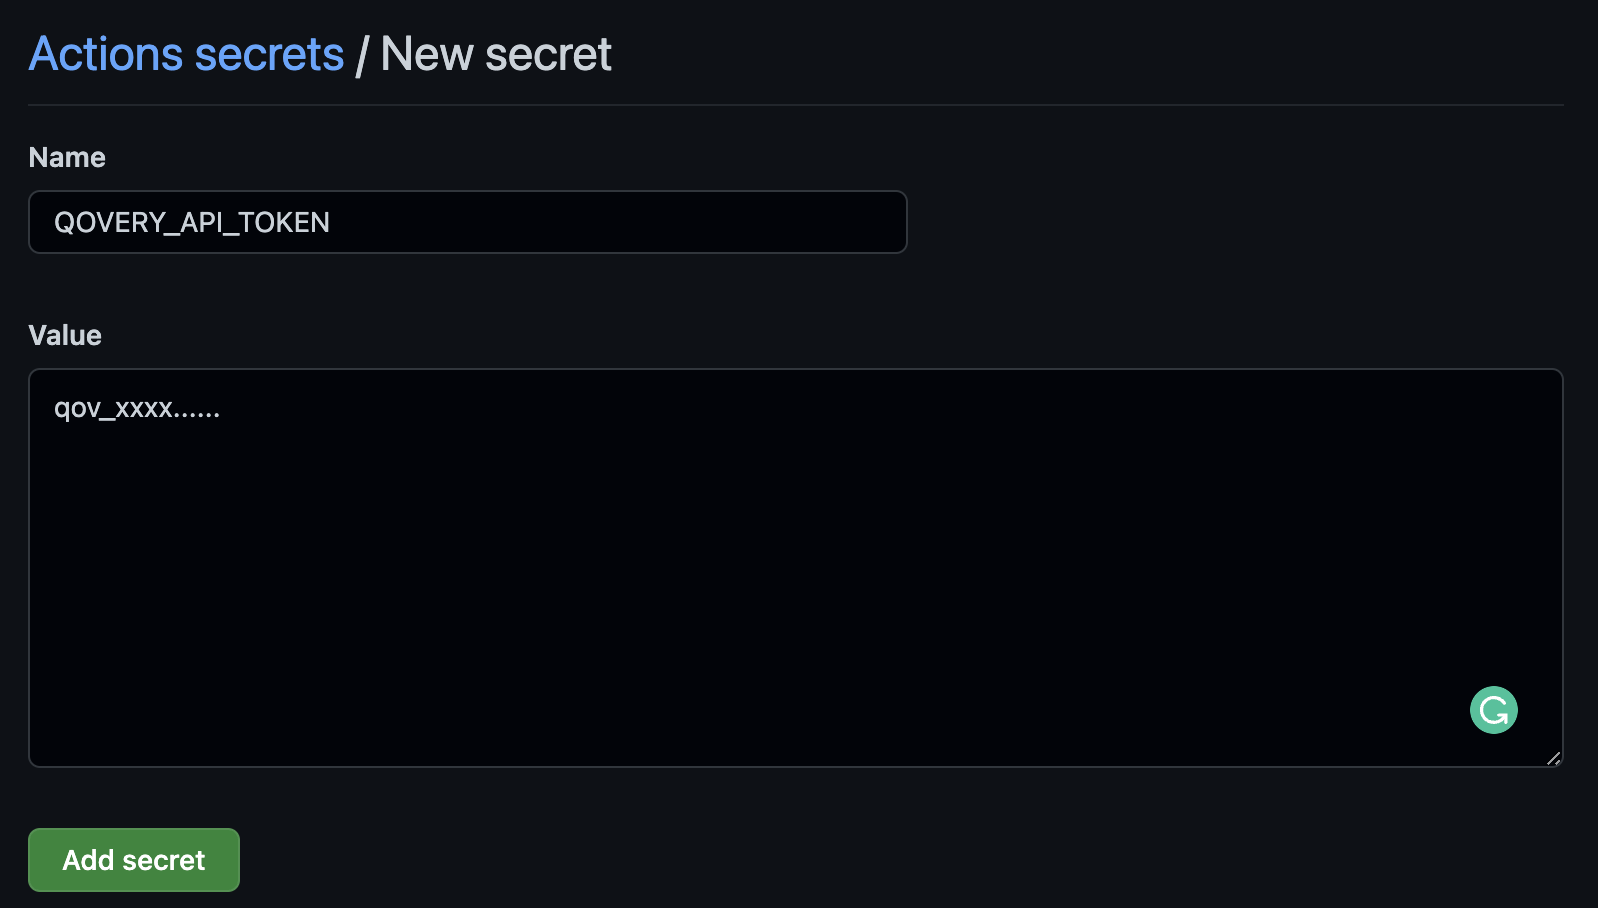
Execute the GitHub Actions Pipeline
We're done with the setup. You can now push your code to the main branch. If you did it properly, under the Actions tab on your GitHub repository, you should see your job being run.
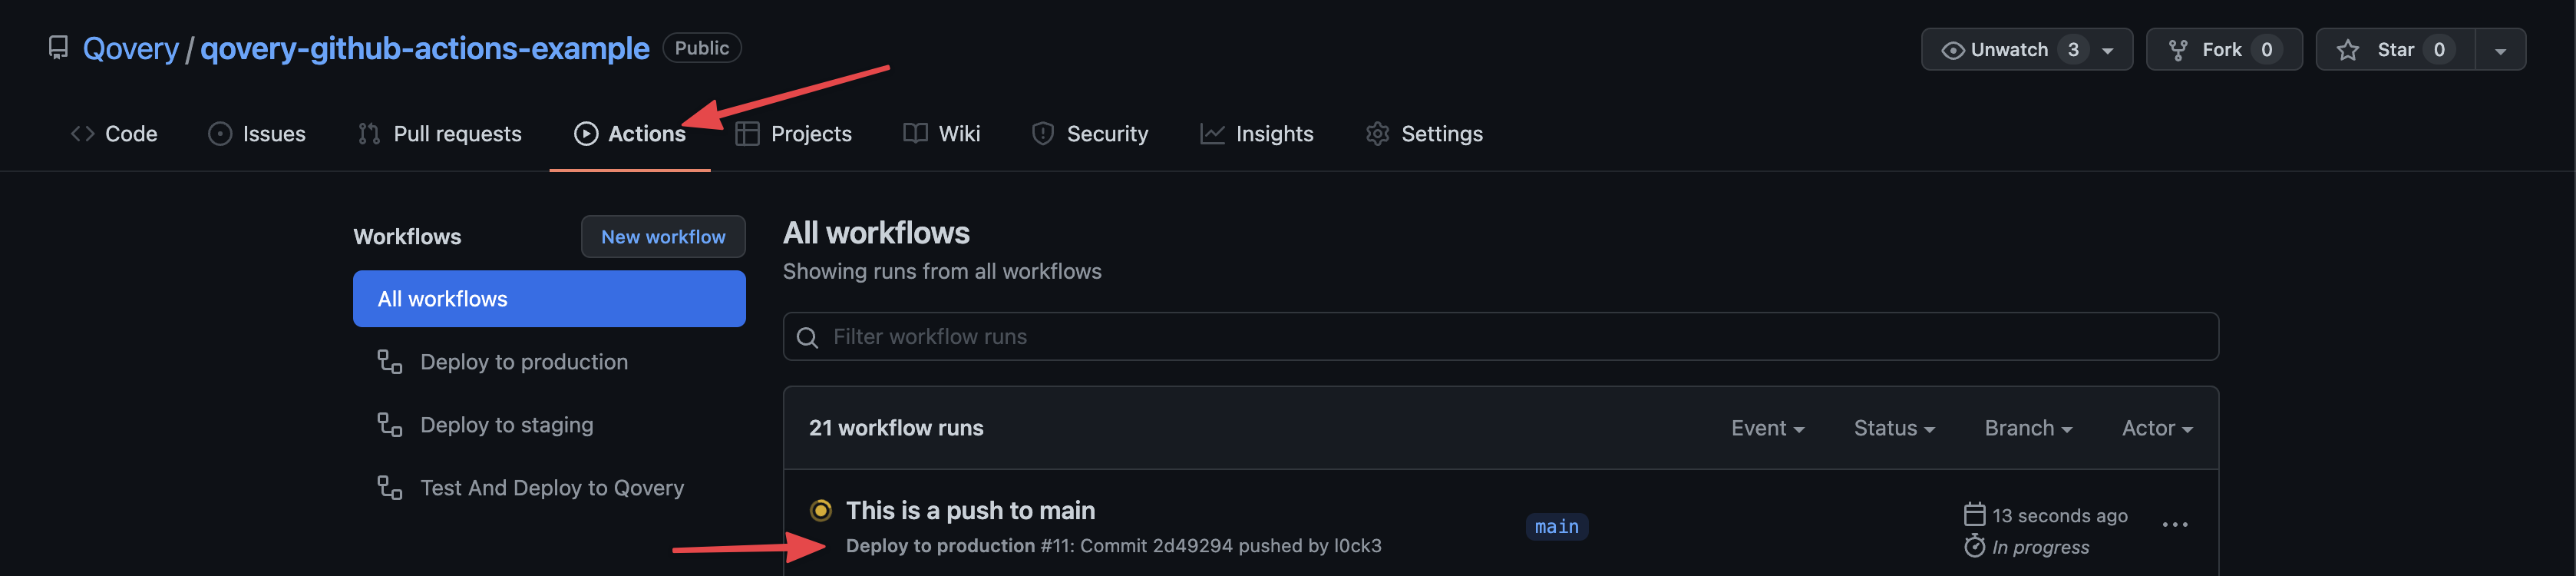
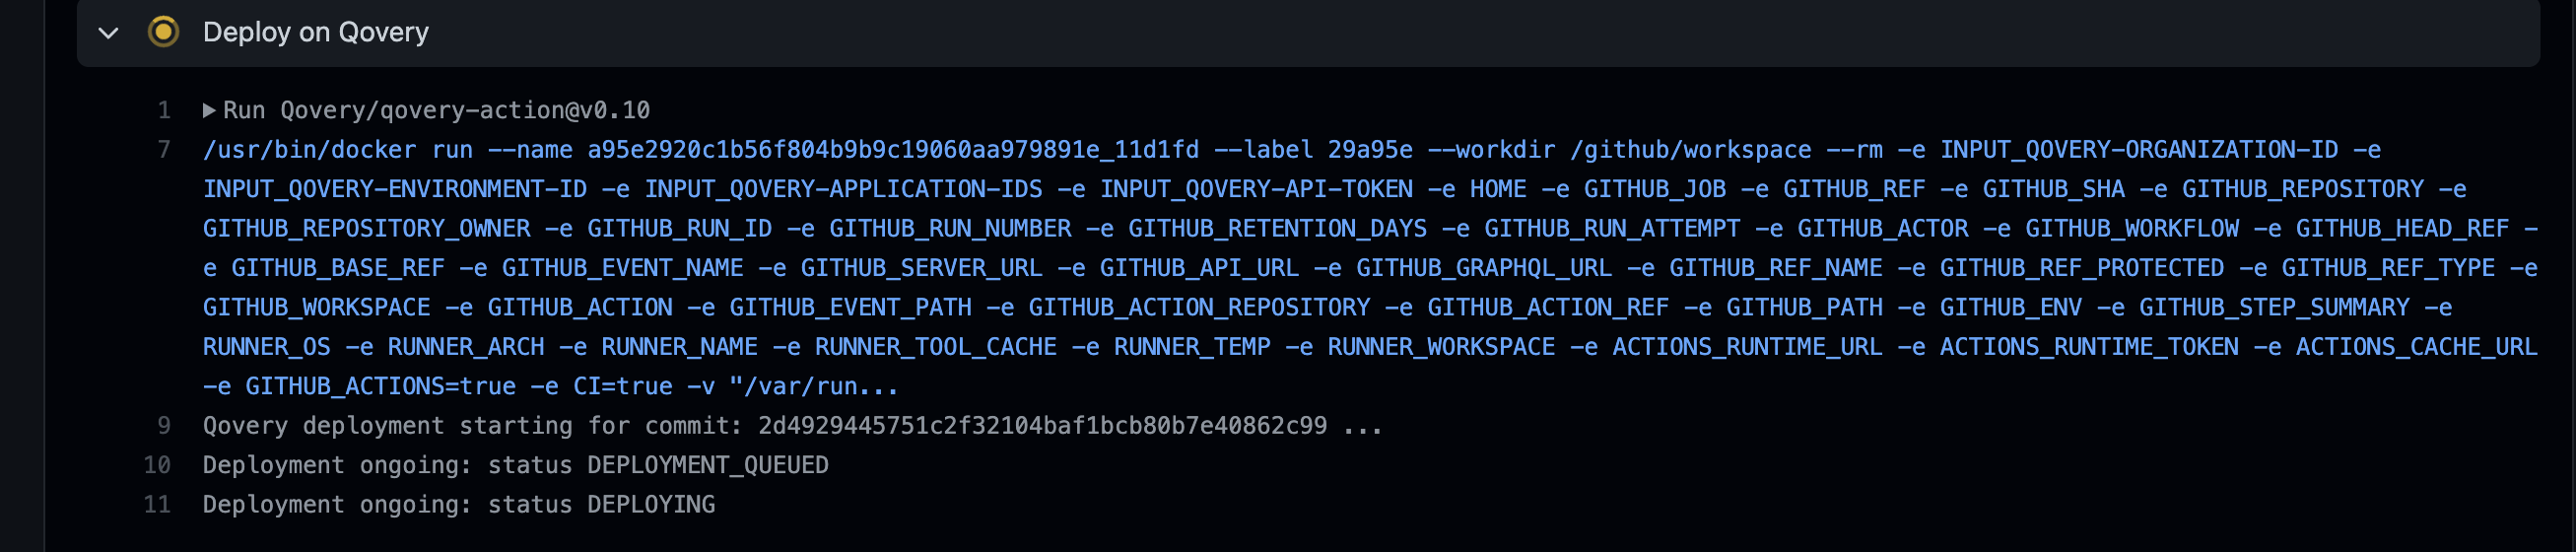
You can click on it to see the details of the jobs. Once the testing phase is green, it will start the deployment job.

As soon as the job is set up, and it starts actually deploying, go to the Qovery console and check that your application is actually being deployed.
Advanced use-cases
It's possible to support any use cases by using the Qovery CLI. Like cloning an environment, changing the branch of some applications and deploying only a subset of applications. Refers to the Qovery CLI documentation to explore all the commands that you can use.
Check out our GitHub Actions integration page to check out more examples.
Conclusion
Integrating Qovery with GitHub Actions enables more complex workflows than just deploying on code push. You can make sure your test suite succeeds before deploying or anything else you need, without sacrificing the simplicity of deployment Qovery brings you.