Qovery Deployment Platform
Have you ever dreamed of deploying your applications on the cloud without any hassle? Imagine a platform where all you need to do is to sign in with your AWS credentials, and automagically the platform does all the hard work of configuration of the cloud for you, and, on top of that, provides some extra features that do not exist out of the box anywhere else.
Qovery is this platform - not only does it allow you to deploy your infrastructure and applications on your own cloud account, but also provides extra cool features, one of which we will see in this article.
Don't take our words for granted - 14000 developers from more than 100 countries use Qovery to deploy their apps on AWS.
Previ1ew Environments
Imagine working on a new feature. You're dealing with a full-stack application - you have a frontend, backend, and a database. You introduce a change to your backend app - how do you test all of it? It would be great if there was a service that could deploy everything for you so you can test your changes quickly and in separation with all the components...
Qovery Preview Environments are designed to help you with exactly this.
It not only deploys the app you changed but all other related applications and databases as well in the cloud so that you can test your new features and collaborate with reviewers of your code.

Preview environments feature is available on other platforms as well. Vercel and Netlify allows you to test your changes before merging code into production. It’s perfect for single frontend applications, but the concept of Preview Environments on Qovery goes far beyond this.
Qovery is able not only to create a preview environment for your frontend, but also for the backend and databases - the whole stack is supported. Running a set of backend microservices? No worries, Qovery got you covered. All services will be replicated in the new environment.
Preview environments benefits
- Time-saving - You don't have to set up a fresh environment to test changes in isolation - Qovery does it all for you
- Productivity - Faster changes, quicker review, better feedback loop - the productivity and quality of your application increases dramatically
- Better tests - It's best to test apps in isolation, but it's almost impossible with a complicated stack if you have to prepare the testing environment manually - Qovery does it all "automagically" for you
- Independence - Each environment is completely separate, meaning more people can work flawlessly on the project, testing the changes they introduce in parallel, not blocking each other
- Deliver quickly - Faster feedback loop, independent developers, fewer bugs, meaning the product is delivered more quickly
- Reduce friction - Waiting for others to test your changes is frustrating - with preview envs everyone has his own testing environment
Demo
AWS Infrastructure
Before we start with the deployments, we need to have our AWS infrastructure ready and deployed. It can be done as simply as by providing credentials to your cloud account, you can see how to configure the credentials in this article - https://hub.qovery.com/docs/using-qovery/configuration/cloud-service-provider/amazon-web-services/
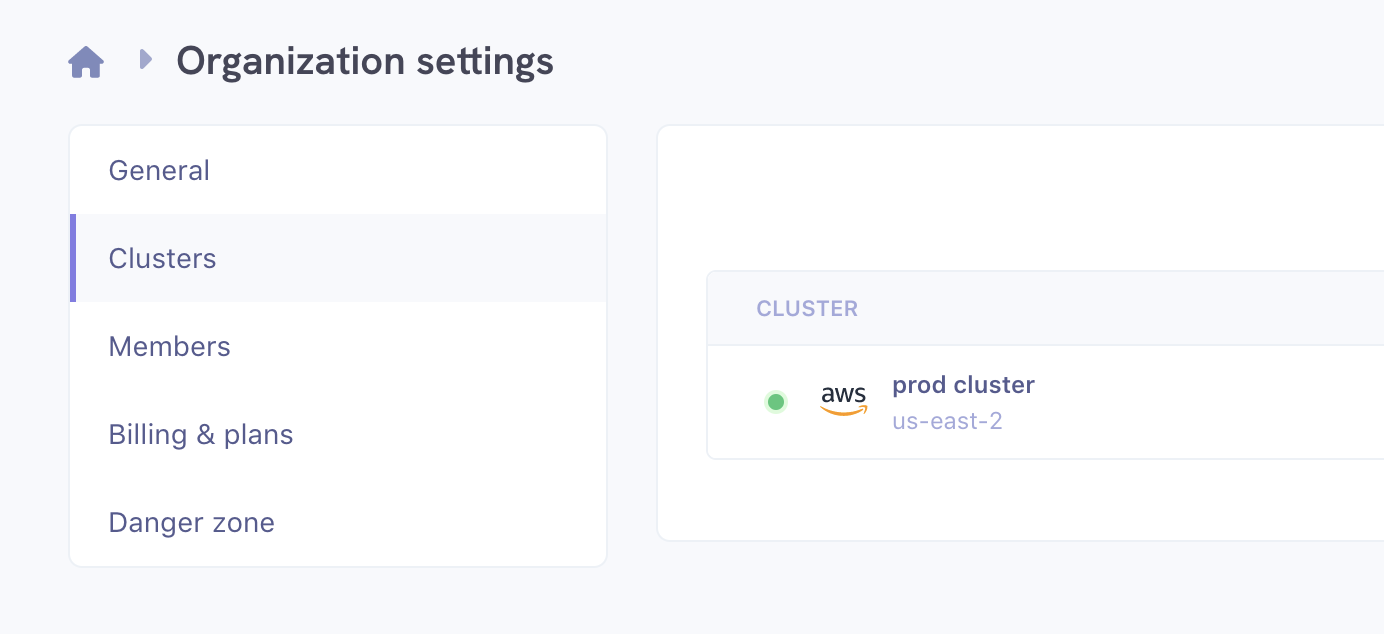
The initial setup takes about 15 min, and your cluster is ready to host your applications.
Full Stack Application
In this example, we will use a Next.js frontend, Node.js backend, and MongoDB as a database. The app will display an image gallery with images fetched from the backend. Preview Environments feature will help us introduce a new change in the backend - moving away from a hardcoded POC list of images to a list fetched from our database.
Frontend
Our simple image gallery will look like this
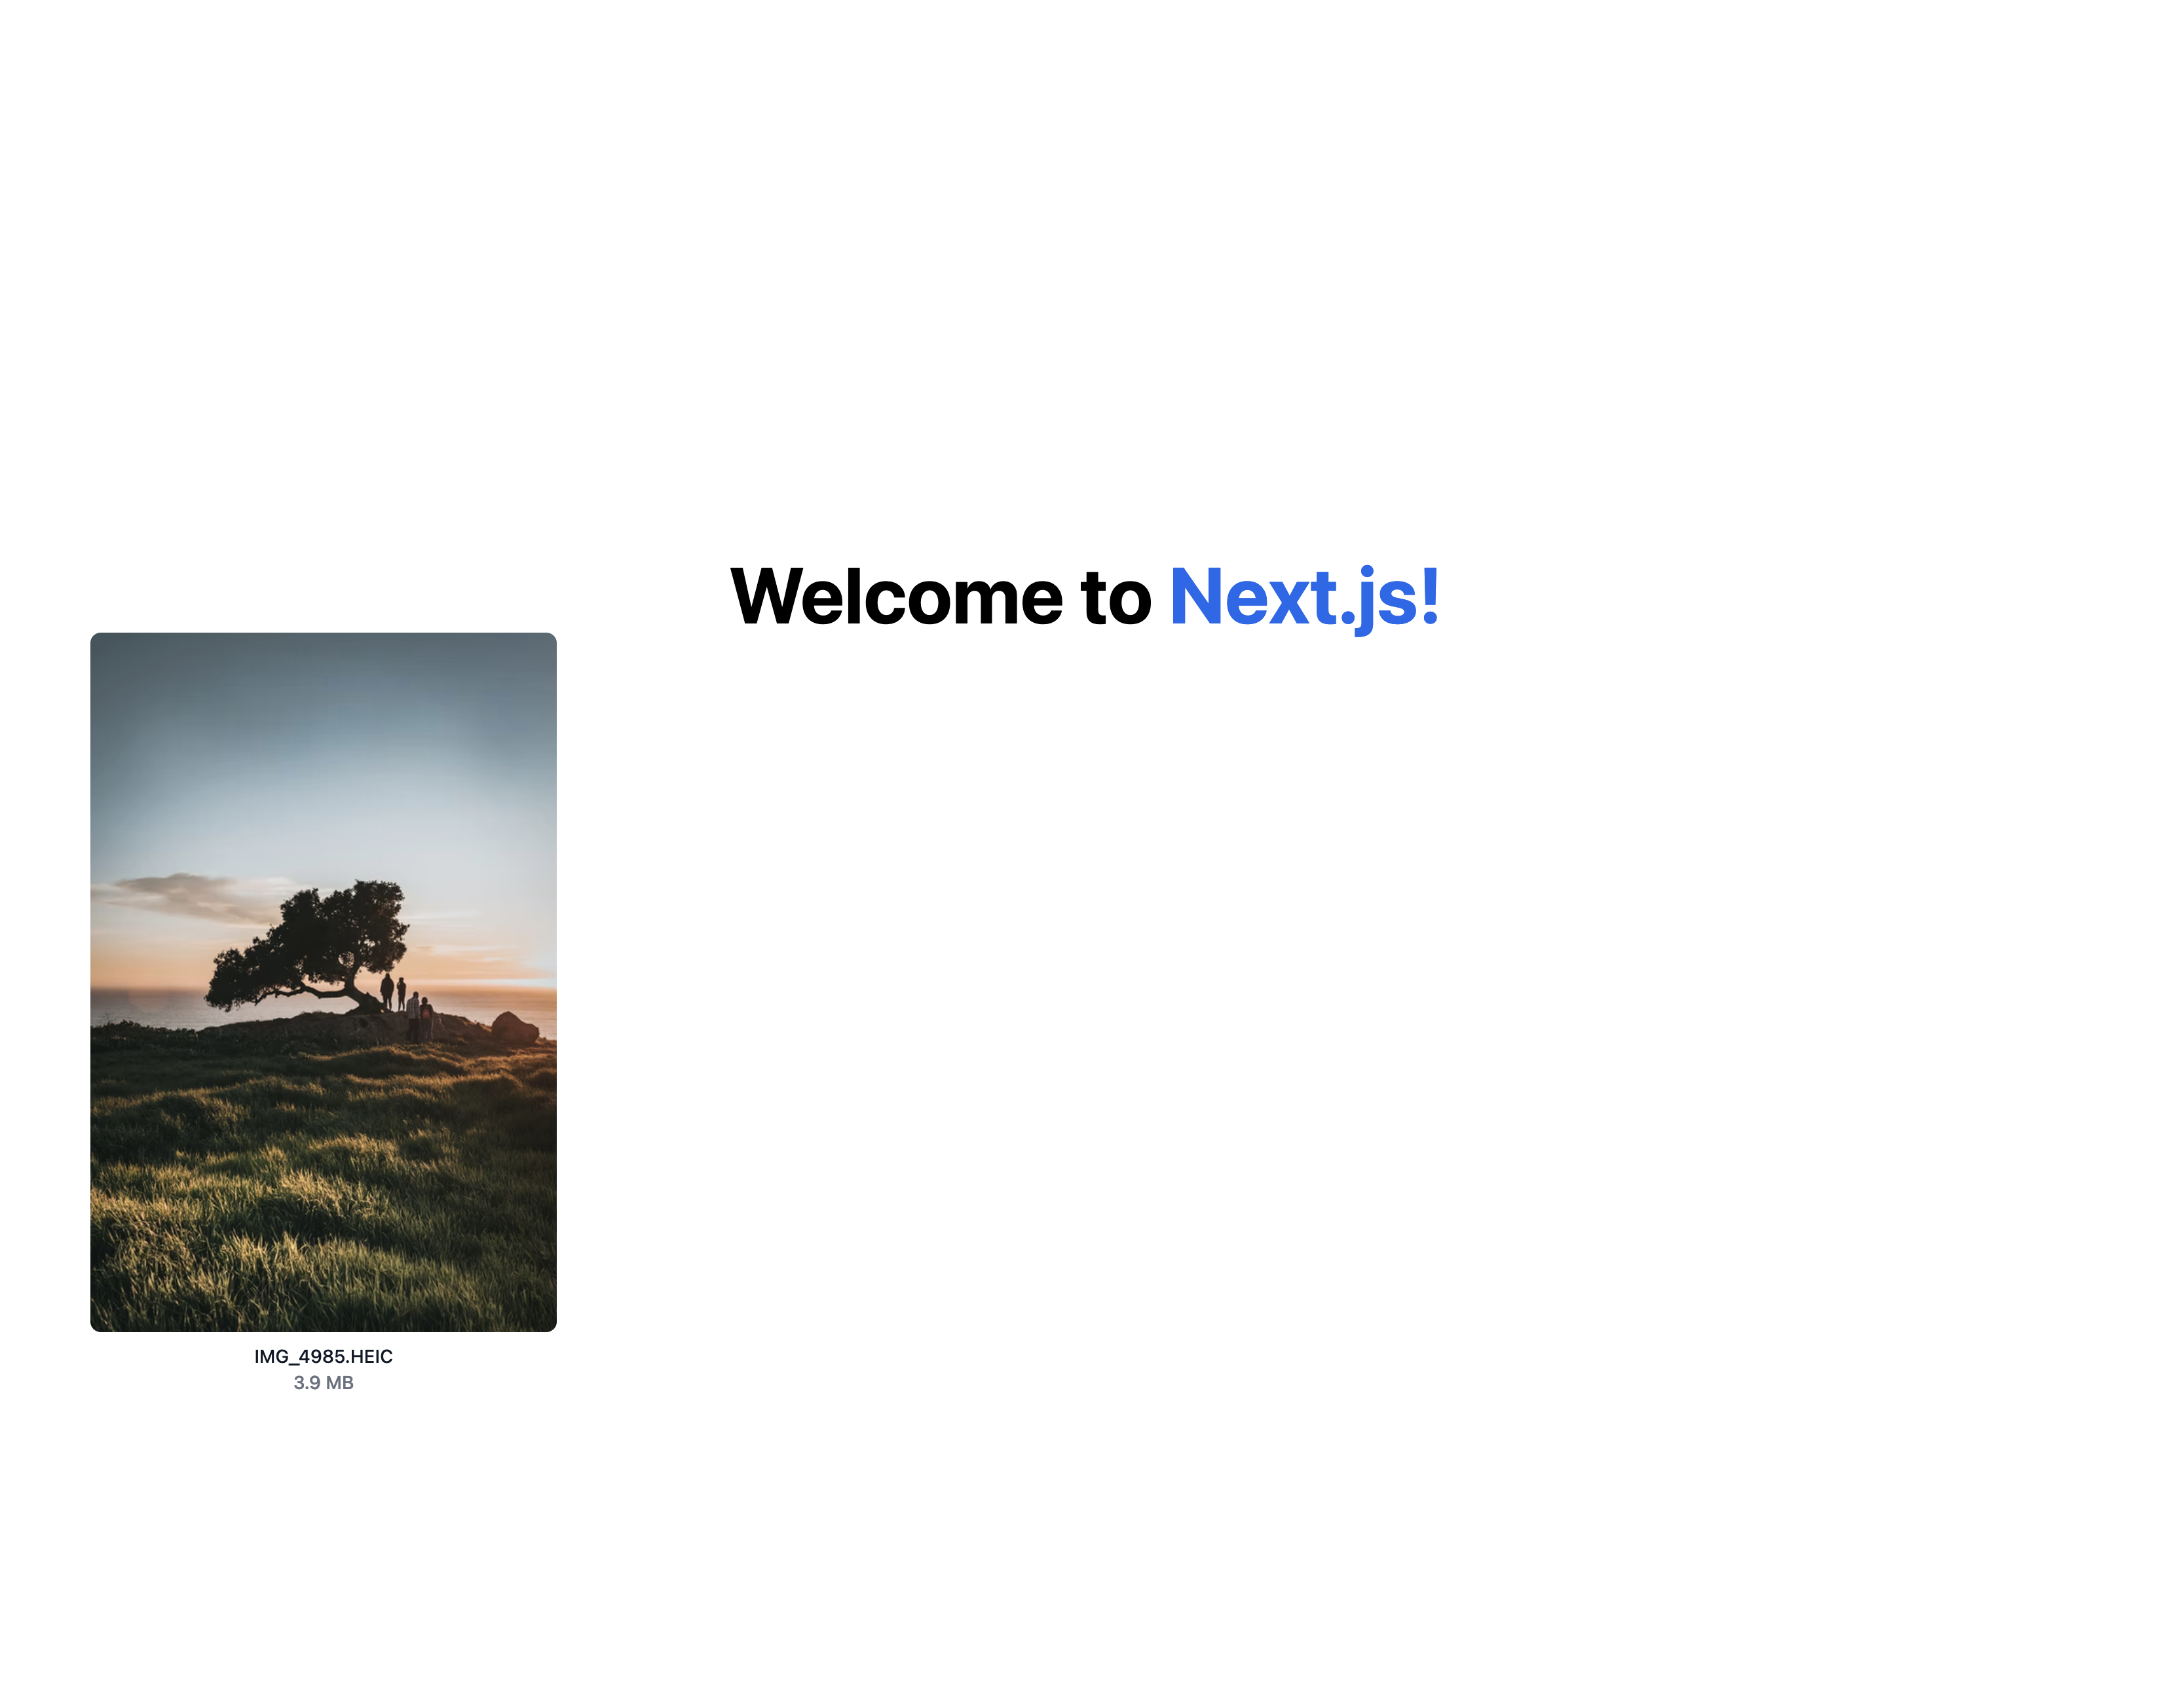
To generate the application, we used npx create-next-app@latest, but the source code can be found here - https://github.com/pjeziorowski/gallery-demo/tree/master/frontend
The main changes introduced to the generated application scaffolding are:
- Adding a
Dockerfile
FROM node:alpineRUN mkdir -p /usr/srcWORKDIR /usr/srcCOPY . /usr/srcRUN npm installRUN npm run buildEXPOSE 3000CMD npm run start
Adding a query to our backend (which we will be built soon in the next steps) that fetches a list of images to display in our gallery
function useImages() {return useQuery("images", async () => {const { data } = await axios.get(`${apiRoot}/api/v1/images`);return data;});}Plus, we adjusted the HTML and styling for the demo purpose of showing a list of images
Backend
Our backend is the main star of the demo. In its first version, the backend is displaying a hardcoded list of images. In the next step, we will gradually expand its capabilities. It will connect to a database and fetch the list from MongoDB instead. To make sure the changes are correct, we will use Preview Environment feature before merging the pull request to our production environment
The backend was generated using Express npx express-generator --no-view, and the source code can be found here - https://github.com/pjeziorowski/gallery-demo/tree/master/backend
Changes that we introduced to the generated app scaffolding are the following:
Adding a Dockerfile
FROM node:16WORKDIR /usr/src/appCOPY package*.json ./RUN npm installCOPY . .EXPOSE 8080CMD [ "node", "src/index.js" ]Creating a
/api/v1/imagesendpoint that returns a hardcoded array of imagesrouter.get('/images', (req, res) => {res.json([{title: 'IMG_4985.HEIC',size: '3.9 MB',source:'https://images.unsplash.com/photo-1582053433976-25c00369fc93?ixid=MXwxMjA3fDB8MHxwaG90by1wYWdlfHx8fGVufDB8fHw%3D&ixlib=rb-1.2.1&auto=format&fit=crop&w=512&q=80',}});});In the next step we will improve the function to use a Mongo database instead.
Deployment
After creating a new project, let's now set up our production environment.
First, let's deploy our frontend. Click Add my first application, select a correct repository, Docker as build mode and expose port 3000. The application root path is /frontend.
Next step: add a MongoDB database - it will be used by our backend later on. You can do so by clicking on Add button in Qovery Console in Environment.
Now let's deploy our backend. Click Add → Application, pick up /backend as application root path, 8080 port, and Docker build mode.
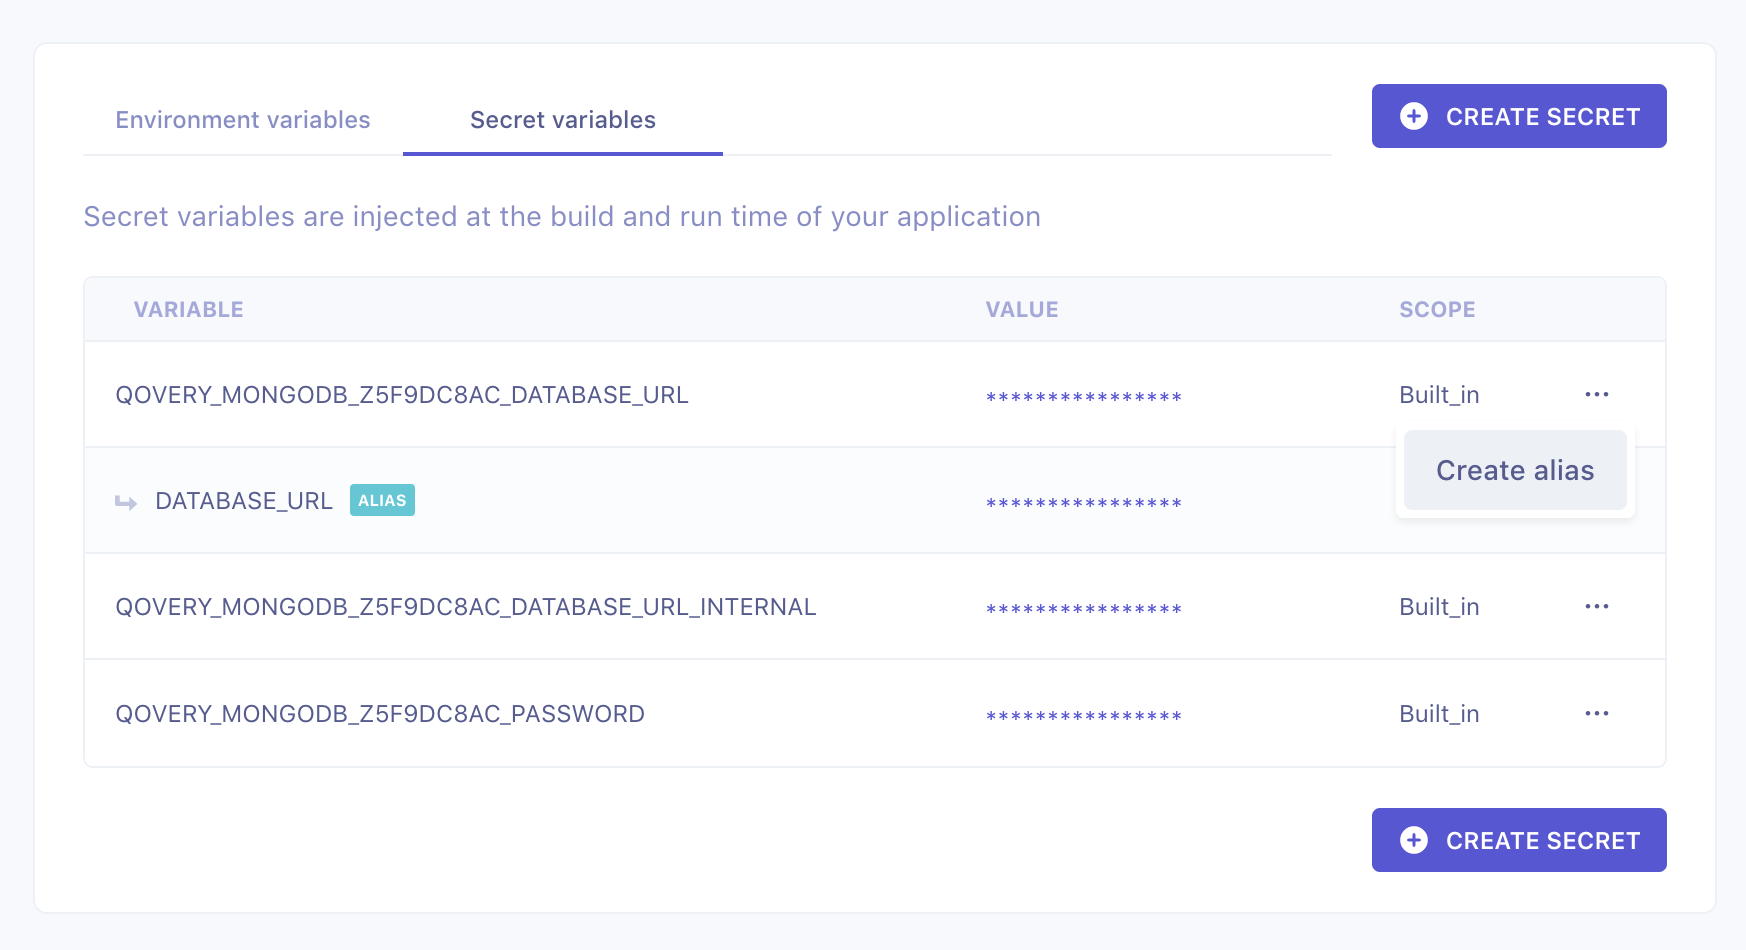
For the future connection to DB, let's add an alias named DATABASE_URL that points to our Mongo database internal URL in our backend Environment Variable settings:
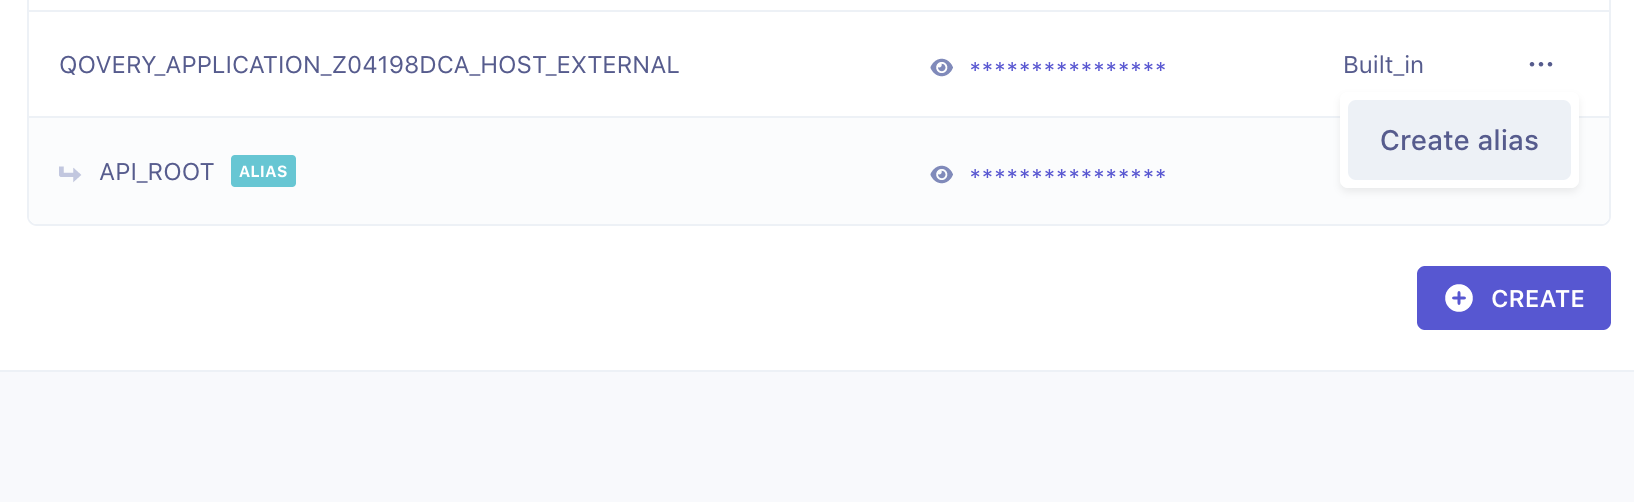
Additionally, let's create an alias called API_ROOT in our frontend application that points to our backend external URL:
This is it! Now we can deploy our production environment. After a few minutes, navigate to the frontend app, click on Open - you should be redirected to the image gallery

Enable Preview Environments
The next step to see the preview environment feature in action is to enable it for our backend application.
To do so, navigate to Environment → Settings → Preview Env and tick it for the backend app
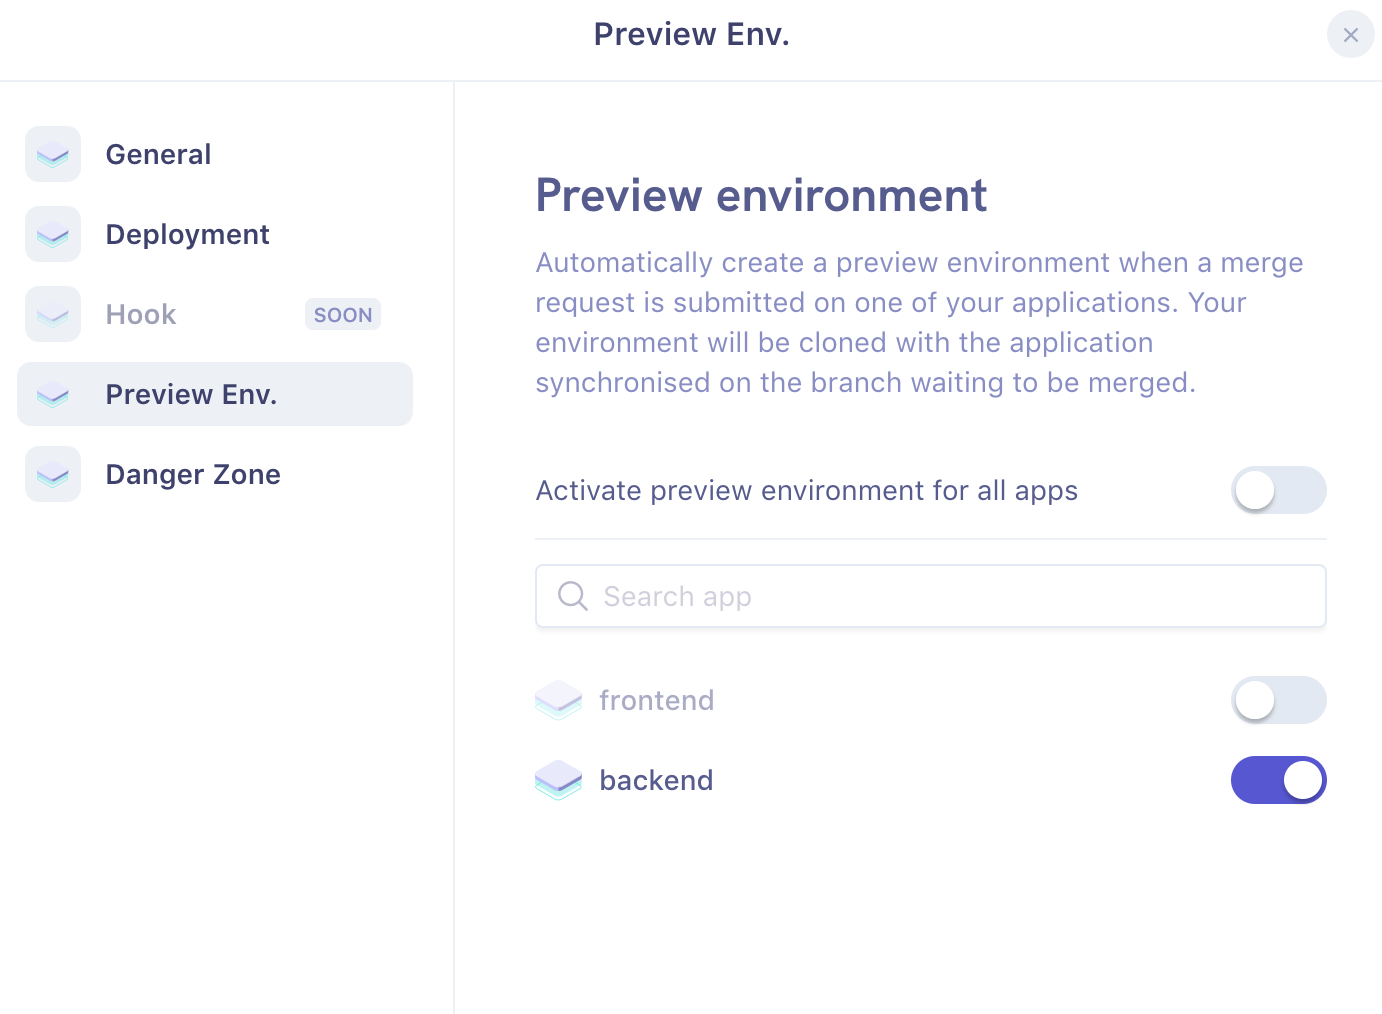
Great! The feature is enabled. To see it in action, let's edit our code in the backend app so that the list of images is fetched from the database instead.
Testing Preview Environments
Let's make a small update of our backend - let's connect to MongoDB and fetch images from there. Here are changes to the function we could introduce to make it happen:
const databaseUrl = process.env.DATABASE_URL|| 'mongodb://localhost:27017/test';const imageSchema = new mongoose.Schema({title: String,size: String,source: String});mongoose.connect(databaseUrl);router.get('/', (req, res) => {imageSchema.find().then((data) => {res.json(data)});});
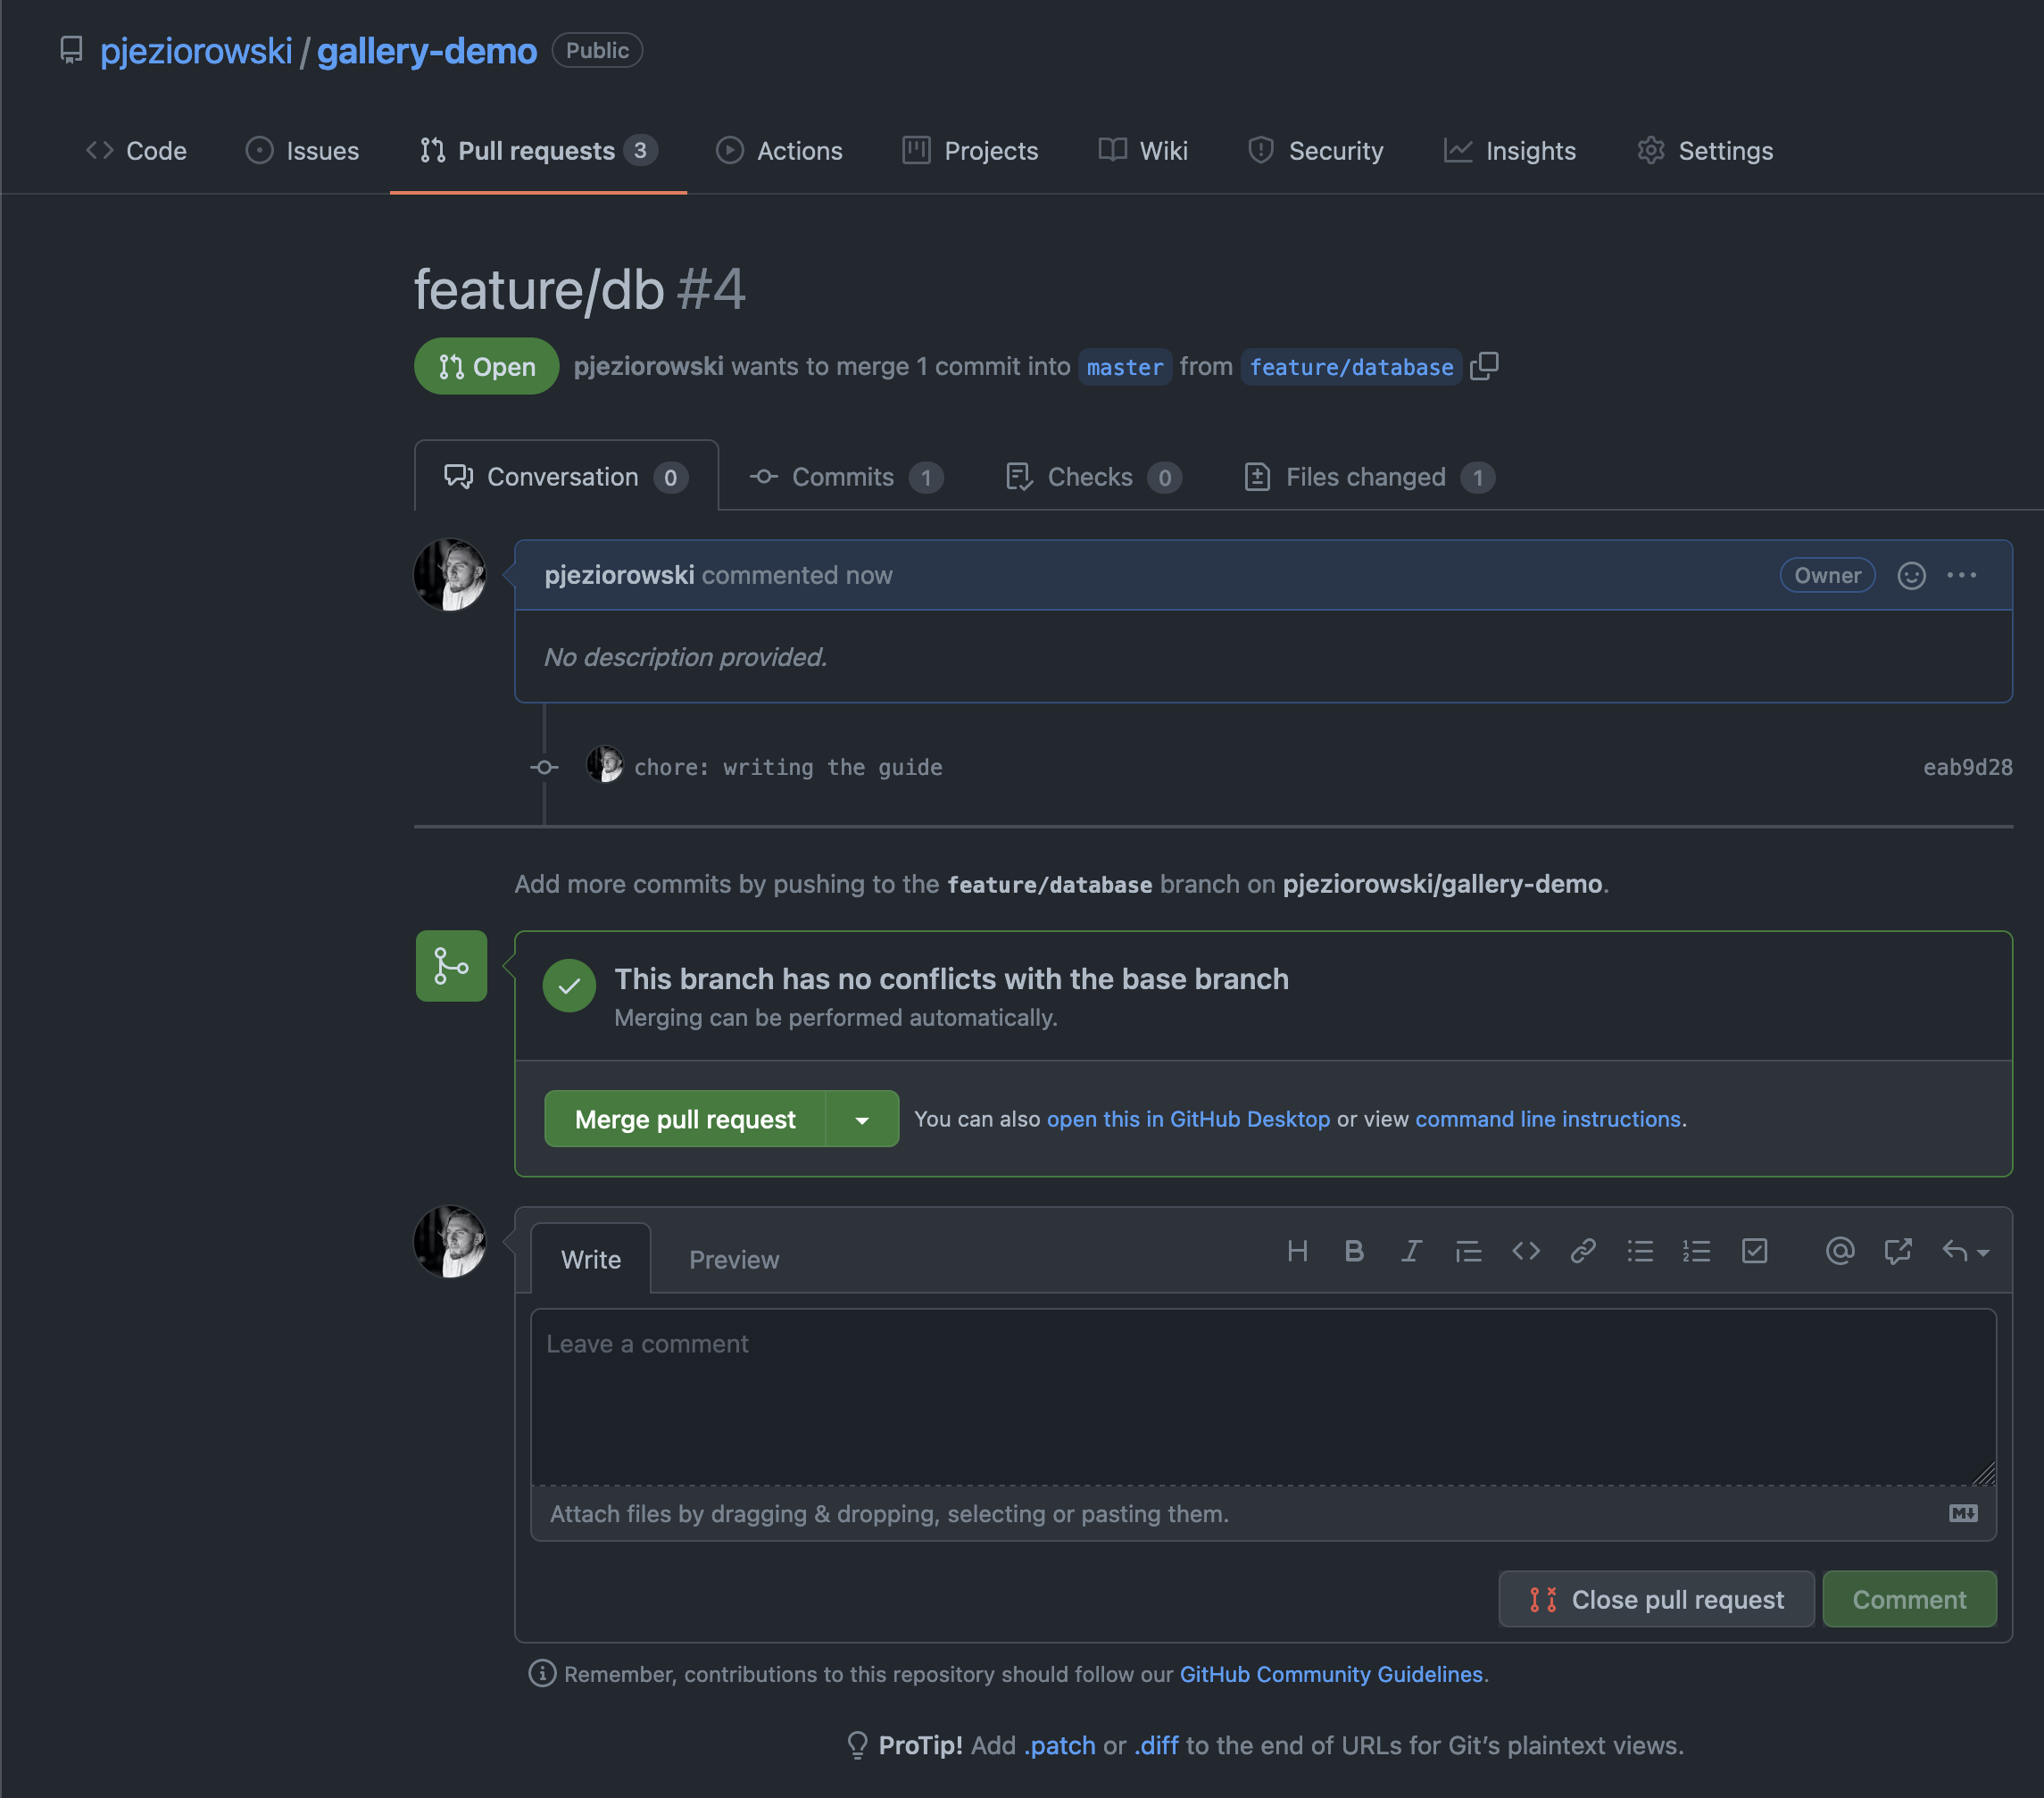
Let's now create a new branch in our repository and create a pull request to our production (master branch) environment. Preview Environments feature will spin up a new environment for us so that we can safely test changes we just introduced!
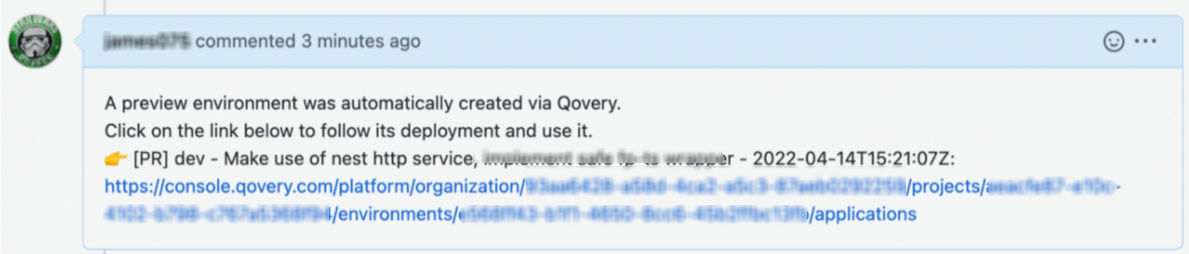
Once the PR is created, an automatic comment has been dropped on our PR to let us know that the new preview environment has been created.
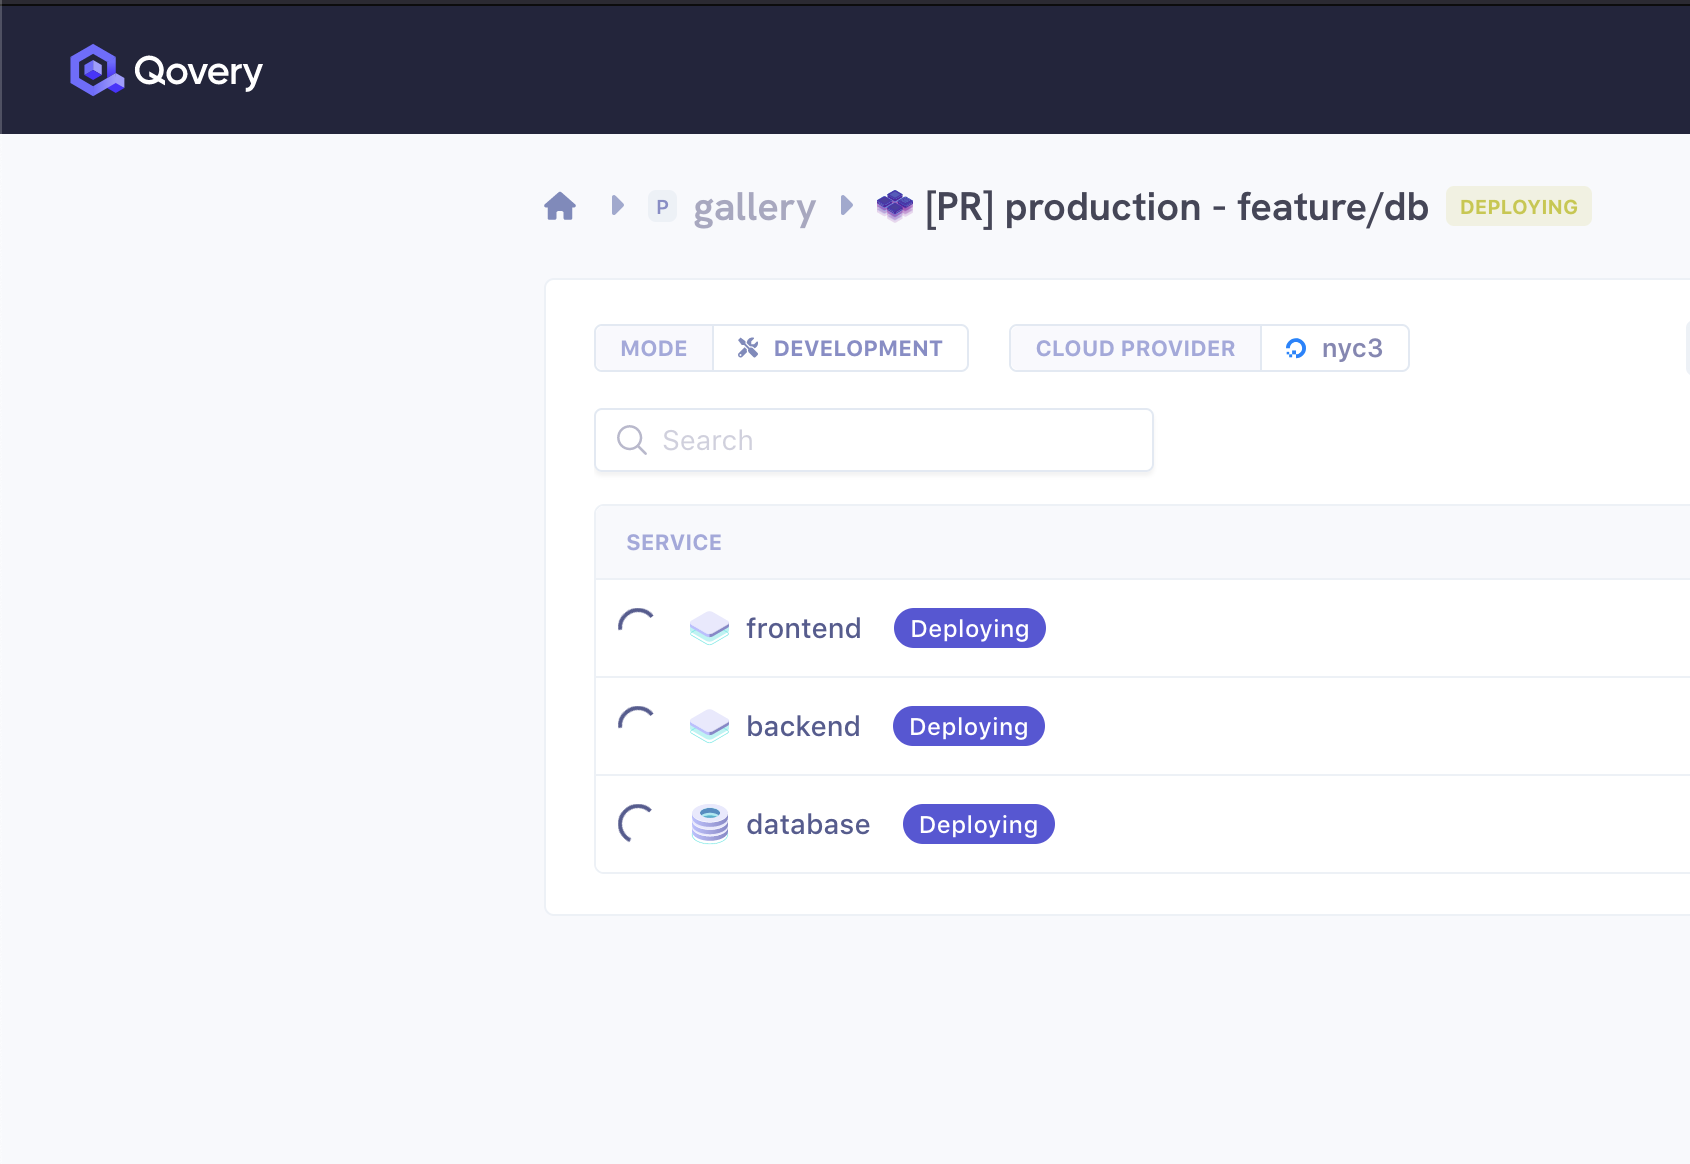
Now, when we display environments in our project, we will see that a new environment for the pull request is being deployed:
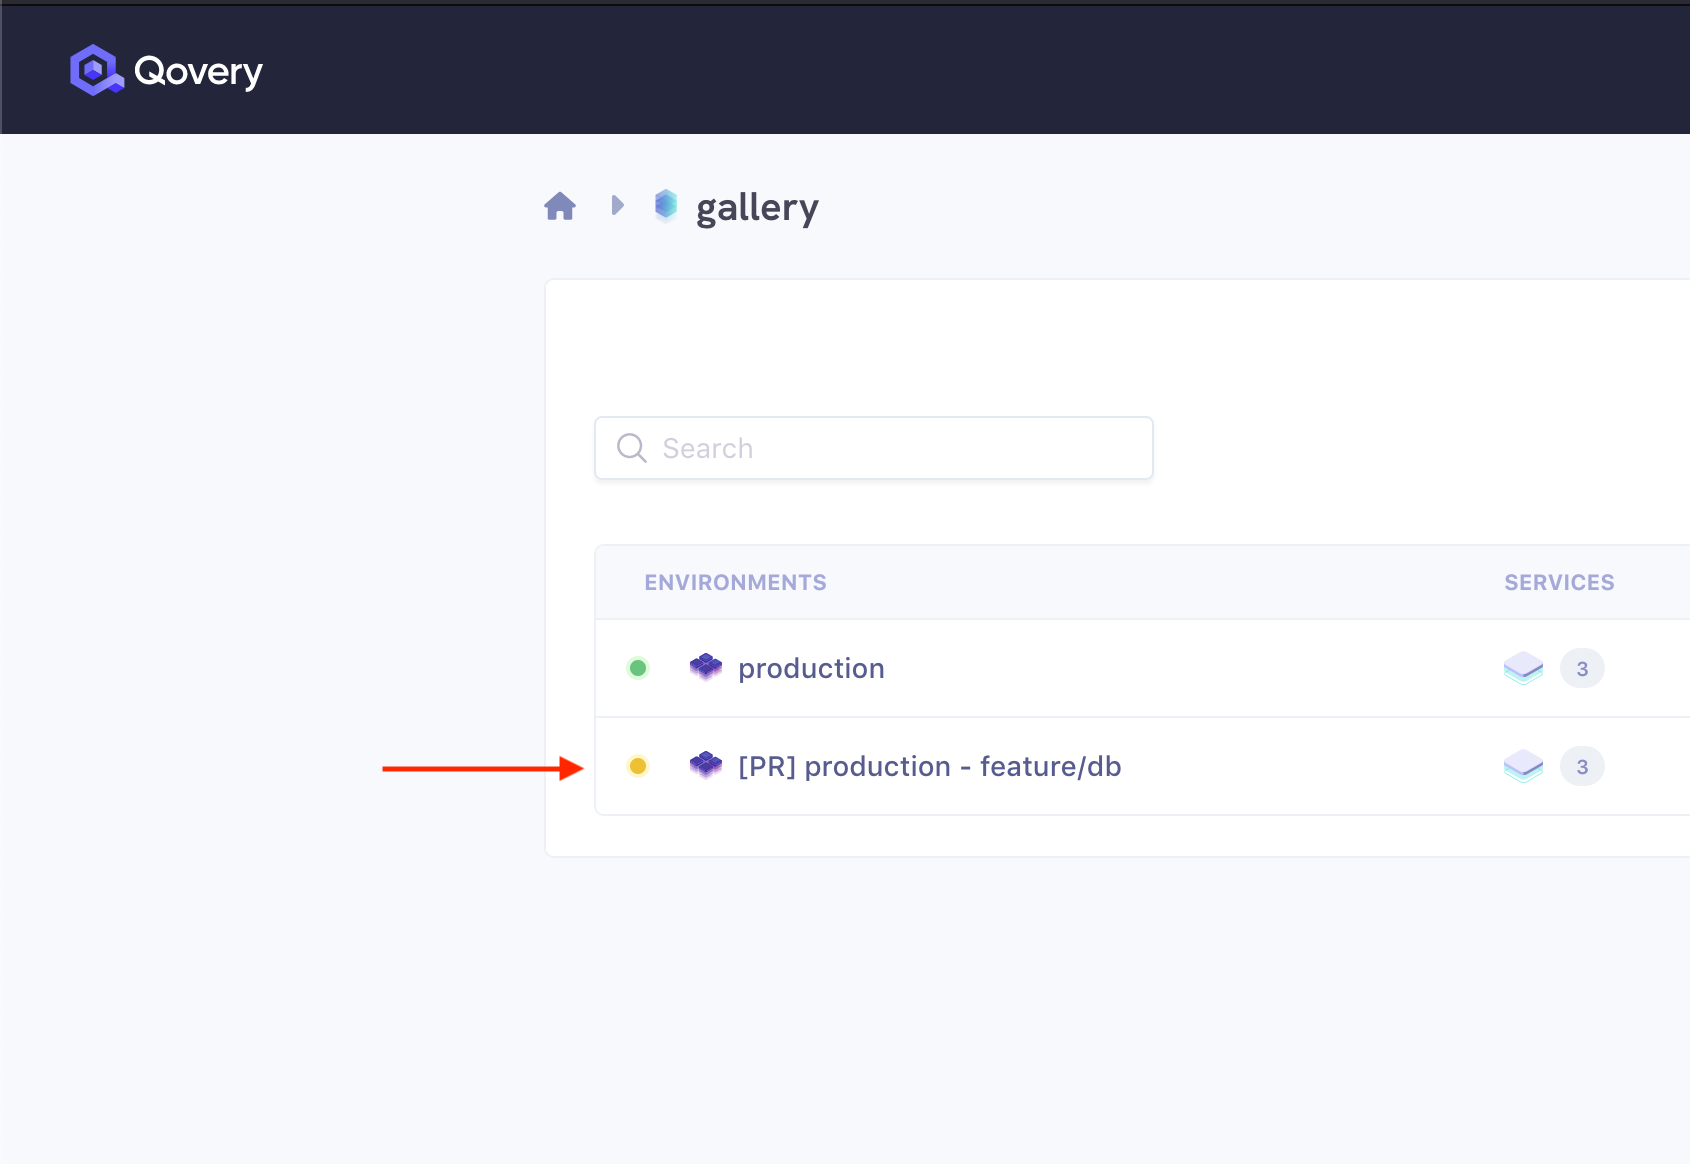
with all the resources we need! A database, backend, frontend - we can now test our changes in complete separation from the production without any manual setting up work:
Preview Environment Explained
The Preview Environment feature can be enabled or disabled per app. It creates a complete copy of your environment so that you can test new changes from pull requests in separation. It deploys your databases, backend, and frontend applications to a completely new environment once a pull request is opened. If you update your pull request, all new changes are also reflected in the new environment so that you can test them or fix problems during the review. What is great is that Qovery takes care of managing all environment variables for you as well, creates new aliases just as you had in your prod environment, so that everything is really tested separately and it all happens automagically. After the pull request is merged, Qovery automatically cleans up the preview environment to save your money.
Testing Preview Environments PT II
After a few minutes, your preview environment should be up and running. You can now navigate to the frontend app and click Open - in the image gallery, you will see an empty list because we don't yet have any images in the database.
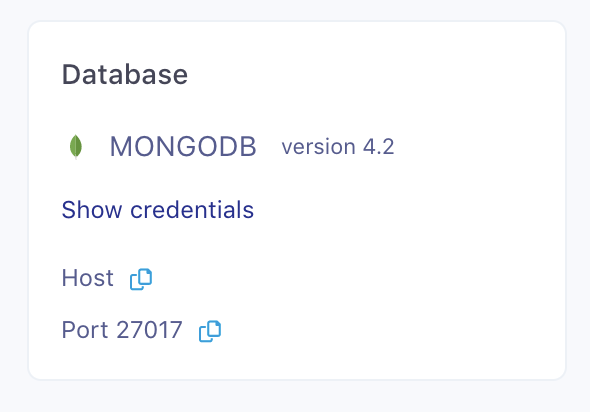
You can add a few images manually by connecting to your mongo instance via CLI. The credentials can be found in the database overview:
After connecting, let's add images by executing the following:
db.createCollection("images")db.images.insert([{title: 'IMG_4985.HEIC',size: '3.9 MB',source:'https://images.unsplash.com/photo-1582053433976-25c00369fc93?ixid=MXwxMjA3fDB8MHxwaG90by1wYWdlfHx8fGVufDB8fHw%3D&ixlib=rb-1.2.1&auto=format&fit=crop&w=512&q=80',},{title: 'IMG_4985.HEIC',size: '3.9 MB',source:'https://images.unsplash.com/photo-1582053433976-25c00369fc93?ixid=MXwxMjA3fDB8MHxwaG90by1wYWdlfHx8fGVufDB8fHw%3D&ixlib=rb-1.2.1&auto=format&fit=crop&w=512&q=80',},{title: 'IMG_4985.HEIC',size: '3.9 MB',source:'https://images.unsplash.com/photo-1582053433976-25c00369fc93?ixid=MXwxMjA3fDB8MHxwaG90by1wYWdlfHx8fGVufDB8fHw%3D&ixlib=rb-1.2.1&auto=format&fit=crop&w=512&q=80',}])
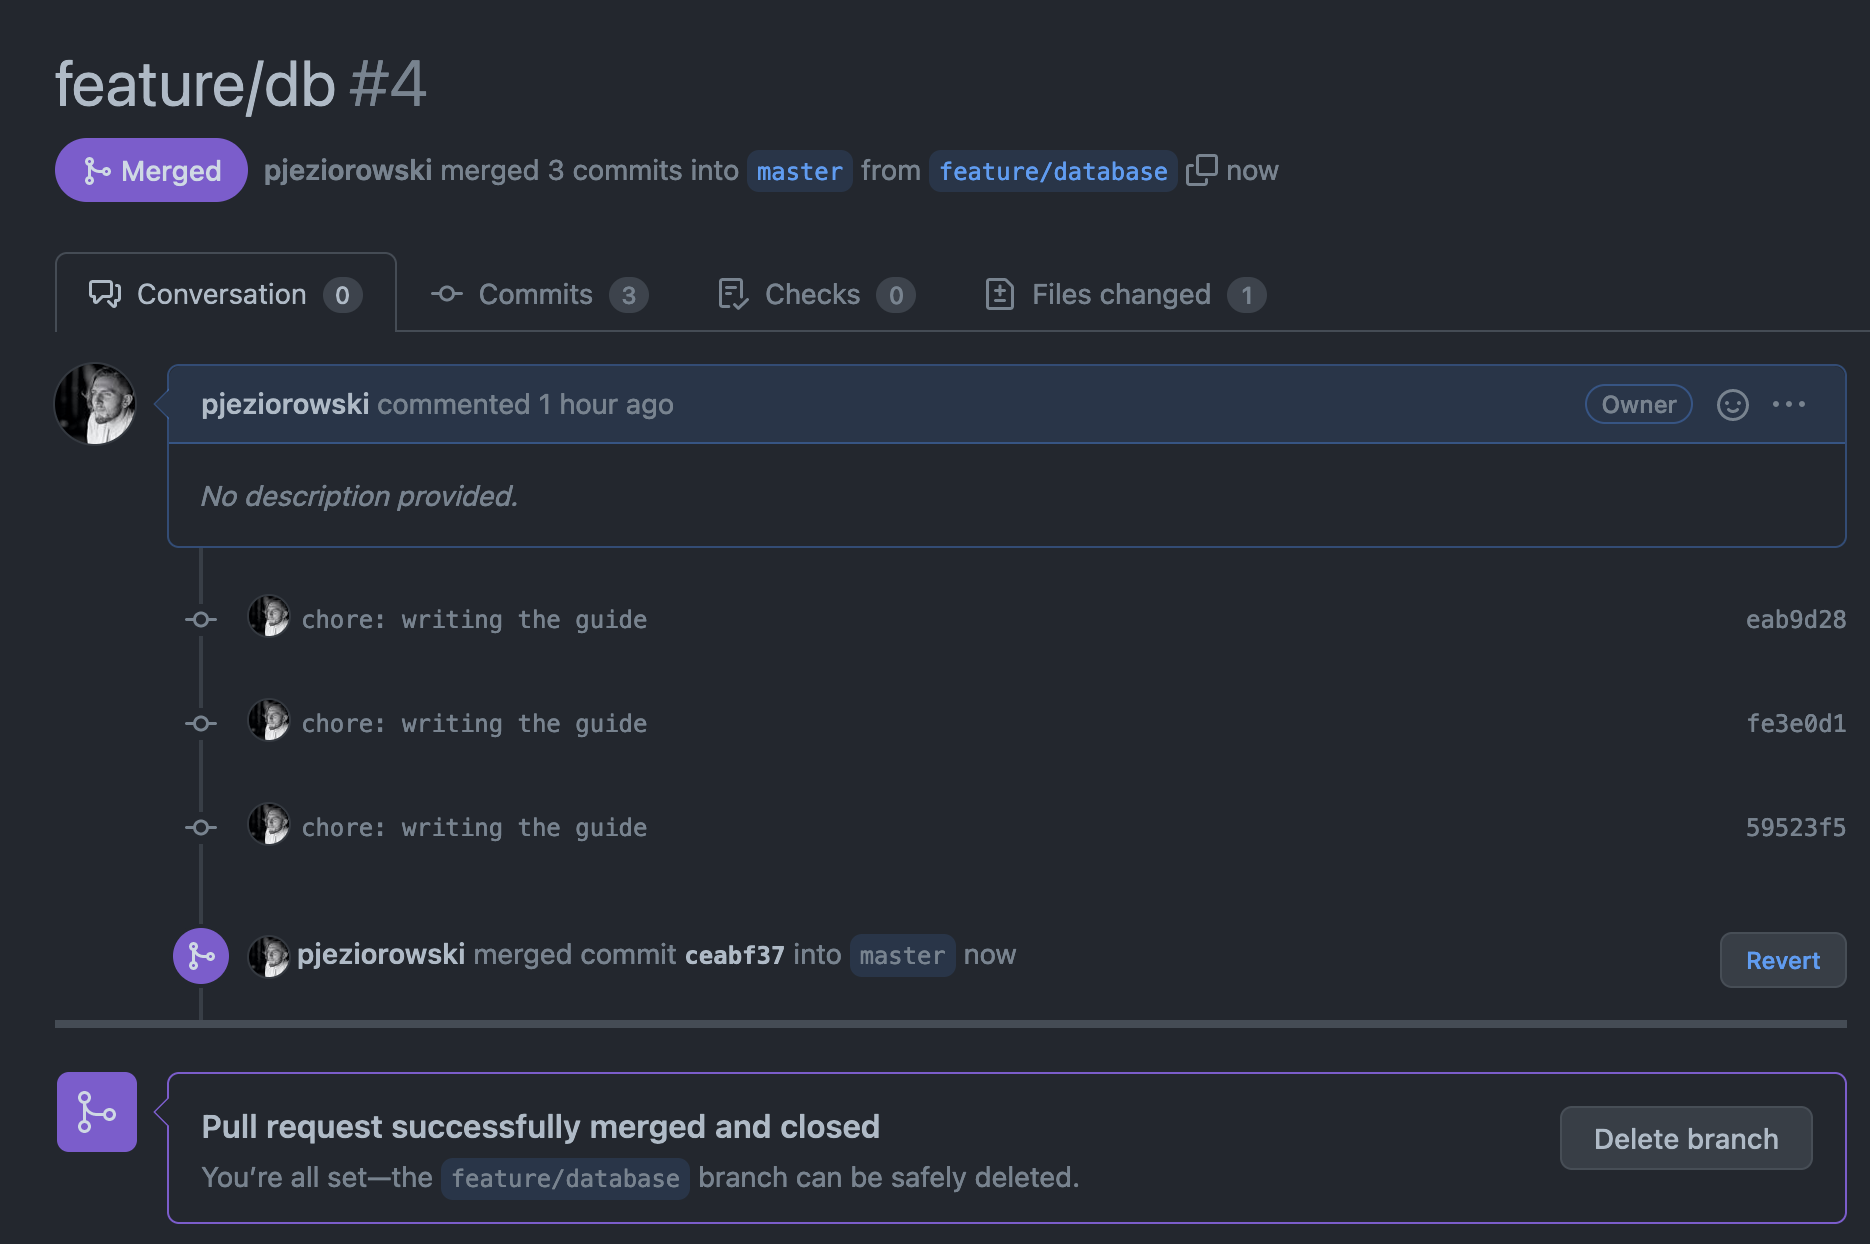
Now, after opening the frontend app in our preview environment, we will see all the images we put in the database! It looks like the feature is working well, so let's merge the PR:
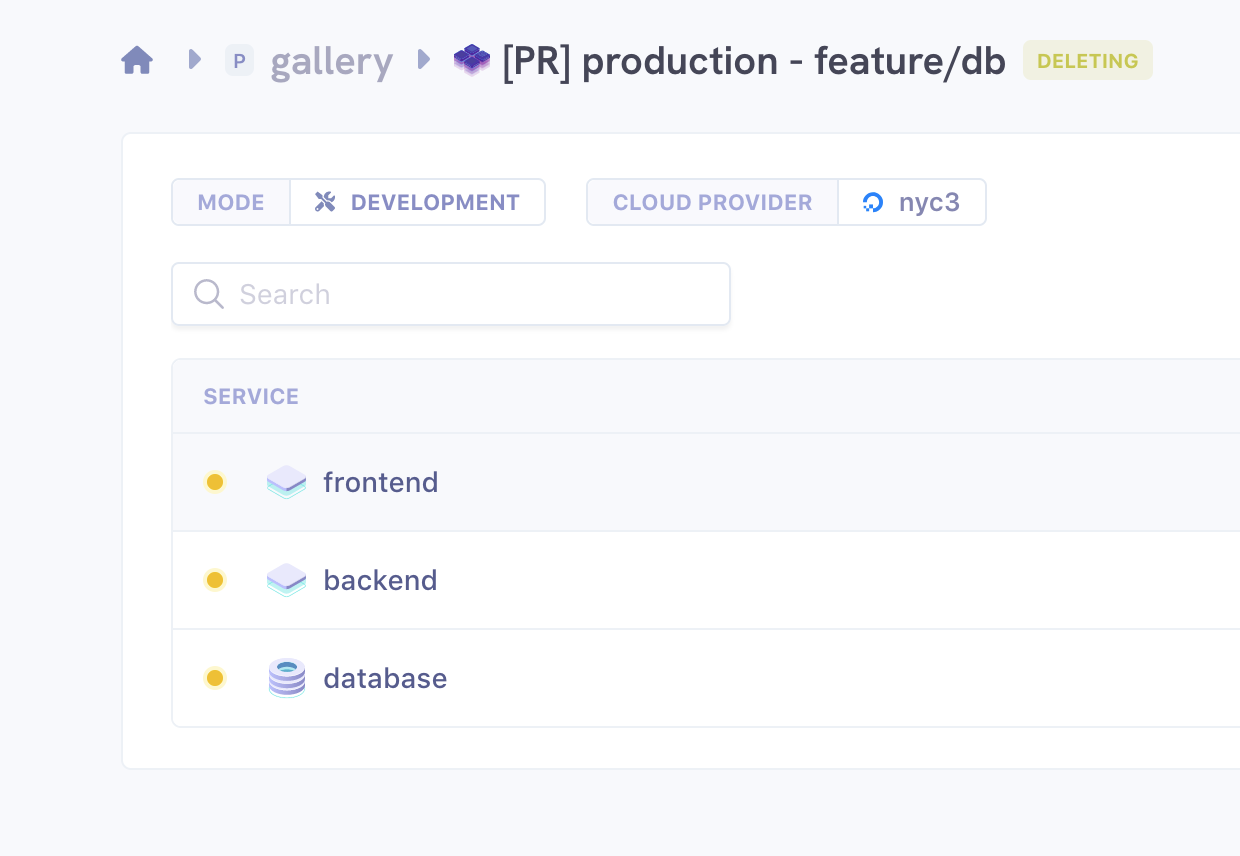
What now happens is automatically after the PR merge, the preview environment is automatically cleaned up:
Great job! Thanks to Qovery Preview Environments, we managed to develop a new feature in a complete separation from our production, we tested it in a real environment deployed in the cloud, and we didn't have to spend any time preparing our environment for tests at all.
Conclusion
In the article, we quickly went through the process of creating a full-stack application with frontend, backend, and database. We enabled the Preview Environment feature to develop new features more quickly. We learned what the benefits of Preview Environments are, how to use them, and how to integrate them to day to day development workflow.