It is critical to have testing and staging environments accurately reflect production, but achieving this can be a major operational hassle. Most engineering teams use a single staging environment which makes it hard for developers to test their changes in isolation; the alternative is for DevOps teams to spin up new testing or staging environments manually and tear them down after testing is done.
Qovery’s Preview Environments solve this problem by automatically creating a clone of your production environment (including applications, databases and configuration) on every pull request, so you can test your changes with confidence without affecting your production.
Qovery keeps your preview environments up to date on every commit and automatically destroys them when the original pull request is merged or closed. You can also set up an expiry time to automatically clean up preview environments after a period of inactivity.
Preview Environments can be helpful in a lot of cases:
- Share your changes live in code reviews: no more Git diffs for visual changes!
- Get shareable links for upcoming features and collaborate more effectively with internal and external stakeholders.
- Run CI tests against a high fidelity copy of your production environment before merging.
In this step-by-step guide you will learn how to get started using the Preview Environments on AWS with Qovery.
Please contact us via our forum if you have any questions concerning the Preview Environments
Before you begin, this guide assumes the following:
- You have sign in on Qovery
- You have installed Qovery on your AWS account
- You have at least already deployed successfully a first application
Steps
- Create a "Blueprint" environment
- Enable Preview Environment feature
- Create a Preview Environment
- Delete a Preview Environment
- Seed your database
- Auto stop and start your Preview Environments
- Integrate your CI (Continuous Deployment) platform
Create your Blueprint Environment
Even if not required, we recommend creating an environment that will serve as a root to create your Preview Environments. The idea is to keep this environment as a template of a fully working environment. This environment should not be directly used. This is what we call "blueprint environment".
I assume you already have a working environment, so to create a blueprint environment you need to:
- Go to your working environment
- Click on "Actions" > "Clone"
- Name your environment "blueprint"
- Click on "Create"
Enable Preview Environment
Now, you can go to turn on Preview Environments by:
- Click on your
Blueprintenvironment "Settings". - Click on the
Preview Env.tab - Turn on Preview Environment feature for all your applications by clicking on
Activate preview environment for all apps.
Change your base branch
Now that you have turned on the Preview Environment feature, you need to change the base branch from your applications inside your Blueprint Environment. Let's say, every new feature branch you create are coming from staging. Then you will need to change all your applications to target the staging branch.
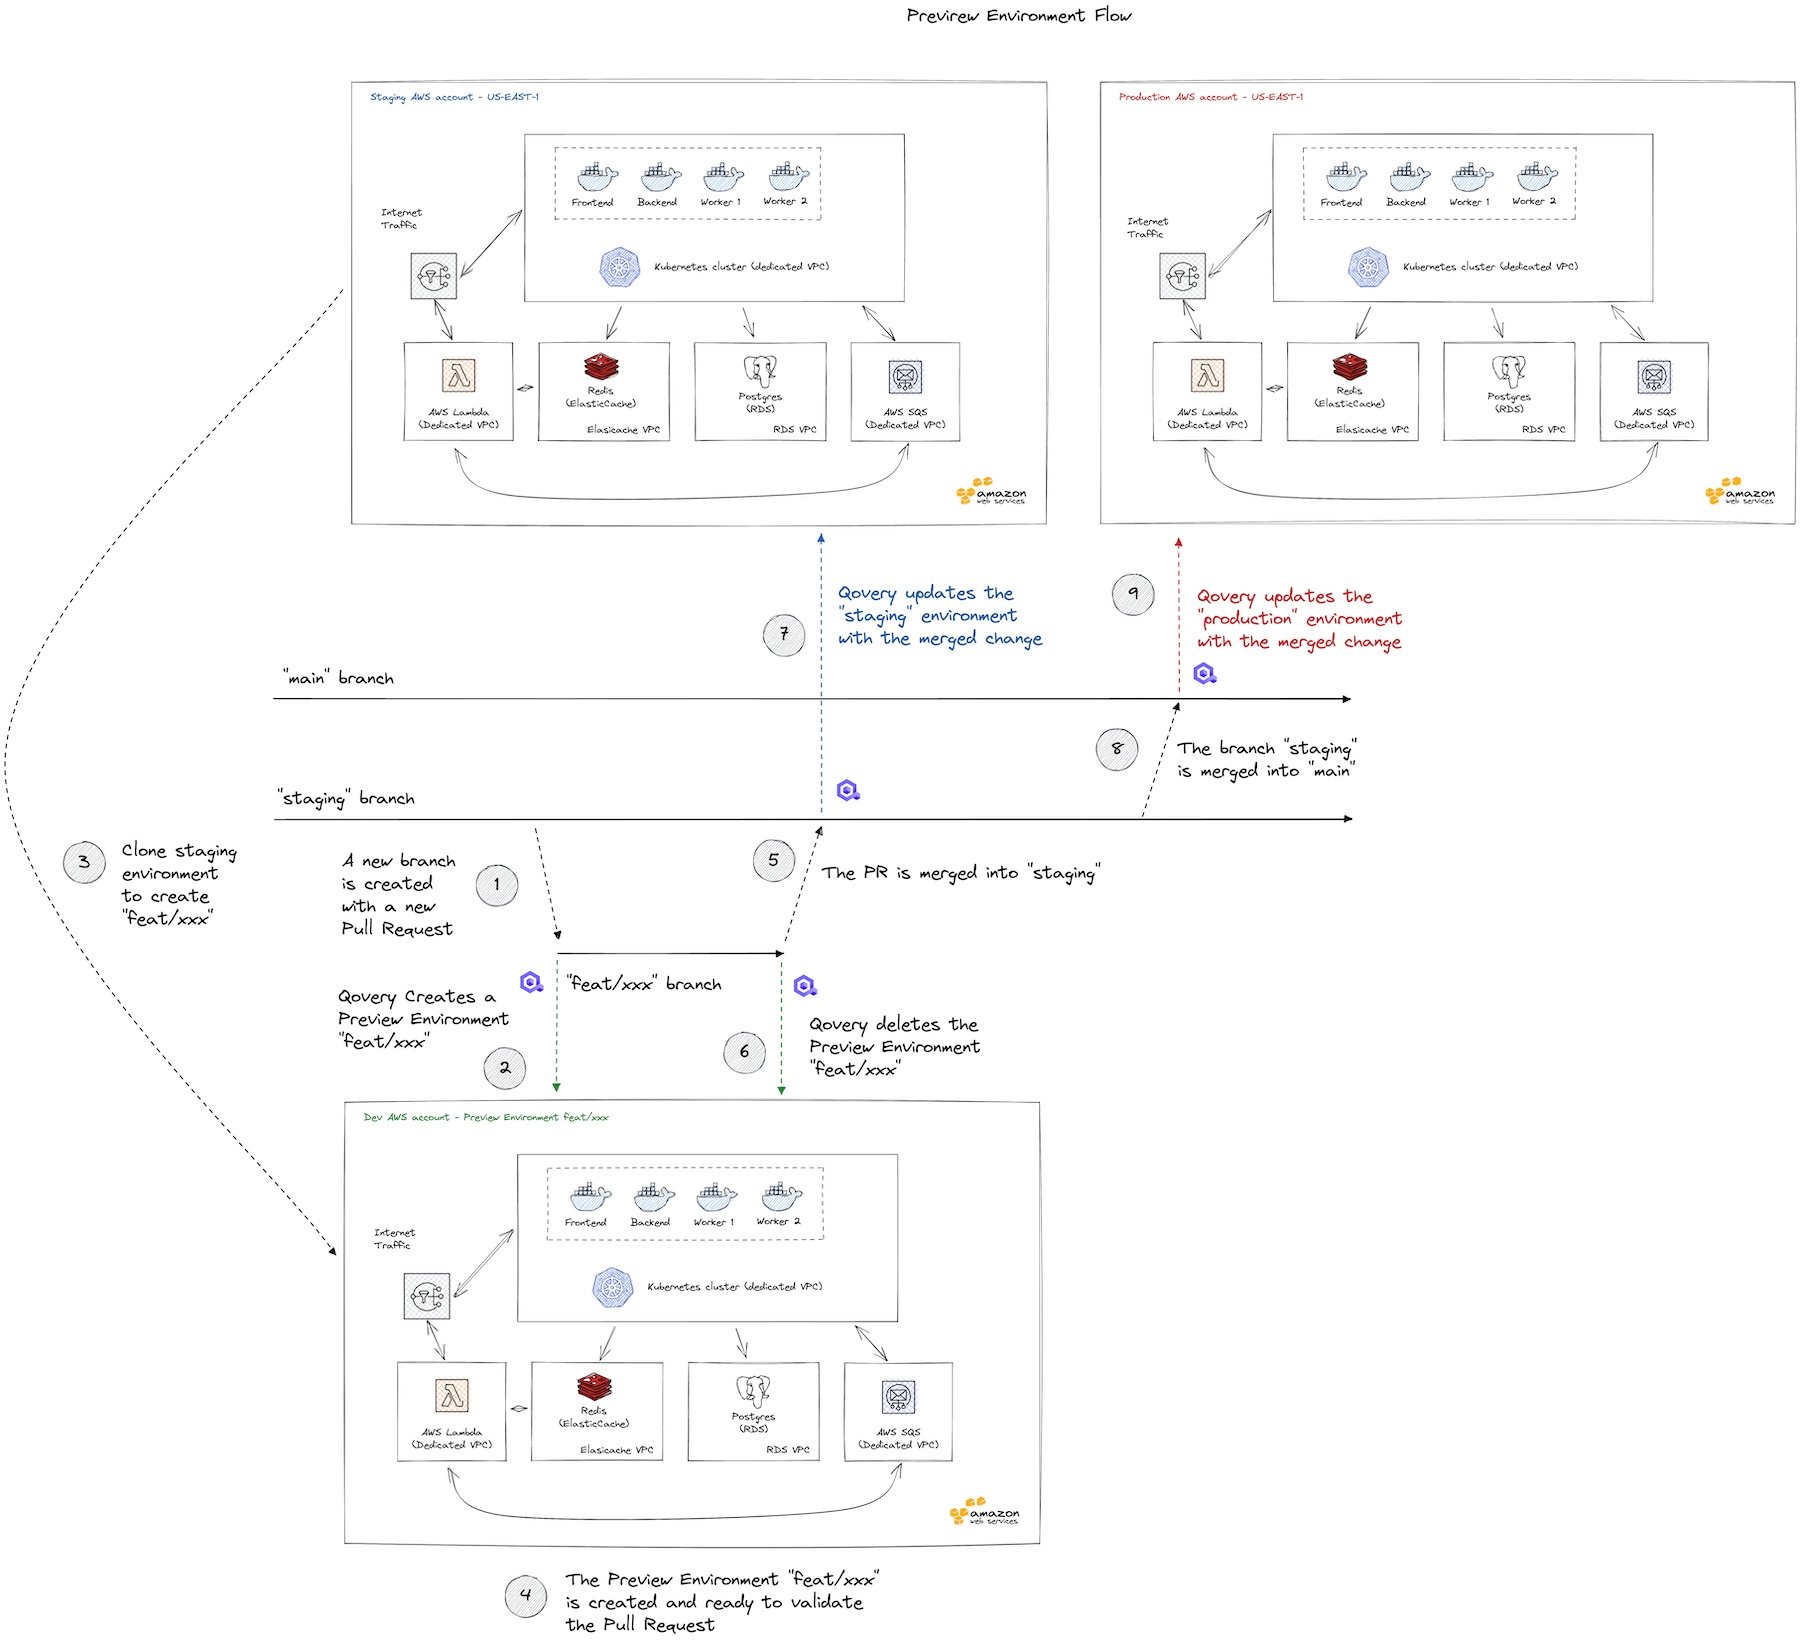
Here is a flow example showing what happen when you create a new Pull Request from a feat/xxx branch that has been created from the base branch staging.
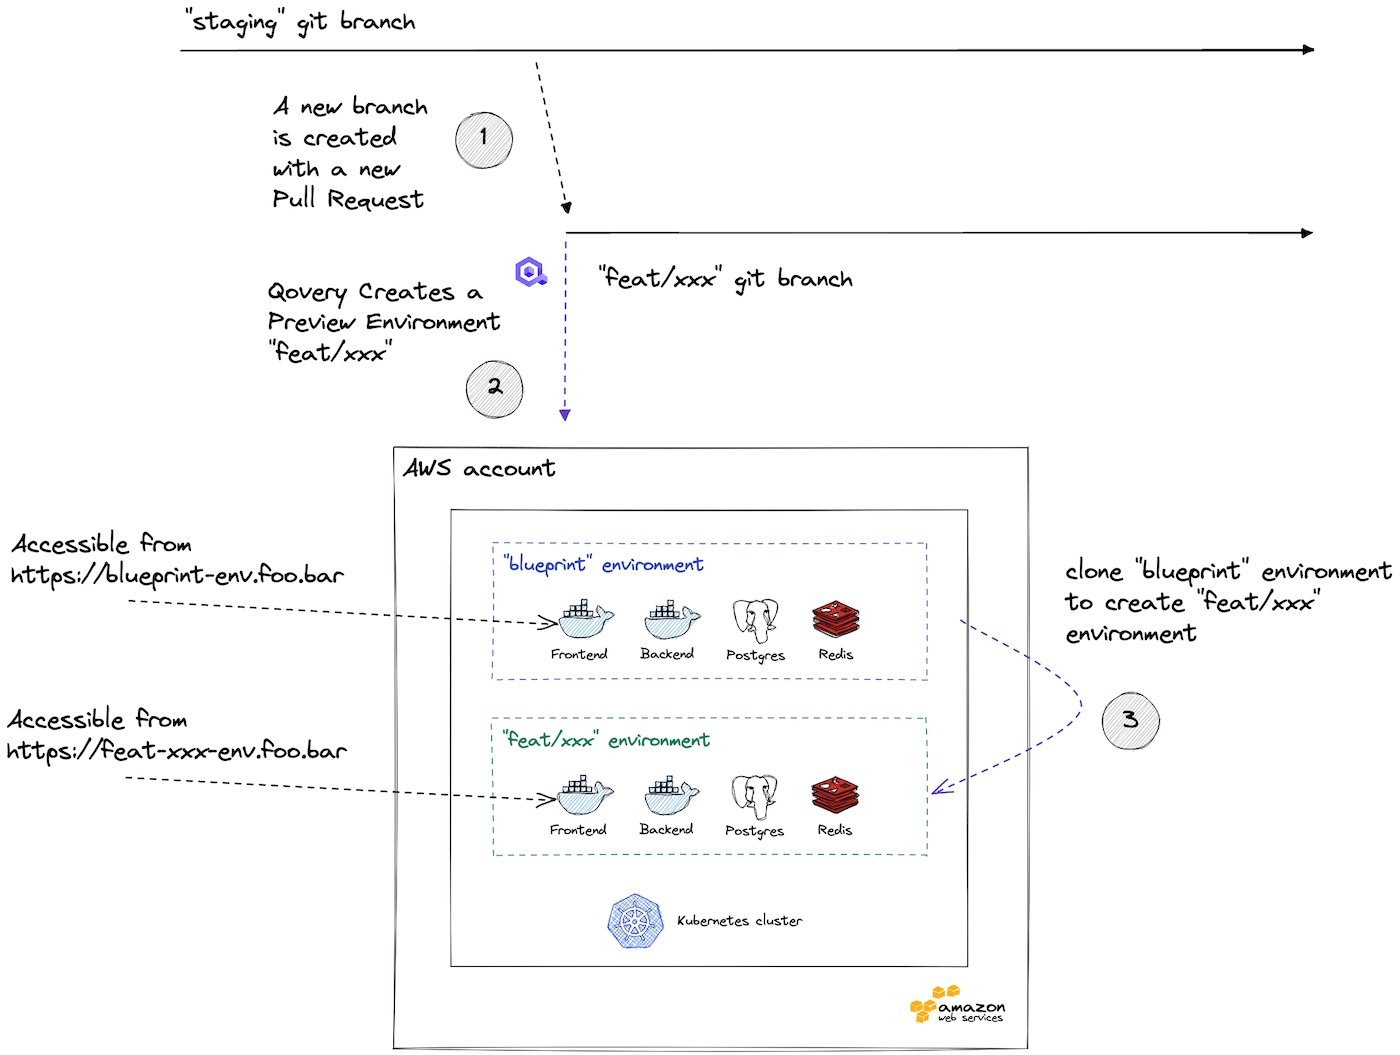
- A developer creates a git branch
feat/xxxis created fromstaging. - A developer creates a Pull Request for
feat/xxx. - Qovery creates a Preview Environment
feat/xxxfrom theblueprintenvironment. The frontend, backend, PostgreSQL and Redis instances are cloned! - The frontend app from the environment
feat/xxxis accessible via a dedicated URL.
Validate your Blueprint Environment
Before creating a Preview Environment, validate that your Blueprint environment works.
Once done, you need to:
- Stop your Blueprint environment by clicking on "Actions" > "Stop".
- Turn off "auto-deploy" by clicking on "Settings" > "Deployment" > "Auto-deploy off" > "Save".
We are now ready to try out our Preview Environment configuration.
Create a Preview Environment
To create a Preview Environment, here are the steps:
- Checkout your
stagingbranch. - Create a branch
test_qovery_preview_environmentand push it. - Create a Pull Request/Merge Request.
You must see a new environment appearing in your environment list on Qovery. Wait until it is fully deployed, then you will be able to connect to it. This environment is fully isolated from your base environment.
Delete a Preview Environment
To delete you need to merge test_qovery_preview_environment into staging. You also have the ability to delete it manually on Qovery.
Advanced
Eager to know how to go integrate Qovery Preview Environments with your CI and much more? Check out our the following guides:
- Seed your Preview Environment database
- Integrate your CI platform
- Auto-stop and start your Preview Environment
- Set up a custom domain for your Preview Environment
Wrapping up
Congrats! You have set up your Preview Environments features. Feel free to check out our forum and open a thread if you have any question. In the next guide, we will go deeper configuration to integrate the Preview Environment with your existing products and workflow.