If you'd like to use Cloudflare instead of CloudFront as your CDN, check out this article.
Frontend apps primarily consist of static content which goes unchanged. Web pages that contain static assets are essentially prebuilt, which makes it efficiently quicker to grab and render content. Their static nature makes them a perfect use case for CDNs and caching systems on edge servers is as it boosts the web page performance and user experience with the system.
Stack
For our frontend stack, we'll use a React app that is served as static files using Nginx.
Frontend Application
To bootstrap the application skeleton, we use create-react-app:
npx create-react-app my-app
Then, we add a Dockerfile to configure how to build the application image:
FROM node:14-alpine AS builderENV NODE_ENV production# Add a work directoryWORKDIR /app# Cache and Install dependenciesCOPY package.json .COPY yarn.lock .RUN yarn install --production# Copy app filesCOPY . .# Build the appRUN yarn build# Bundle static assets with nginxFROM nginx:1.21.0-alpine as productionENV NODE_ENV production# Copy built assets from builderCOPY --from=builder /app/build /usr/share/nginx/html# Add your nginx.confCOPY nginx.conf /etc/nginx/conf.d/default.conf# Expose portEXPOSE 80# Start nginxCMD ["nginx", "-g", "daemon off;"]
The last step - let's configure our Nginx server by adding a nginx.conf file with the following content:
server {listen 80;location / {root /usr/share/nginx/html/;include /etc/nginx/mime.types;try_files $uri $uri/ /index.html;}}
Deployment
Now, to deploy the app, create a new application on Qovery with the following configuration:
- Port -
80 - Build Mode -
Docker - Keep other options in default settings
After the app is created and configured as above, you can safely run the app deployment. After a few minutes when the app is running, click on the Open button:
CloudFront
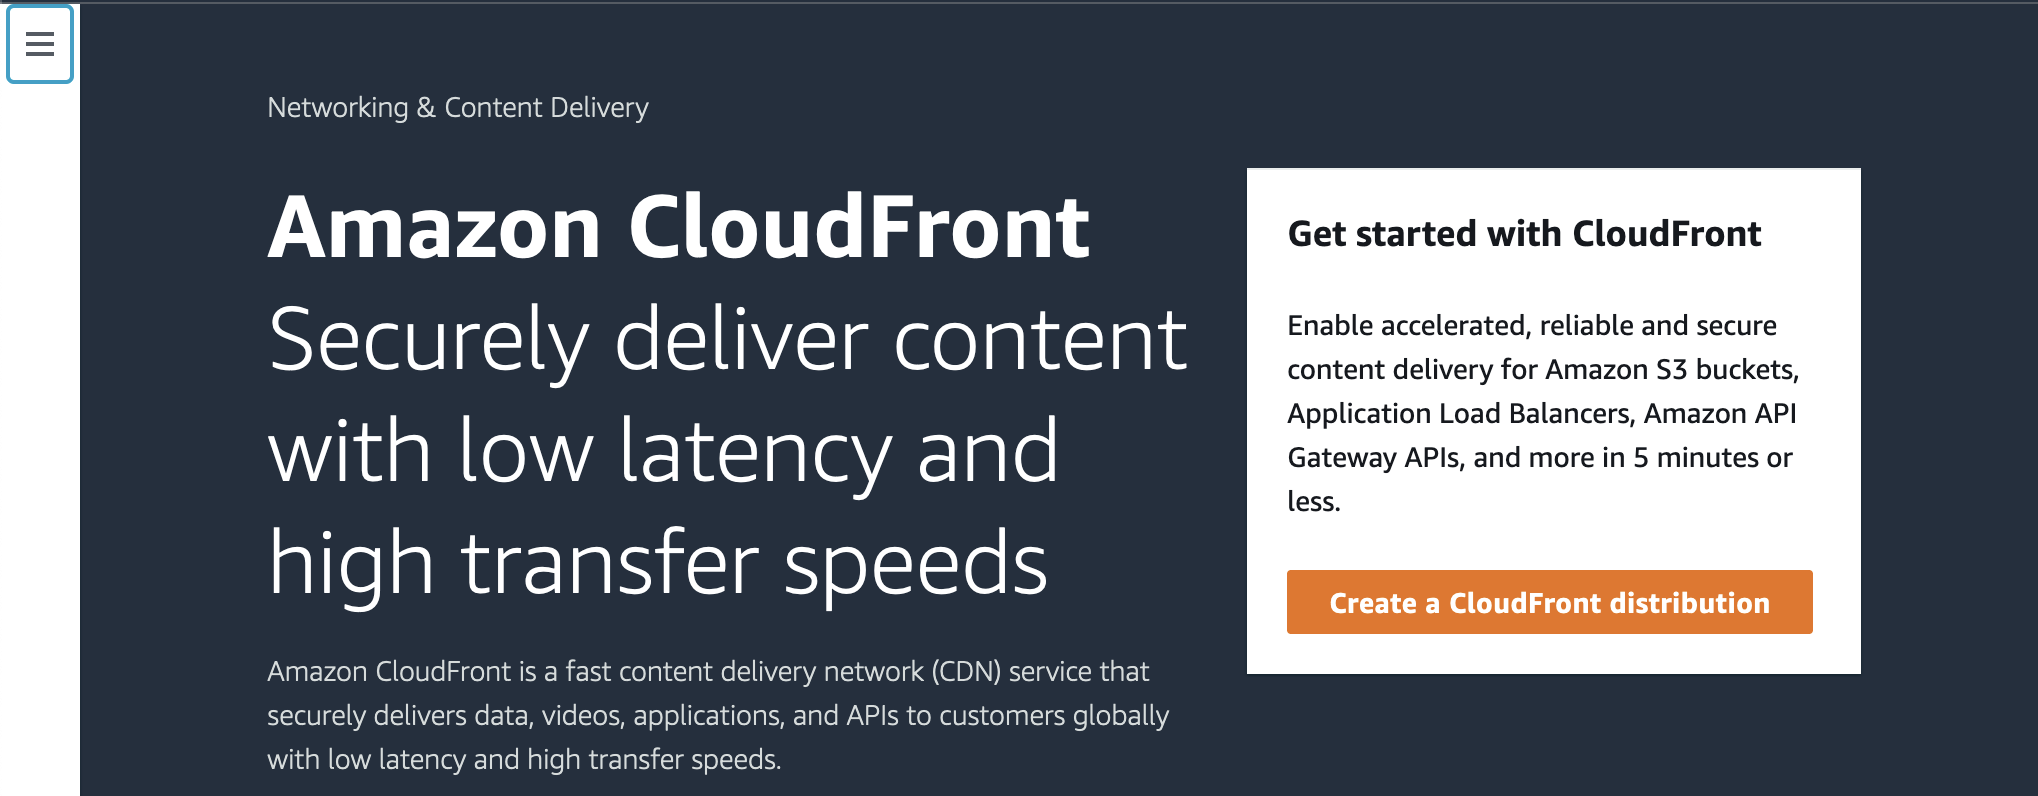
To set up CloudFront as a CDN, first, navigate to CloudFront service in AWS console and click on the new distribution button:
In settings, choose an origin (URL to your frontend app hosted on Qovery):
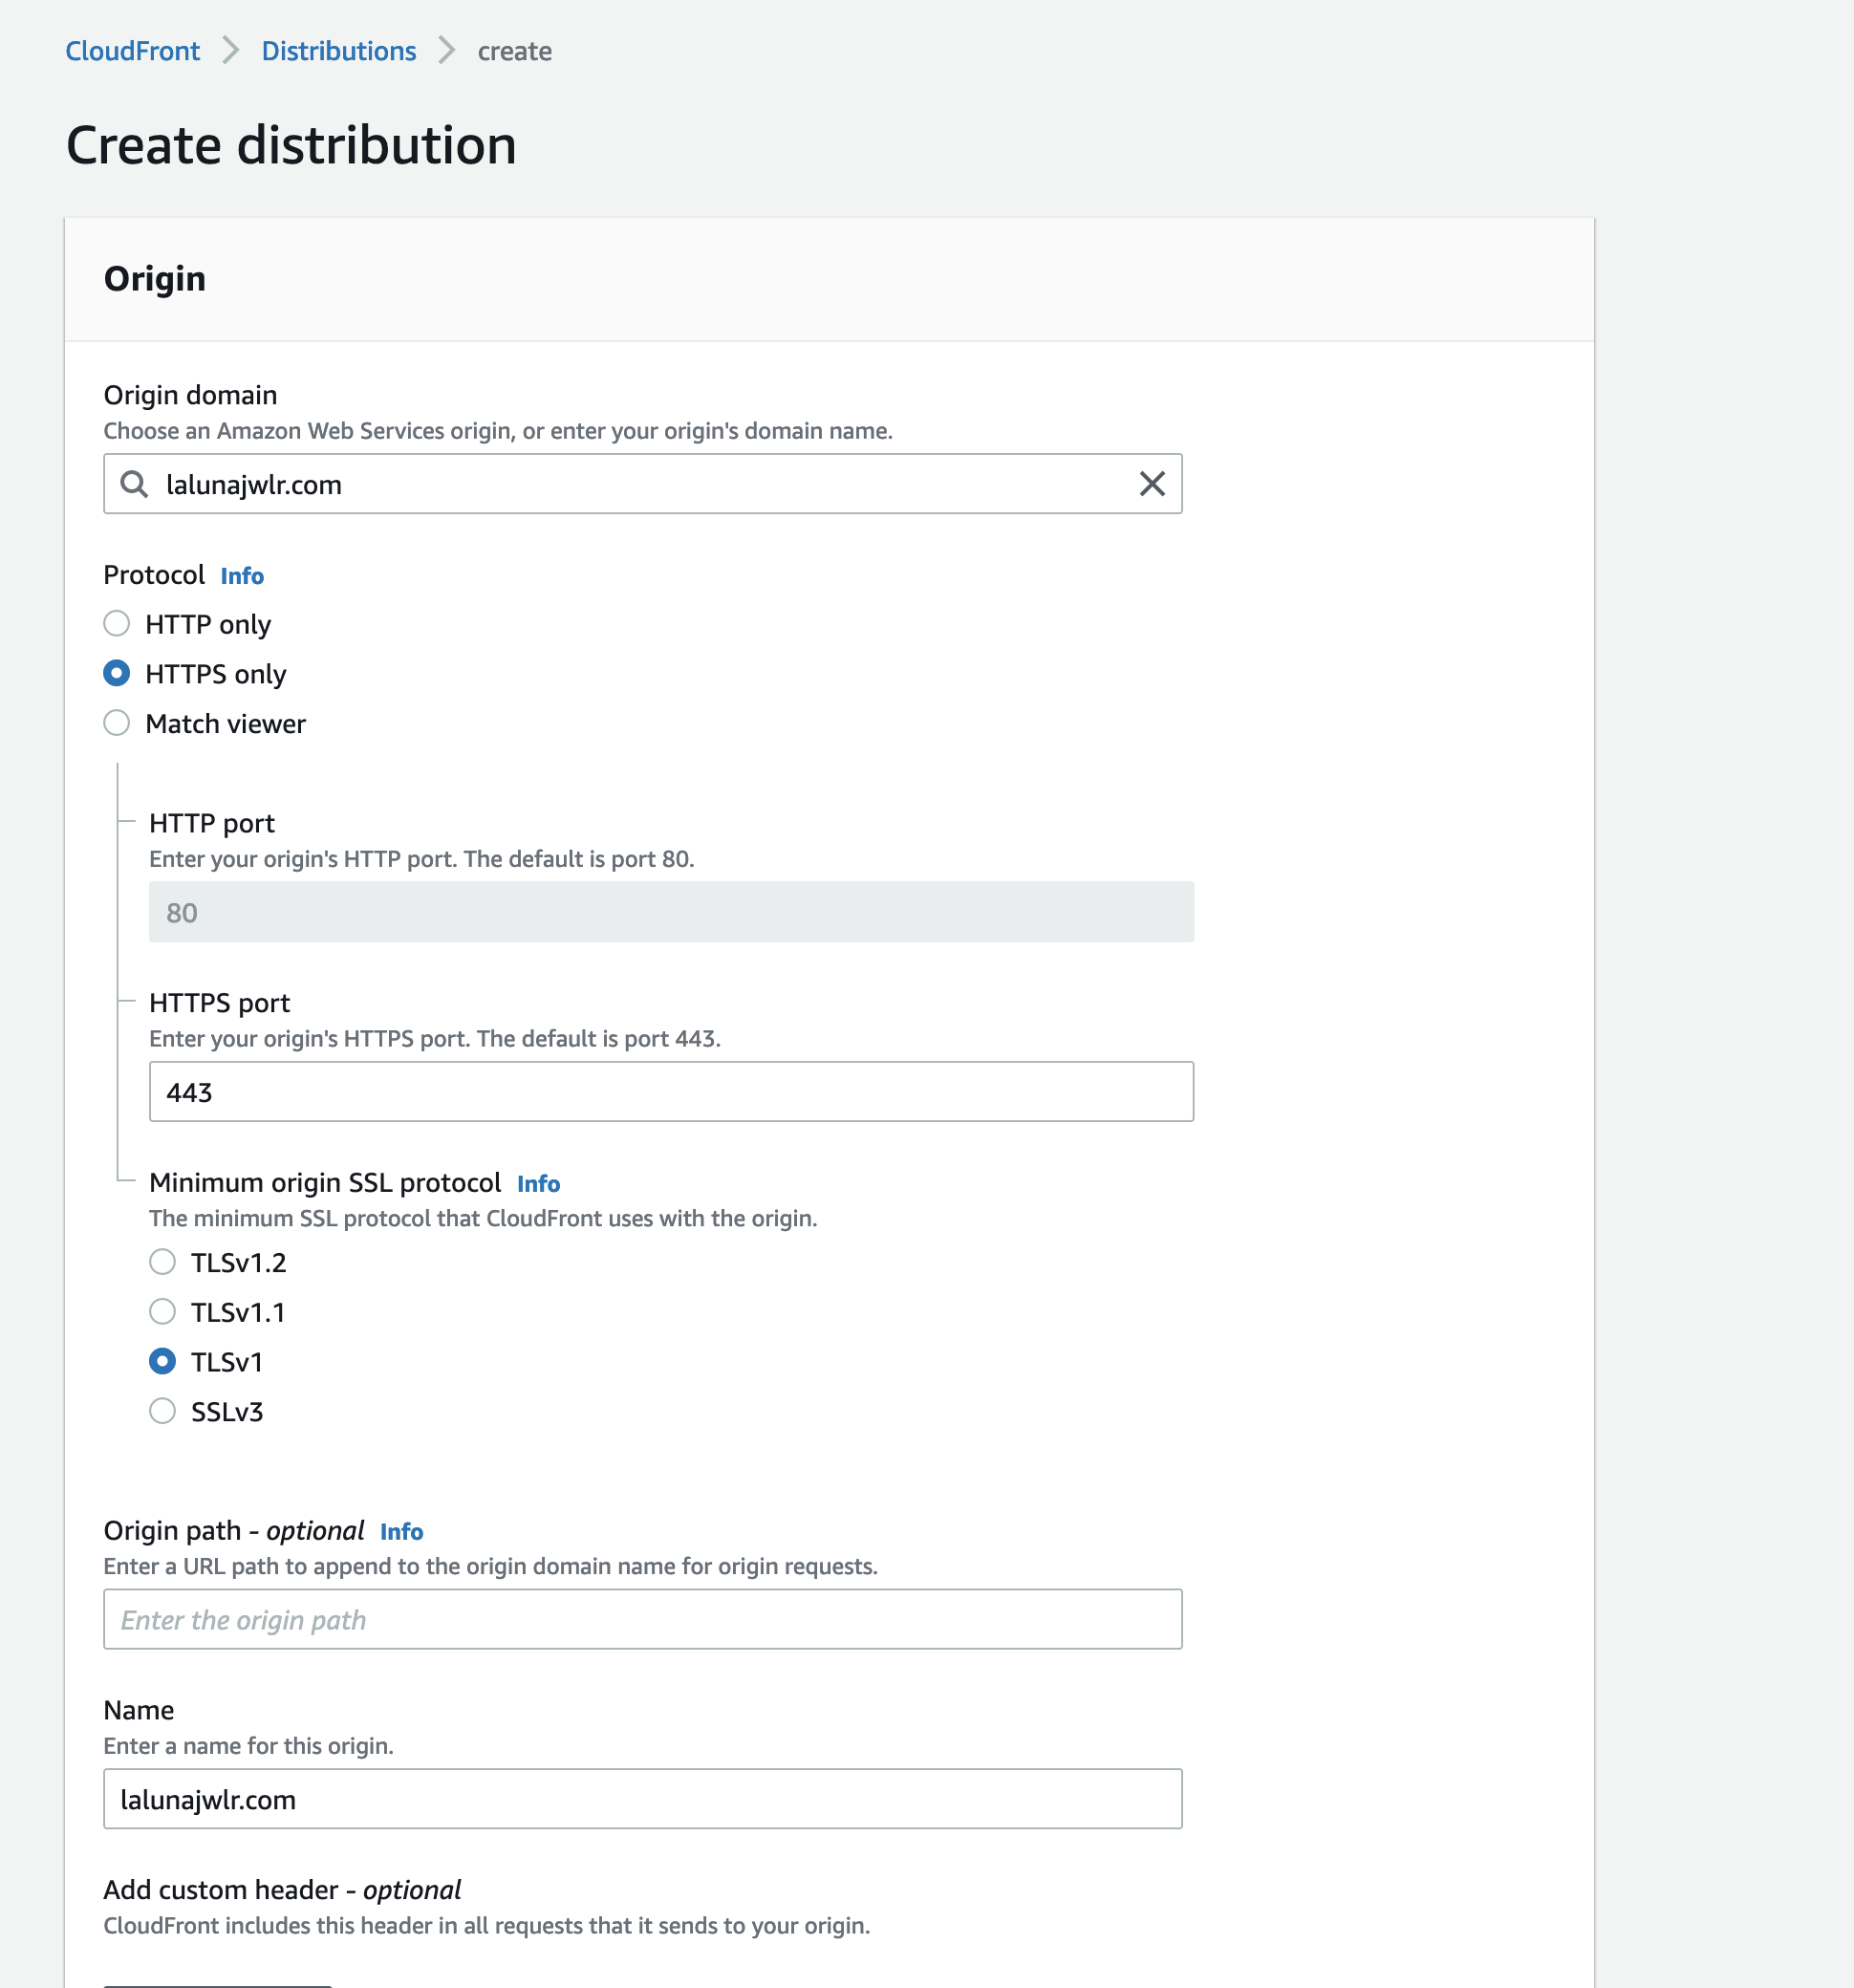
You can also tweak other settings or leave them in their defaults:
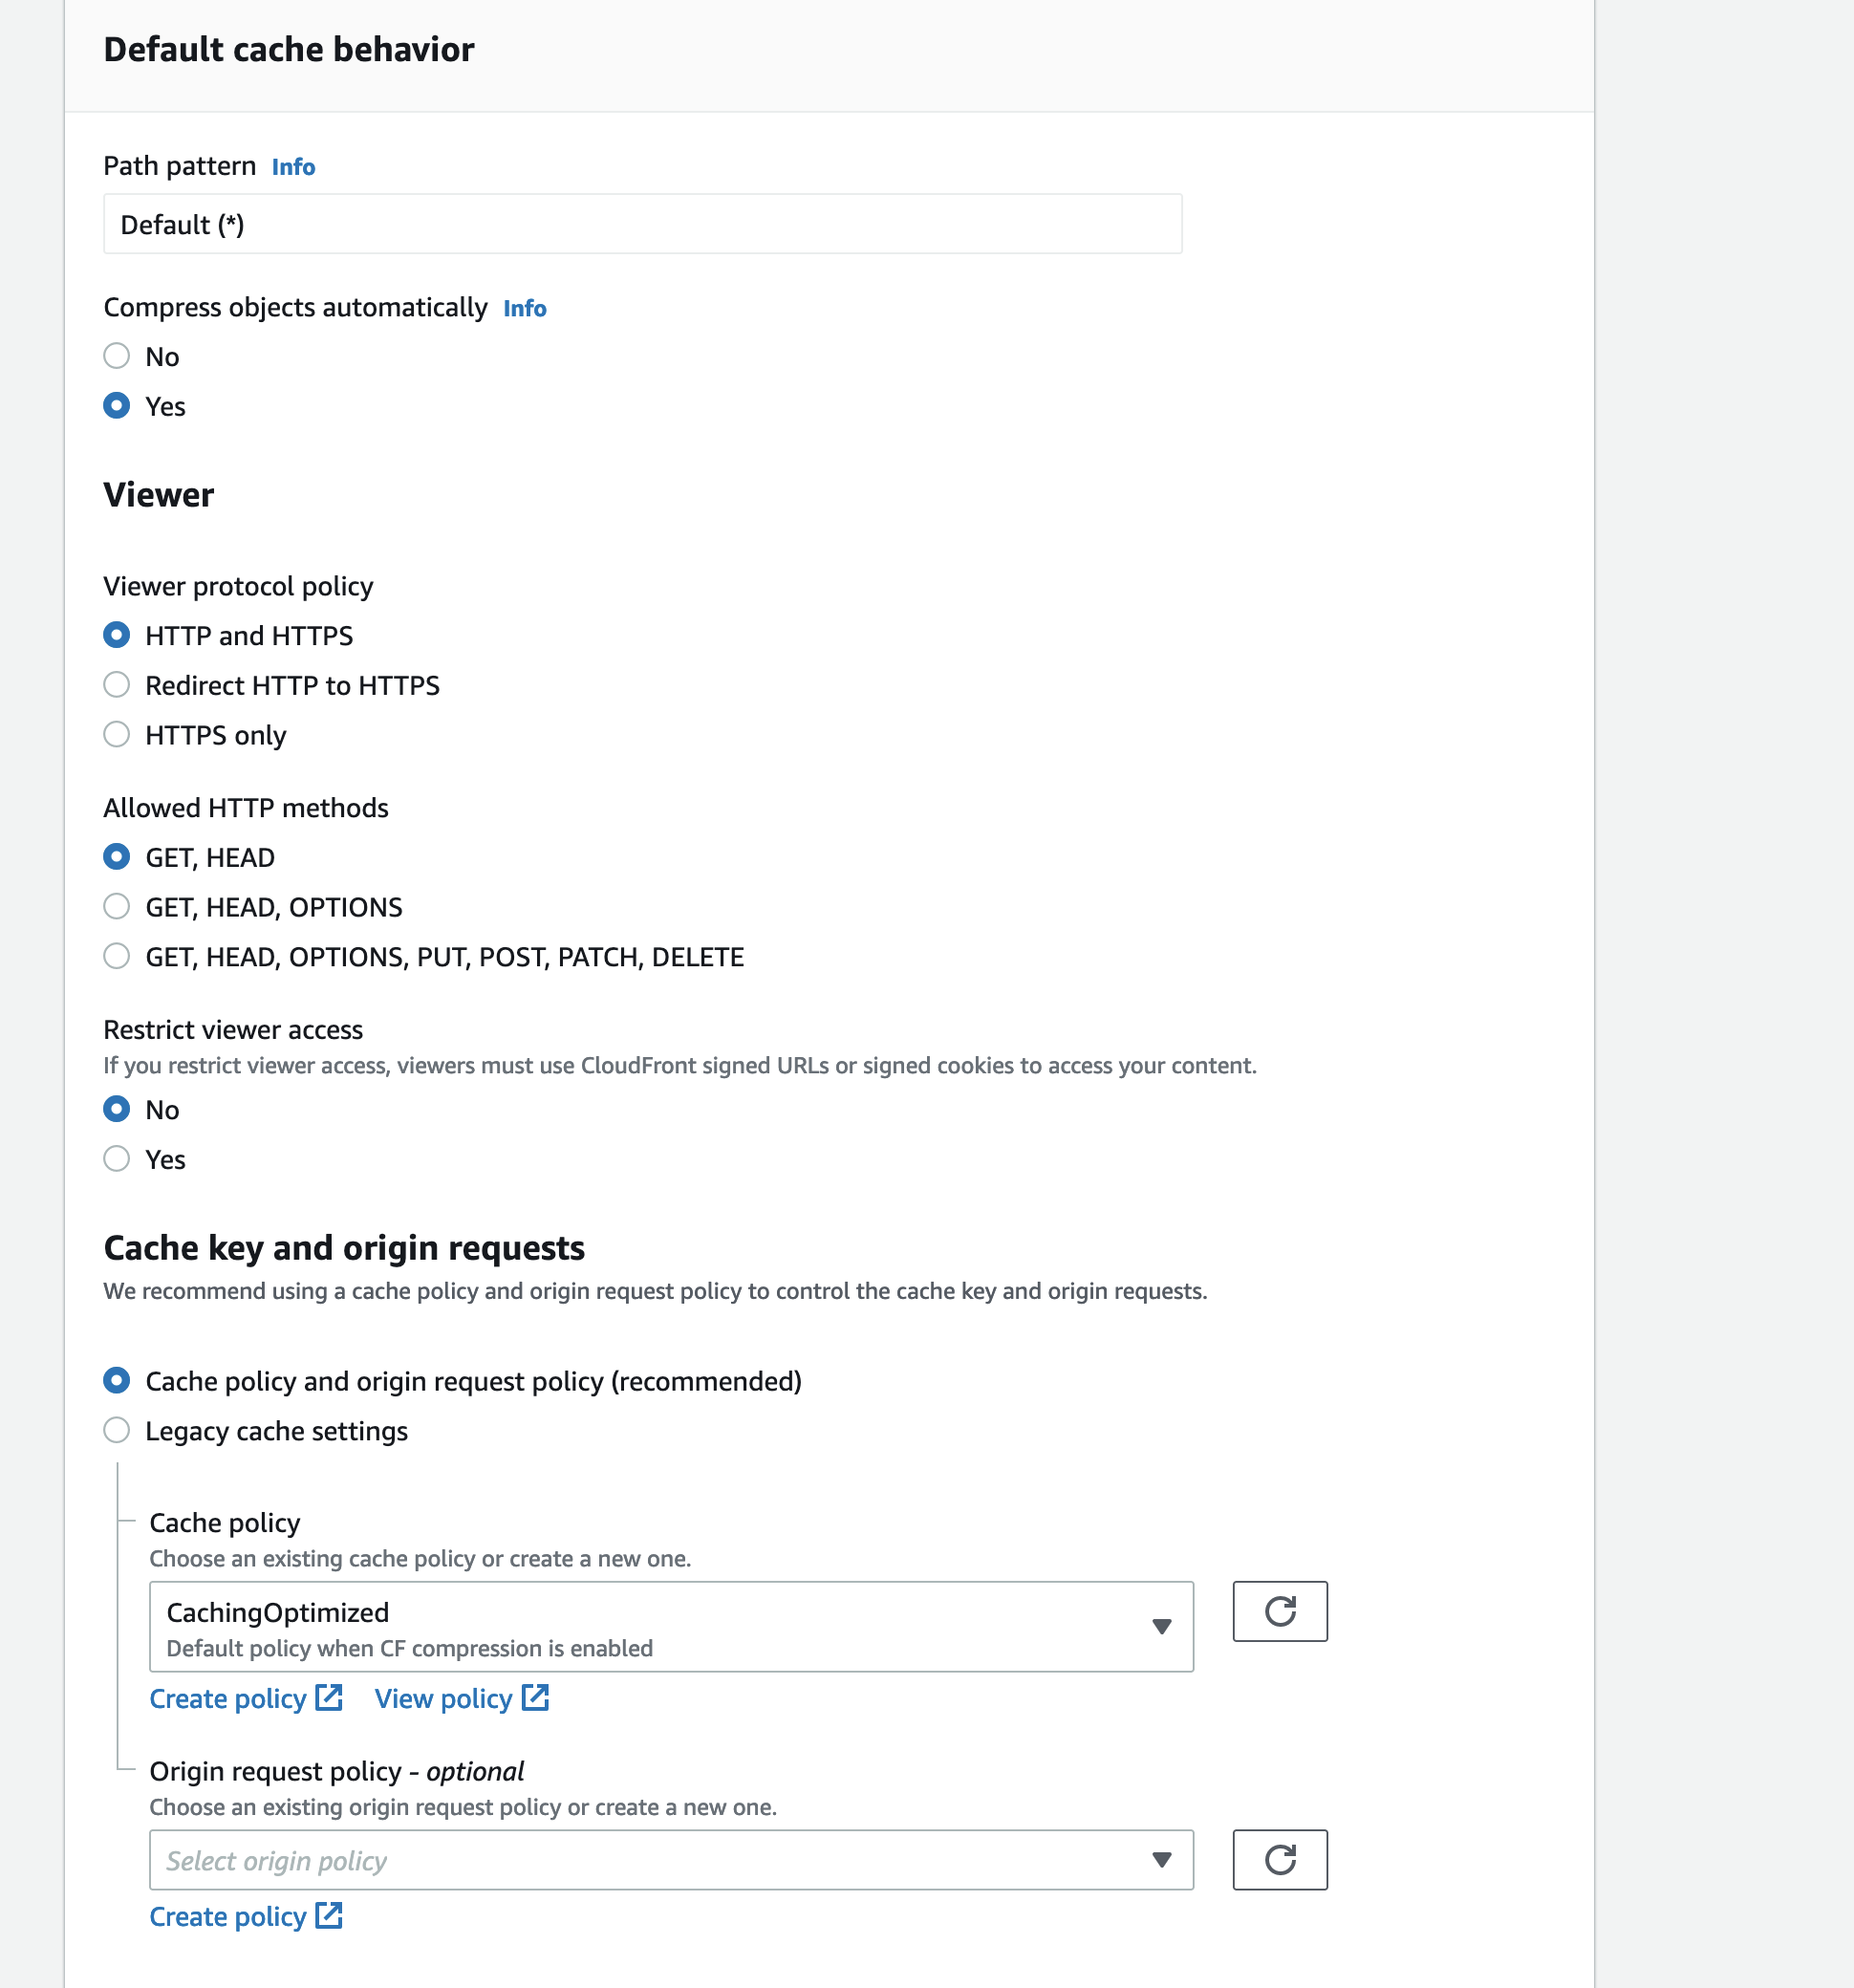
Additionally, you can assign an alternate domain to your application in Alternate domain name:
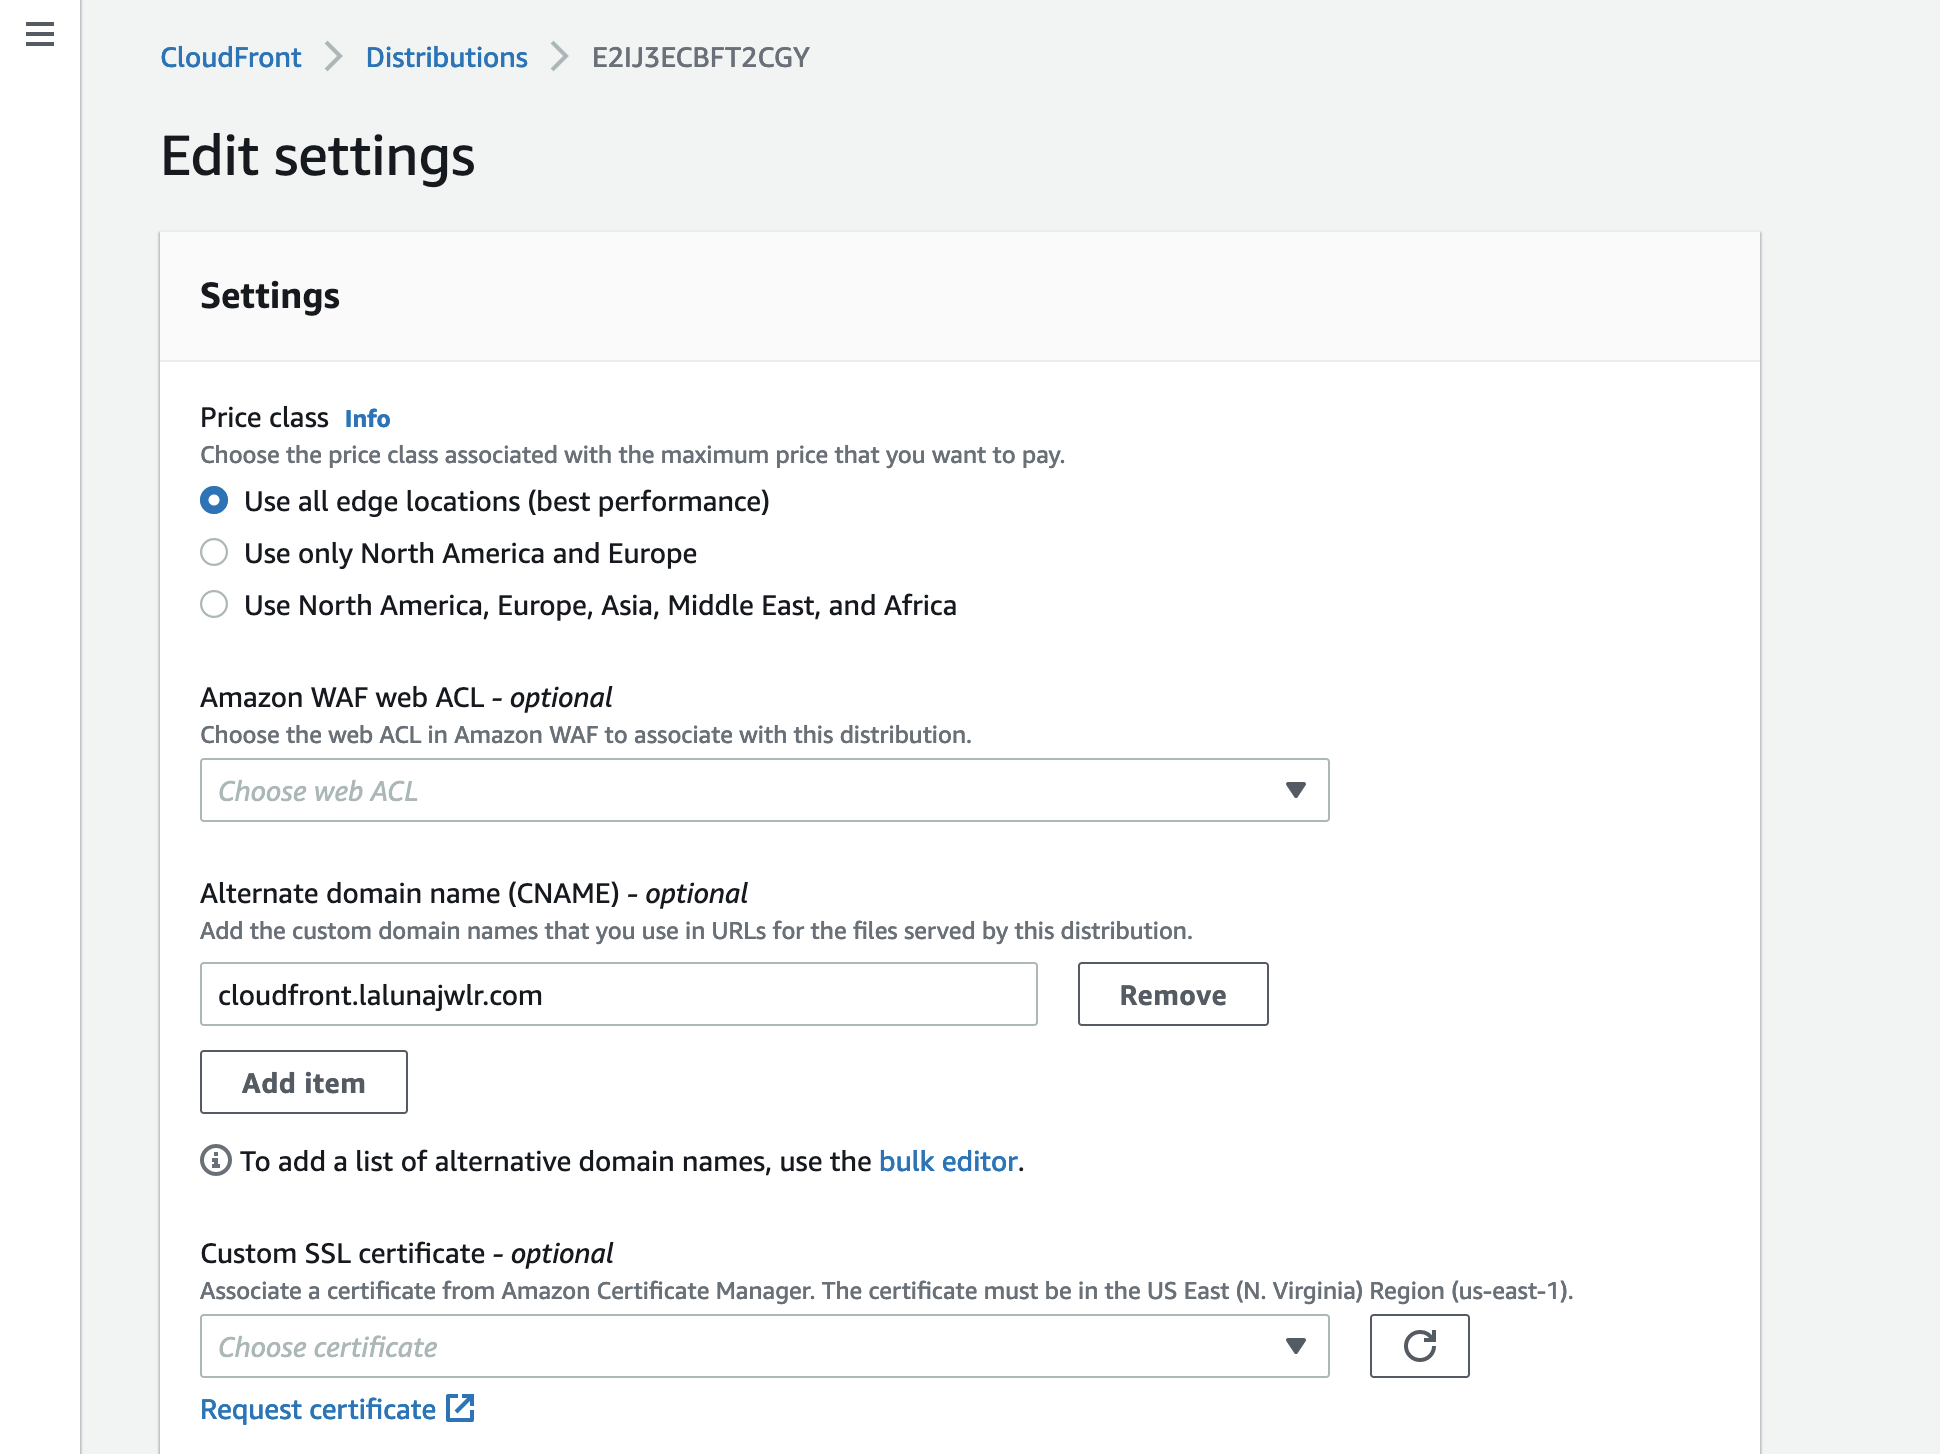
Adding an alternate domain requires it having a certificate - click on the Request certificate button, type your alternate domain name and use DNS for validation method:
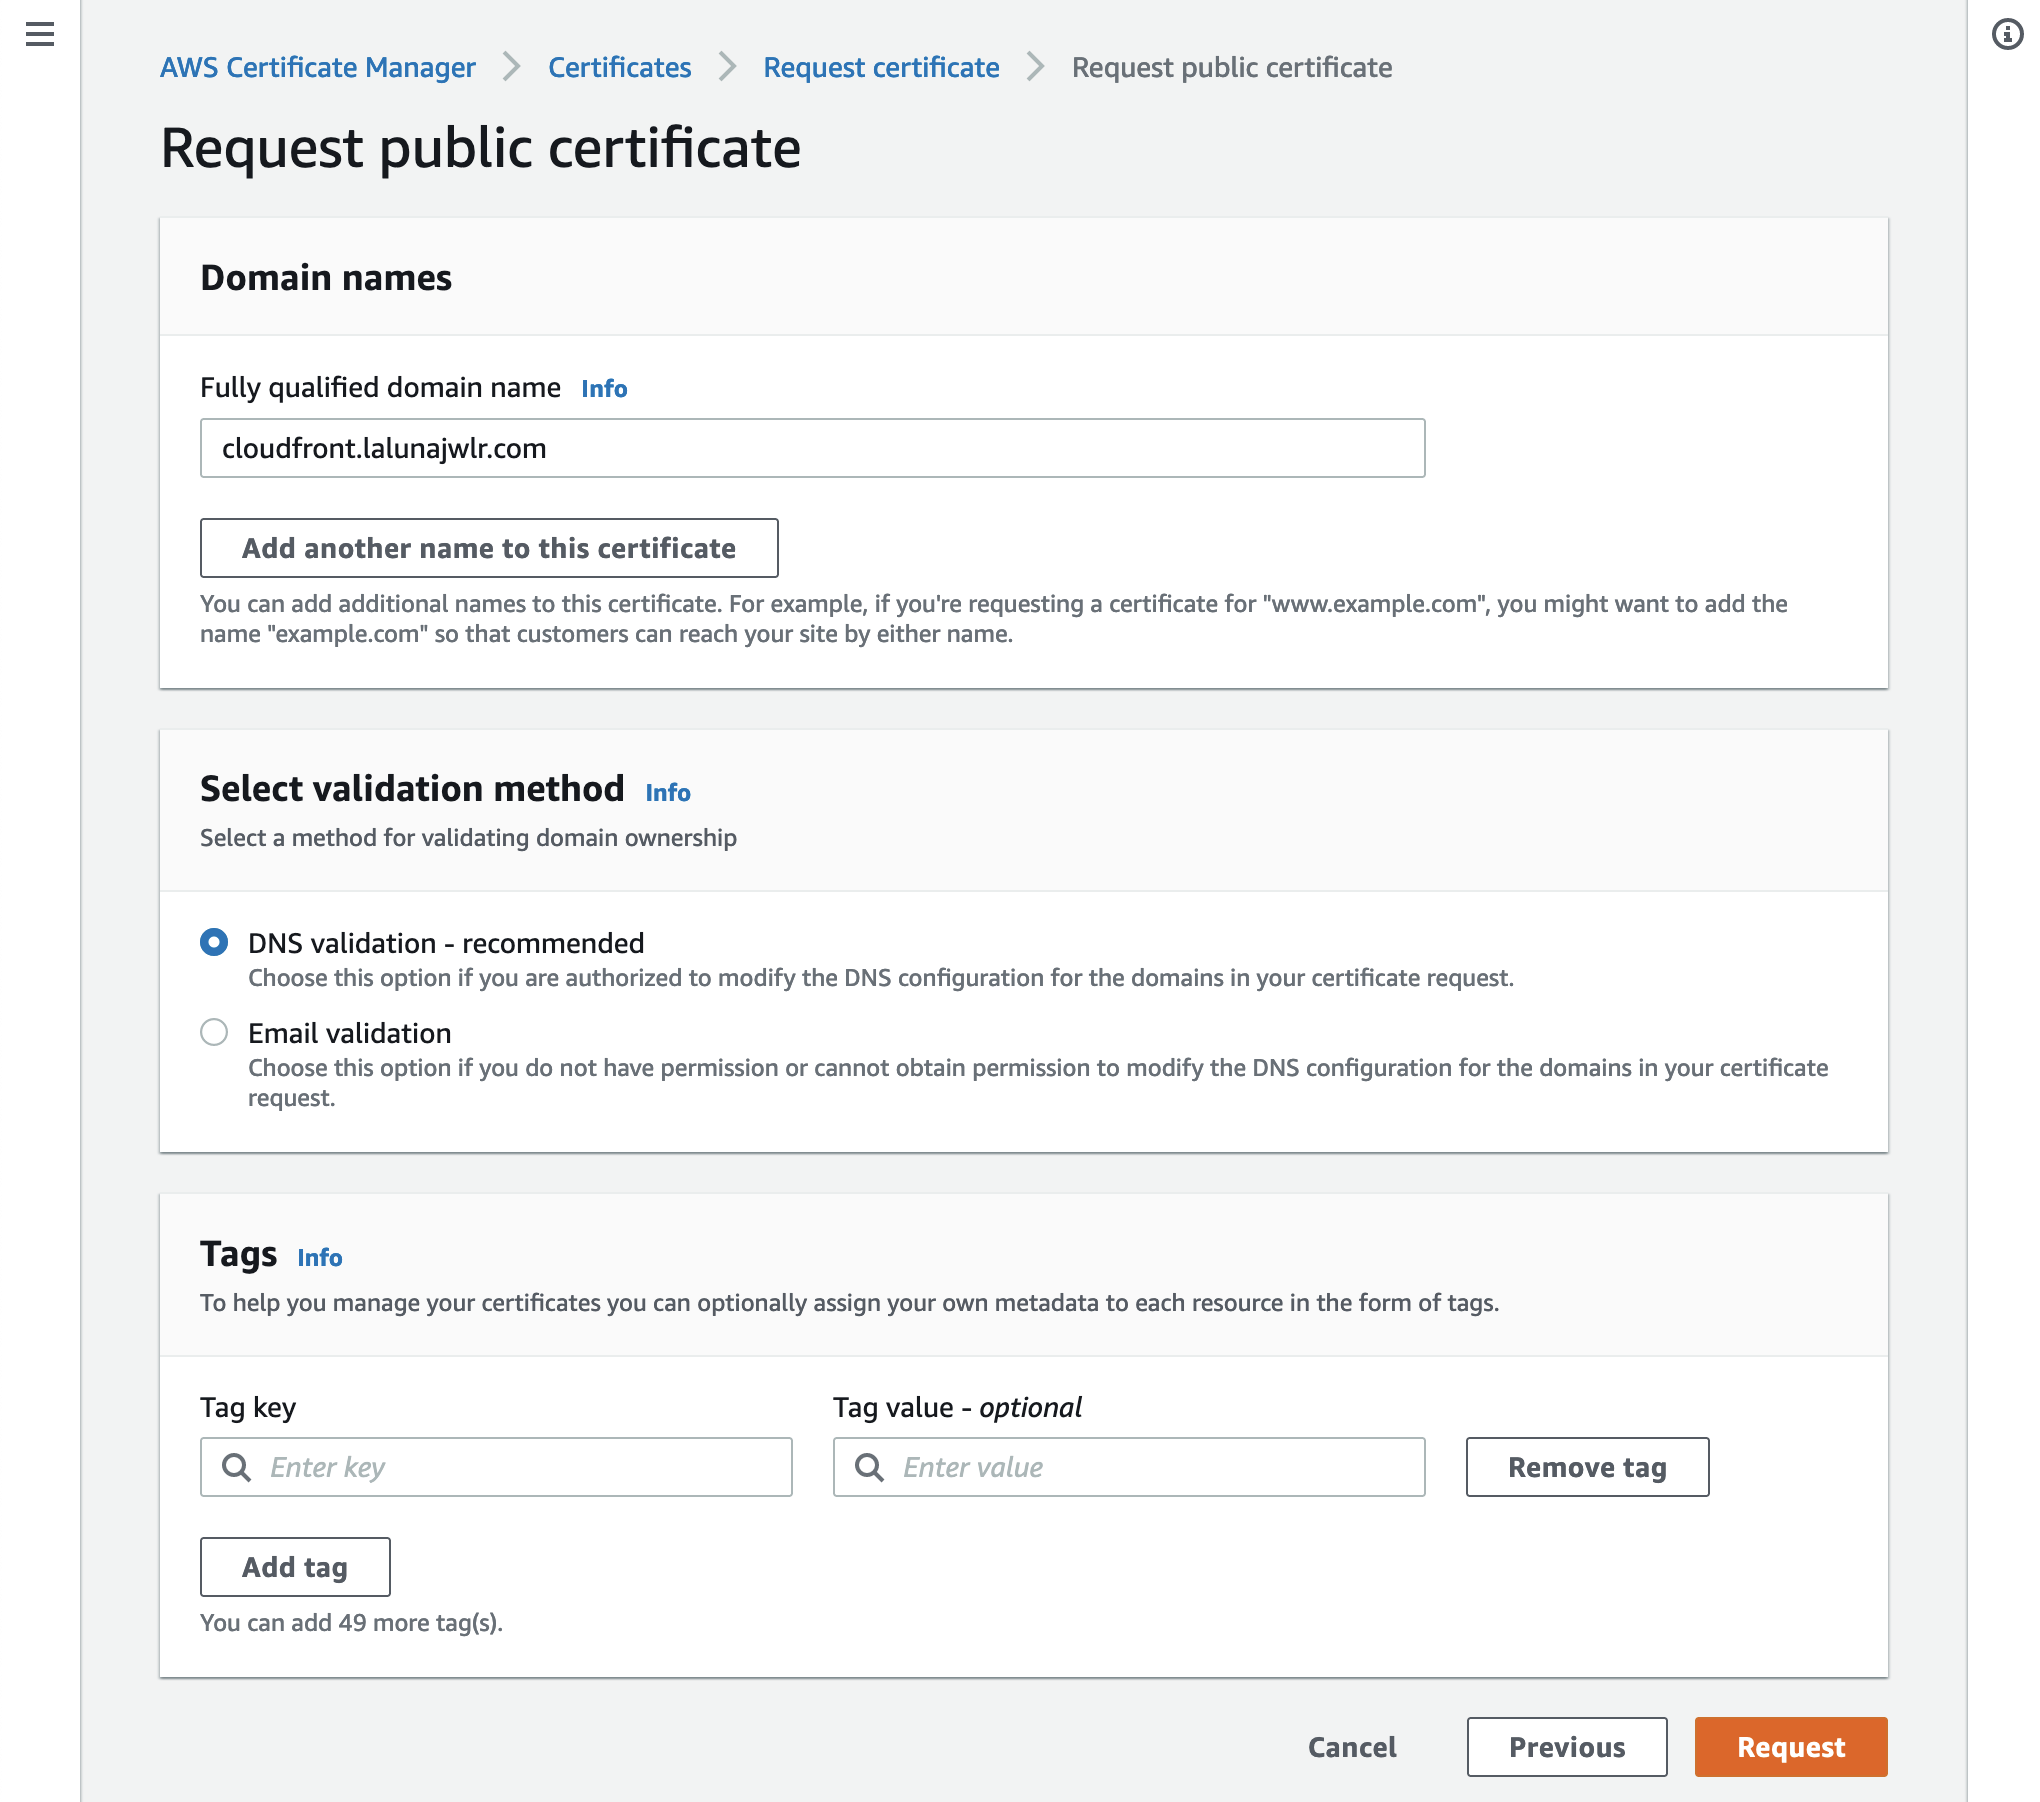
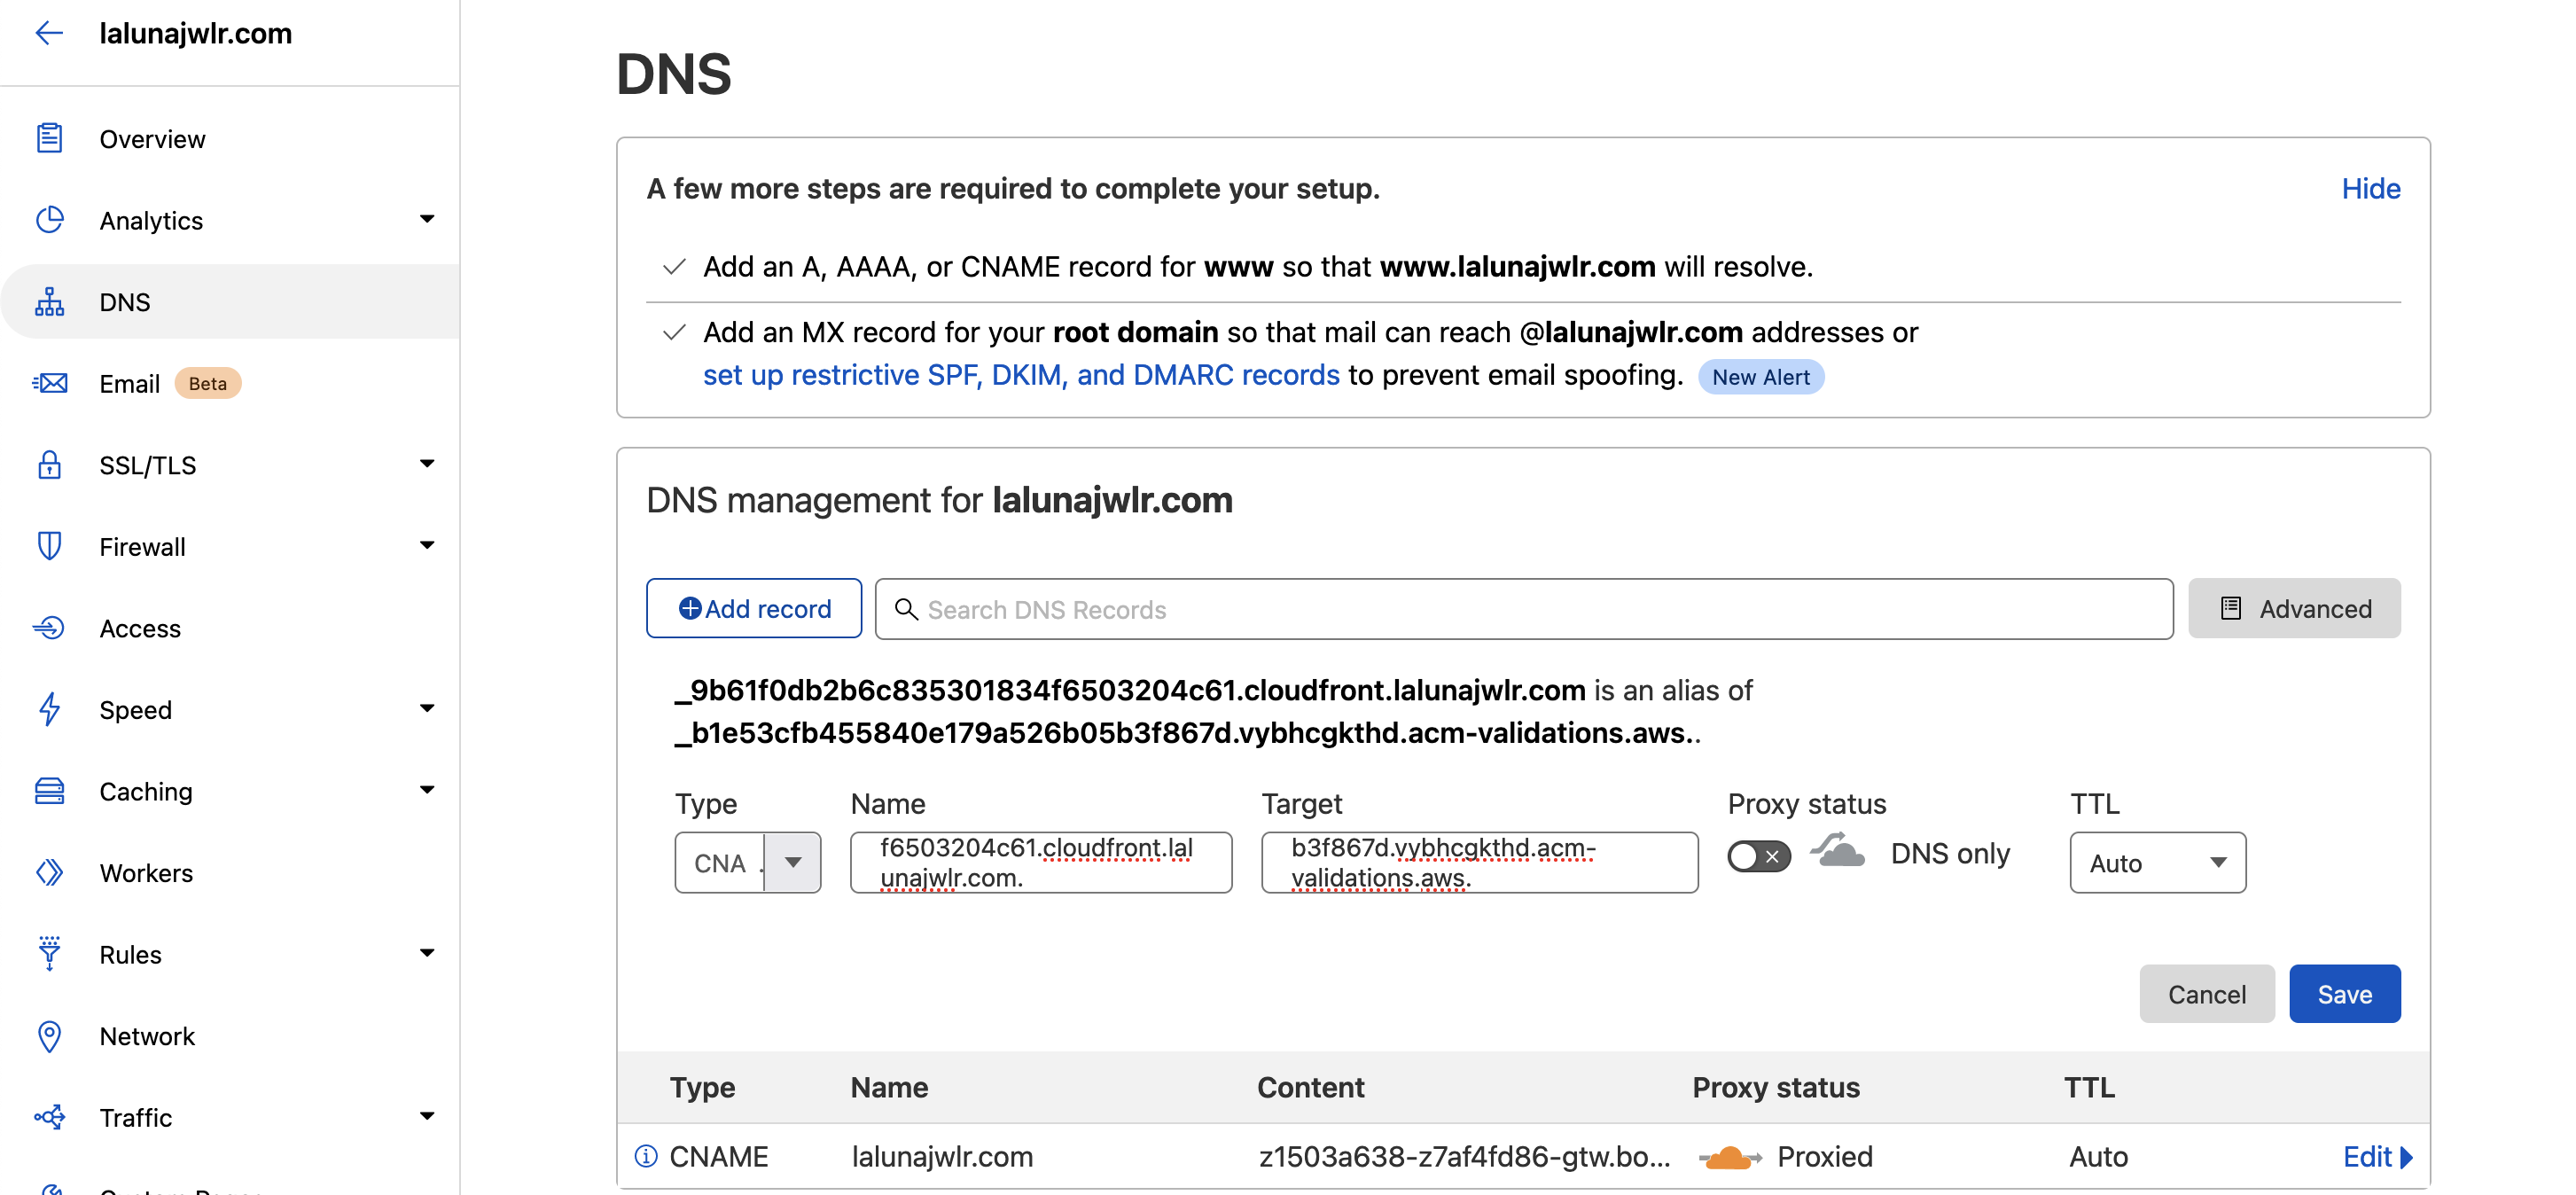
Request the certificate. In the end, you will see a screen with settings you need to set up in your domain name provider:
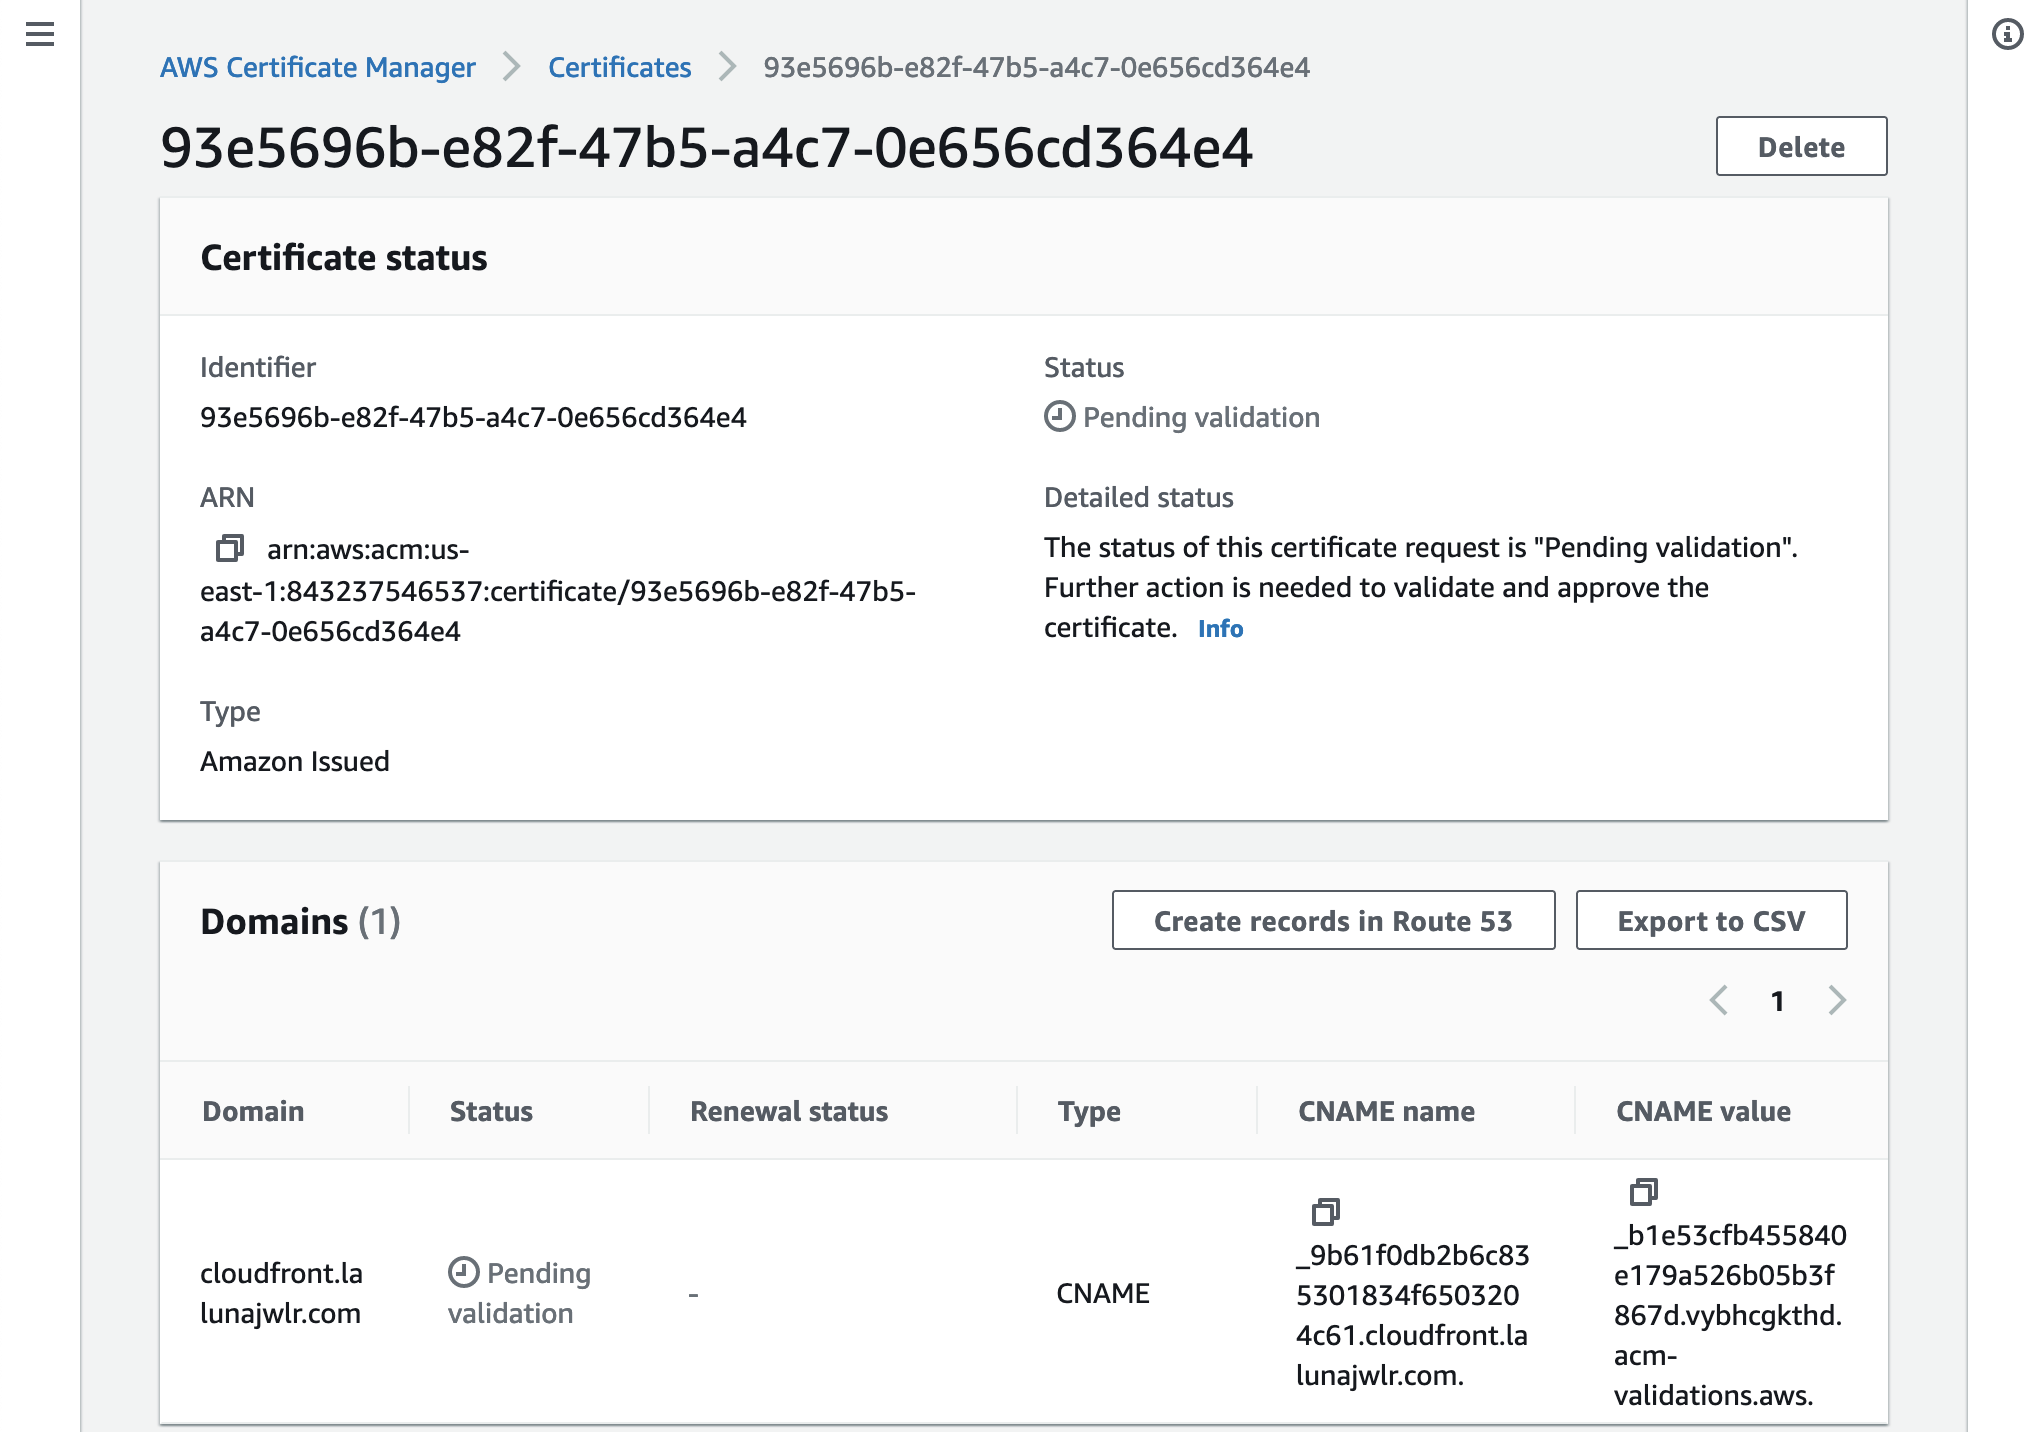
Copy them and save them in your DNS provider settings:
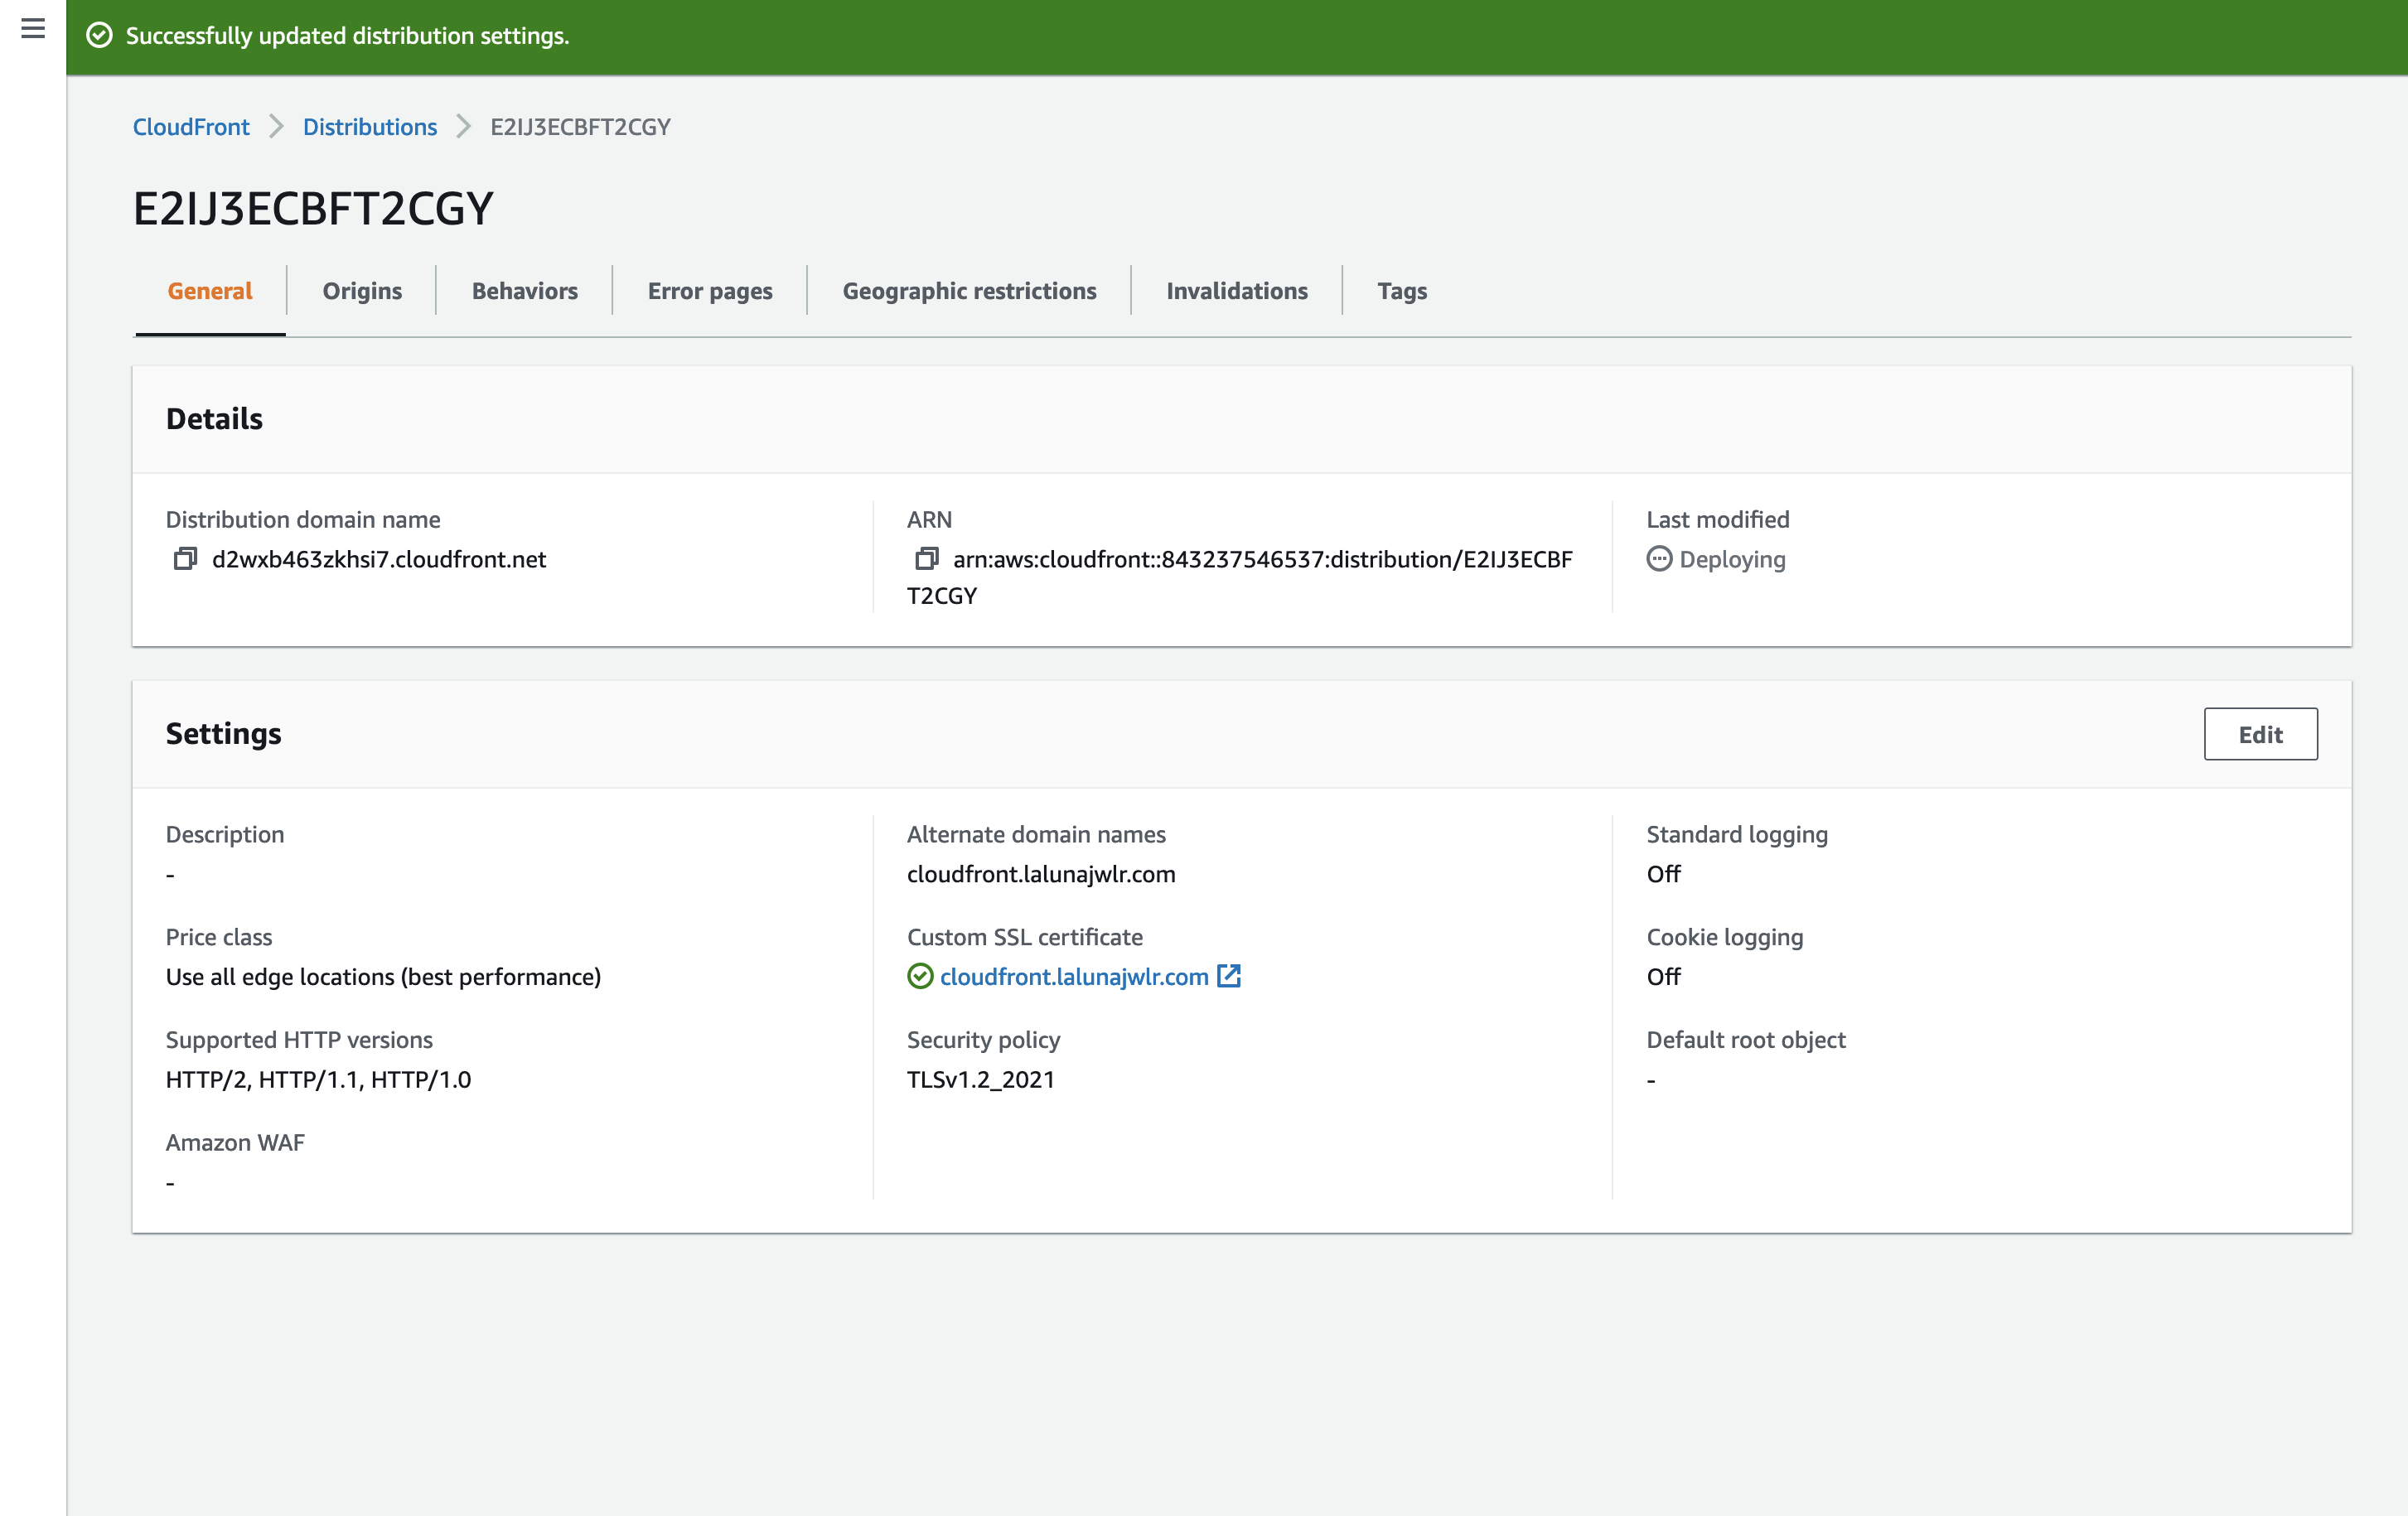
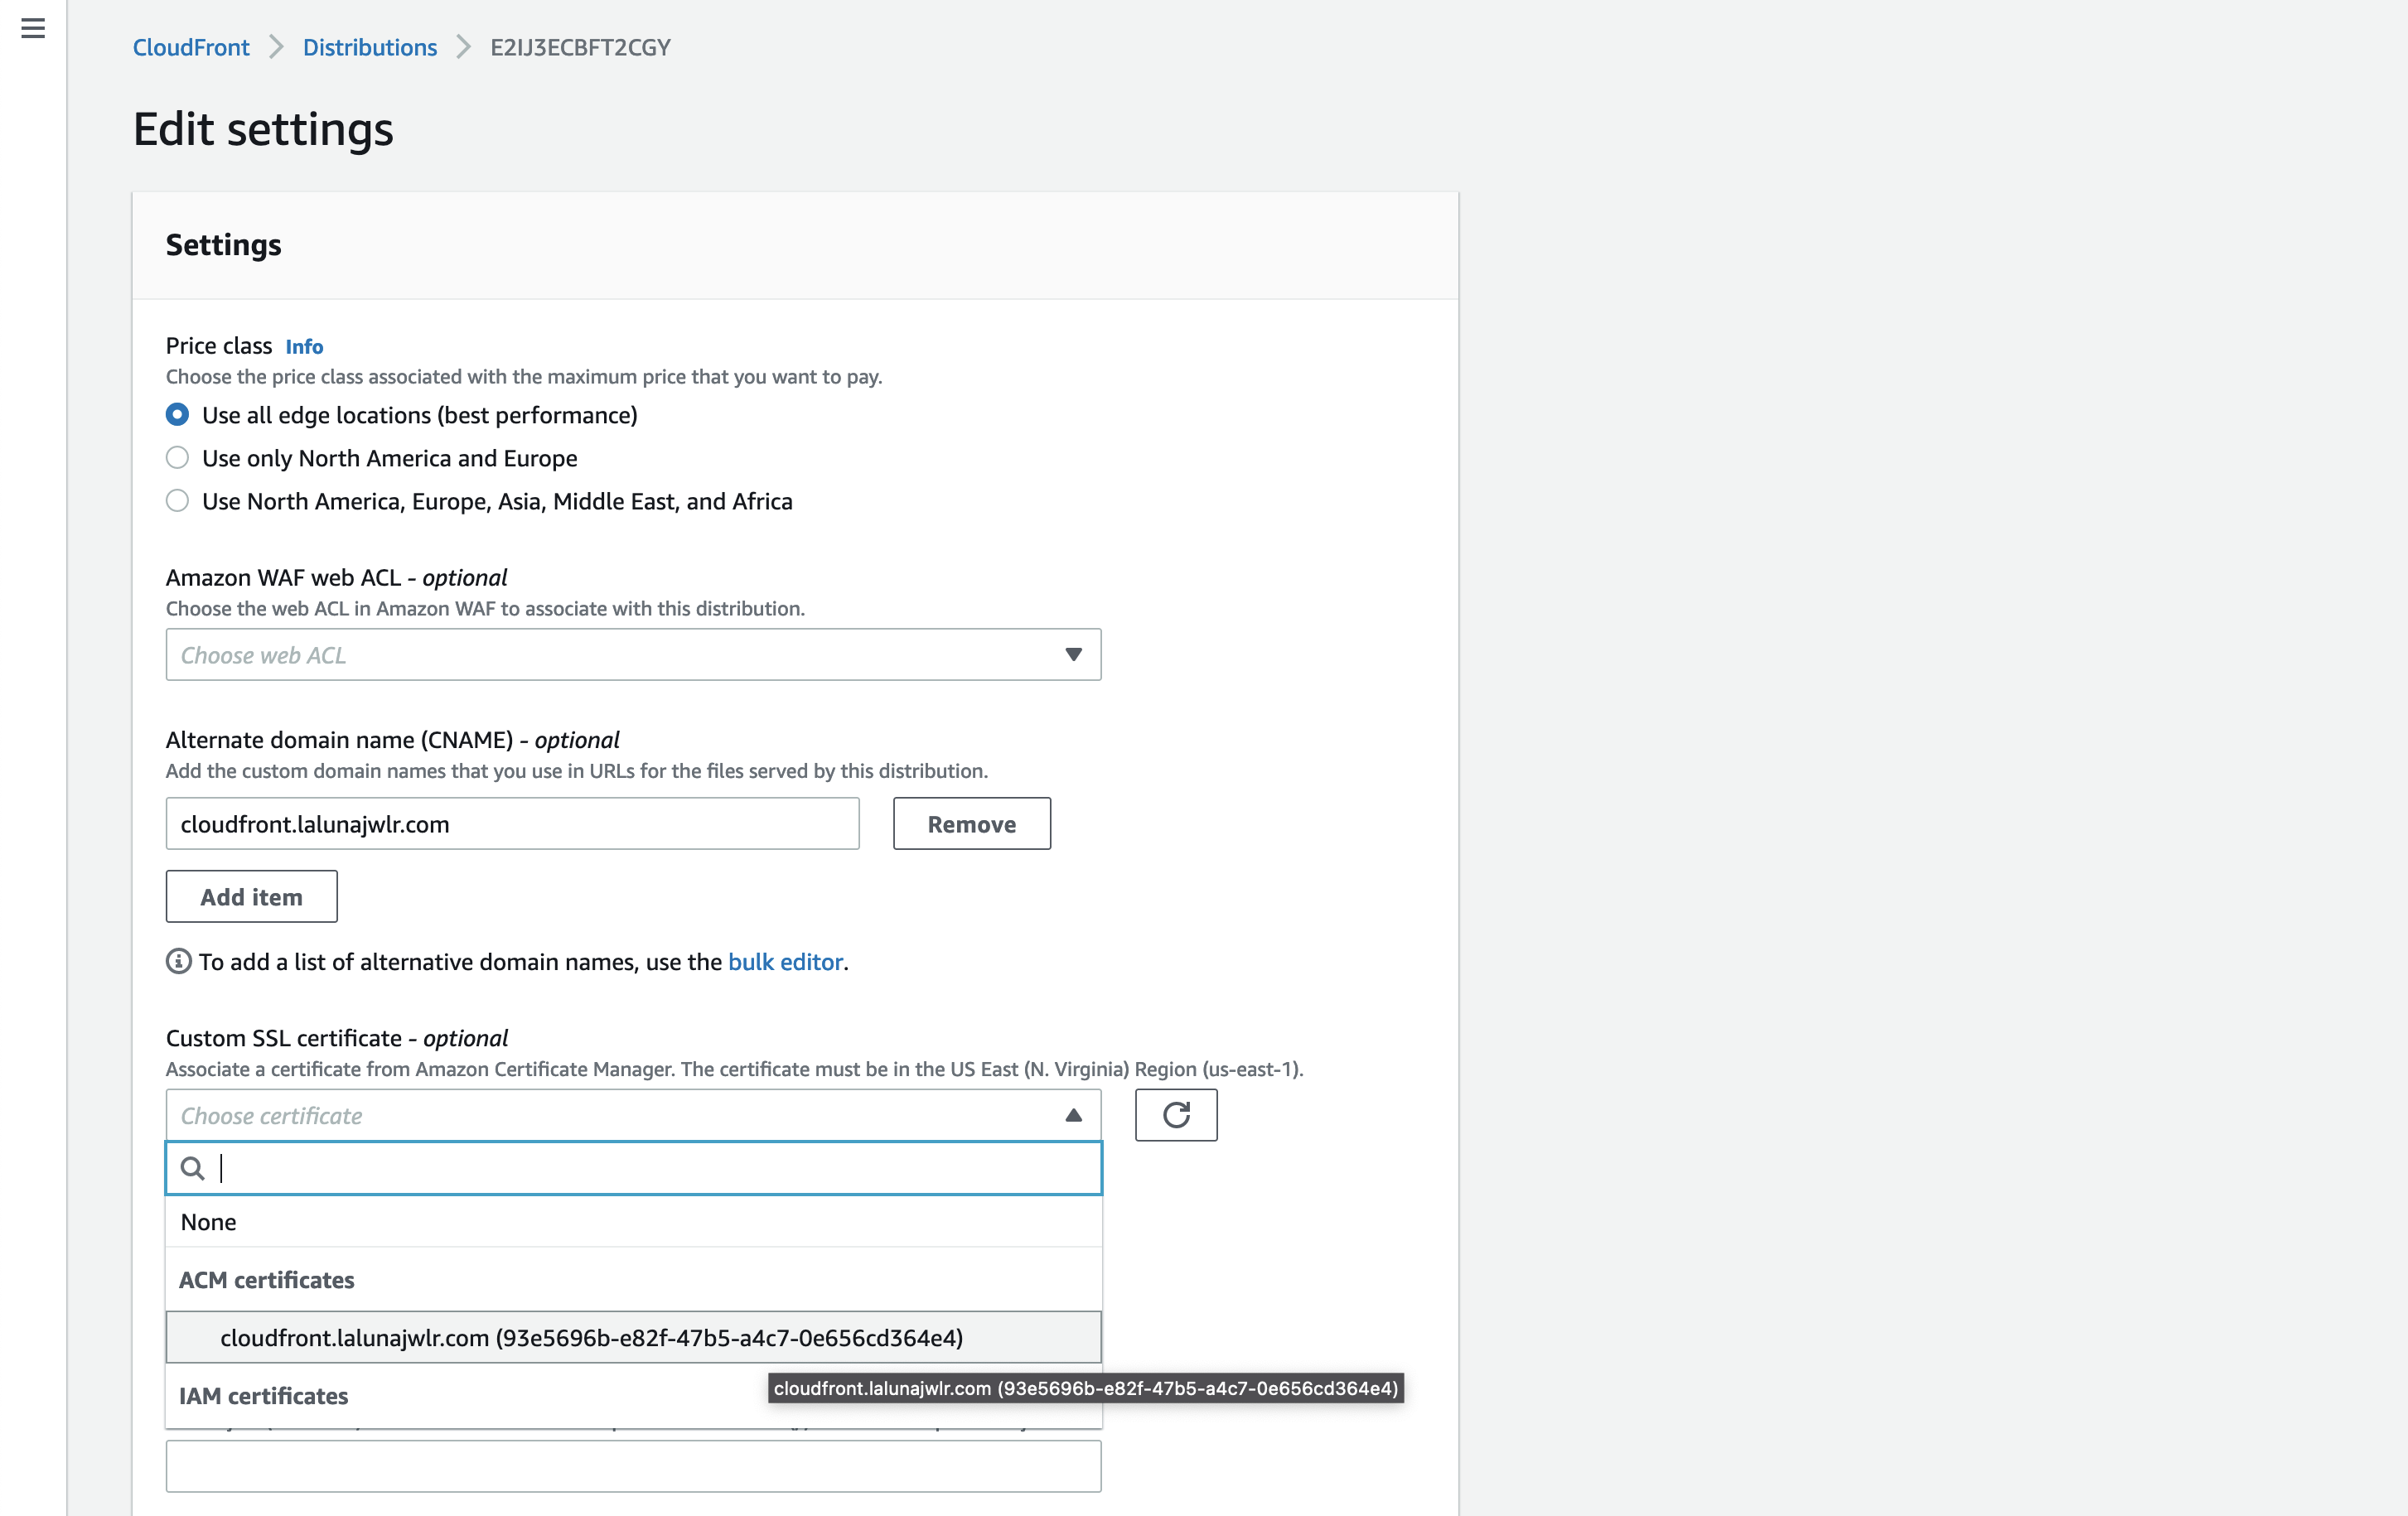
After it's done, you should be granted a certificate - go back to CloudFront Distribution settings, and pick the certificate for your alternate domain name from the list:
In the end, you should end up with a CloudFront set up with your app on Qovery and using an alternate domain name. Now it's time for you to tweak the CloudFront settings to meet your needs.