The Lifecycle Job is a powerful feature that allows you to run any kind of commands before or after your environment is deployed. It can be used to run database migrations, create a new database, or even to run a script that will create a new user.
Some use cases:
- Run Terraform, Pulumi, or any other infrastructure as code tool to create resources.
- You want to deploy SQS, SNS, Lambdas, or any other AWS resources.
- You want to deploy MongoDB Atlas, Google BigQuery, or any other cloud services.
- Seed your database when your environment is created.
In a more general way, you can see the Lifecycle Job as a way to create and destroy resources when your environment is deployed or deleted. Possibilities are endless.
How to use Lifecycle Job (example with Terraform)
In this example, we will use Terraform to create a new AWS RDS MySQL instance. I will use this example to schematize the process of using the Lifecycle Job. ⚠️ Note that you can use any other tool to create your resources. Lifecycle Job is not limited to Terraform. However, Terraform is a great way to show the power of the Lifecycle Job since it requires a lot of configuration and can be used to create a lot of different resources.
Execution Flow
Here is the execution flow when my Environment is deployed:
- Qovery builds my Lifecycle Job (and my others services).
- Qovery runs my Lifecycle Job Start Event (and my others services).
- My Lifecycle Job creates a new AWS RDS MySQL instance.
- My Lifecycle Job injects the database credentials into a
/qovery-output/qovery-output.jsonfile. - Qovery reads the
/qovery-output/qovery-output.jsonfile and injects the database credentials into my Environment Variables. - My others services can access my database.
When my Environment is deleted:
- Qovery runs my Lifecycle Job Deleted Event
- My Lifecycle Job destroys the AWS RDS MySQL instance.
- Qovery destroys my Environment and release all the resources.
Create a Lifecycle Job
Before you begin, this page assumes the following:
- You have a Qovery account
- You have an existing project and an existing environment.
Fork this repository.
Go inside your Environment, and add a Lifecycle Job.

Give a name, description, pick your GitHub account, and select the repository of the Lifecycle Job. In our example, the root application path is
/examples/aws-rds-with-terraform.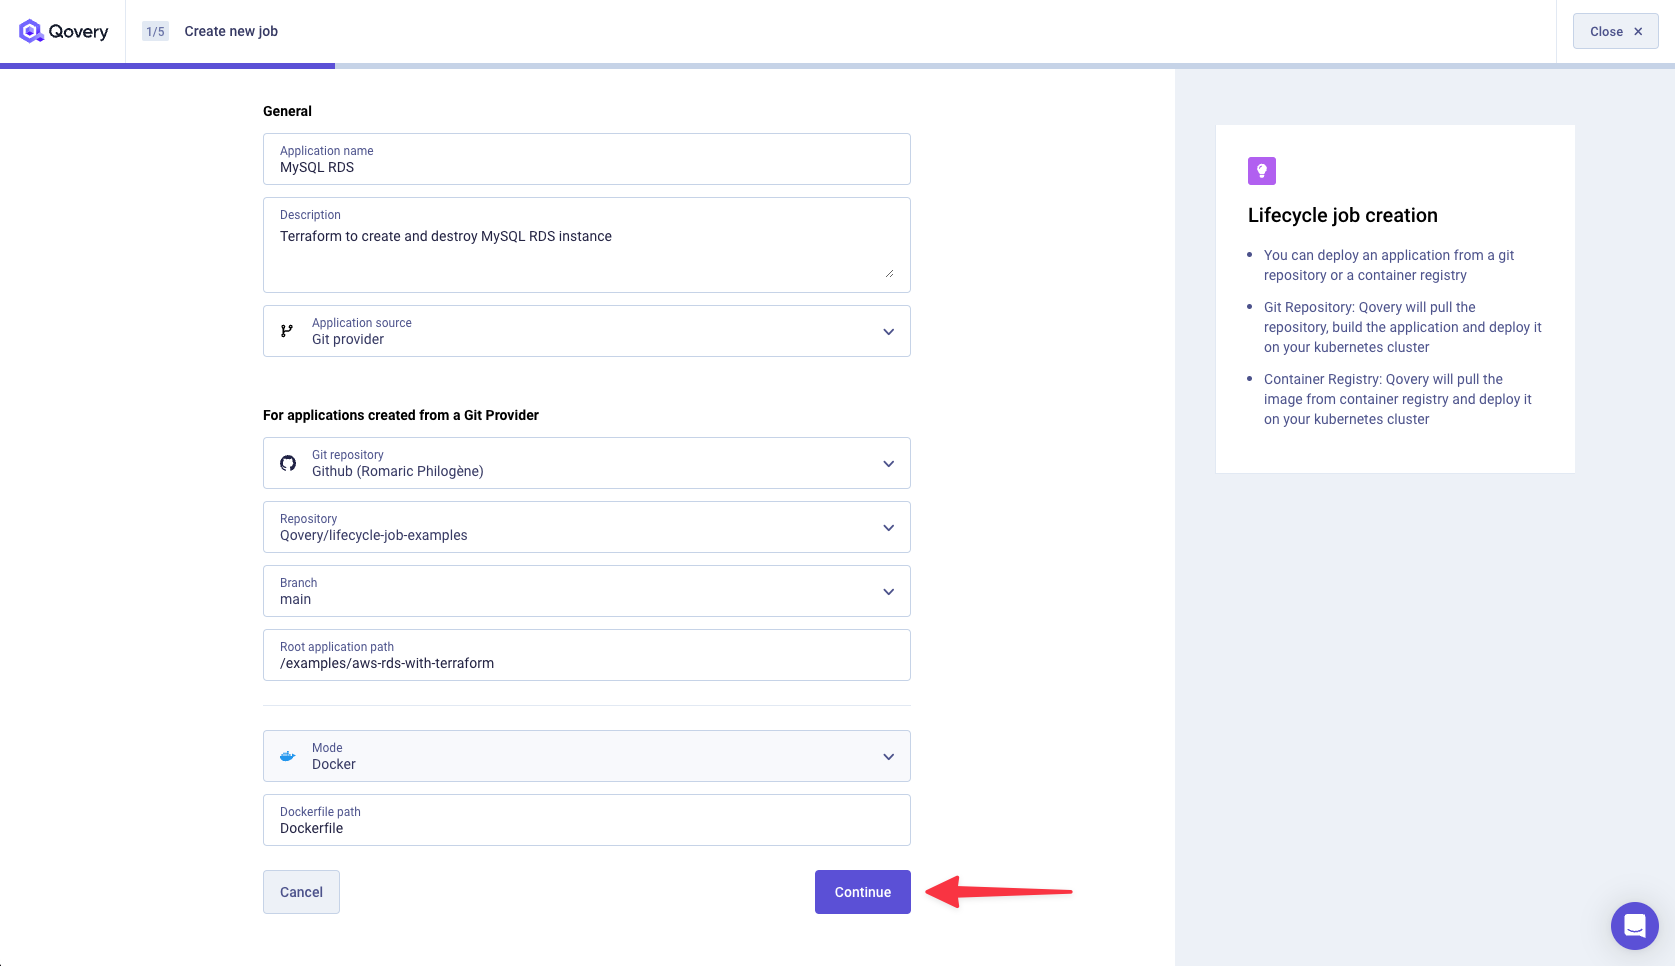
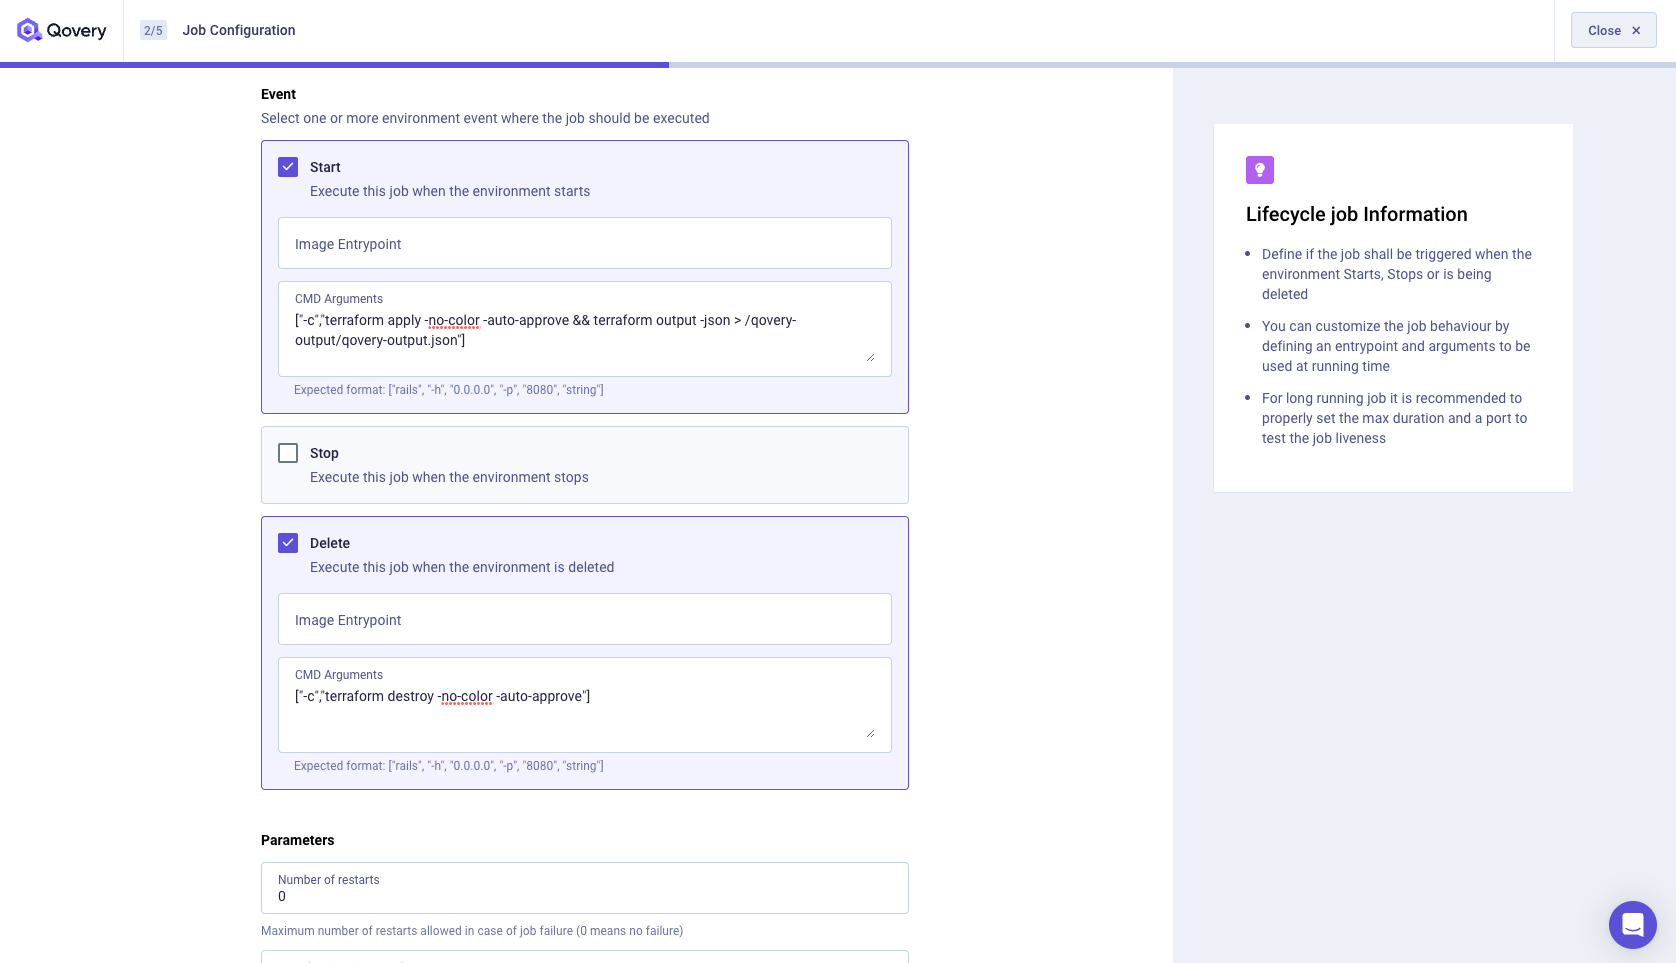
Since we are using Terraform, we want to make sure that our MySQL RDS instance is created when our Environment is deployed. So we select the Start Event. We also want to make sure that our MySQL RDS instance is destroyed when our Environment is deleted. So we select the Deleted Event.
If you look at our Dockerfile in the repository, you will see that we are using the official Terraform image. I have also inserted by default the
ENTRYPOINT ["/bin/sh"]to simplify the Qovery Lifecycle Job configuration.For the Start Event, we want to run the
terraform apply -no-color -auto-approvecommand. We don't need to run theterraform initcommand since it is already done in the Dockerfile.You will also notice that we are also using
&& terraform output -json > /qovery-output/qovery-output.jsonto create a/qovery-output/qovery-output.jsonfile. This file will be used by Qovery to inject the database credentials into our Environment Variables. We will cover this part later.For the Deleted Event, we want to run the
terraform destroy -no-color -auto-approvecommand.So for the Start Event, we have:
["-c","terraform apply -no-color -auto-approve && terraform output -json > /qovery-output/qovery-output.json"]and for the Deleted Event, we have:["-c","terraform destroy -no-color -auto-approve"]. Feel free to copy/paste these commands.I recommend setting the Timeout to 1800 seconds (30 minutes). It is the maximum time your Lifecycle Job can run. If your Lifecycle Job takes more than 30 minutes to run it will be stopped by Qovery. In our case, it should take less than 10 minutes to create the AWS RDS MySQL instance. But let's be safe.
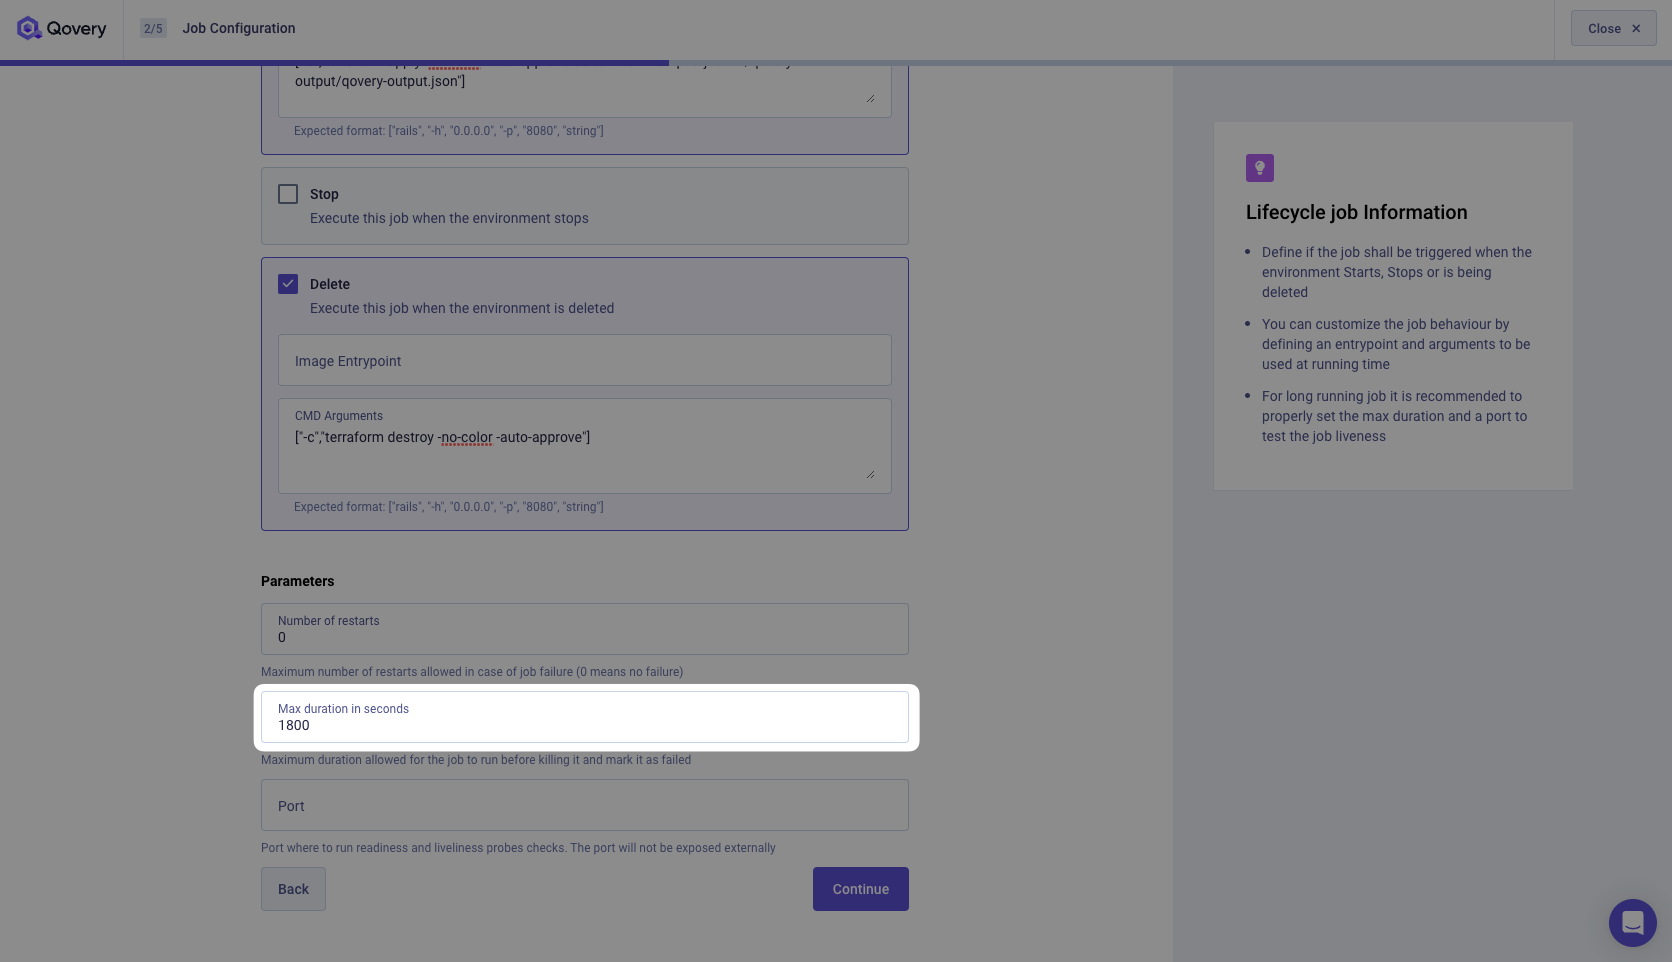
Click Continue.
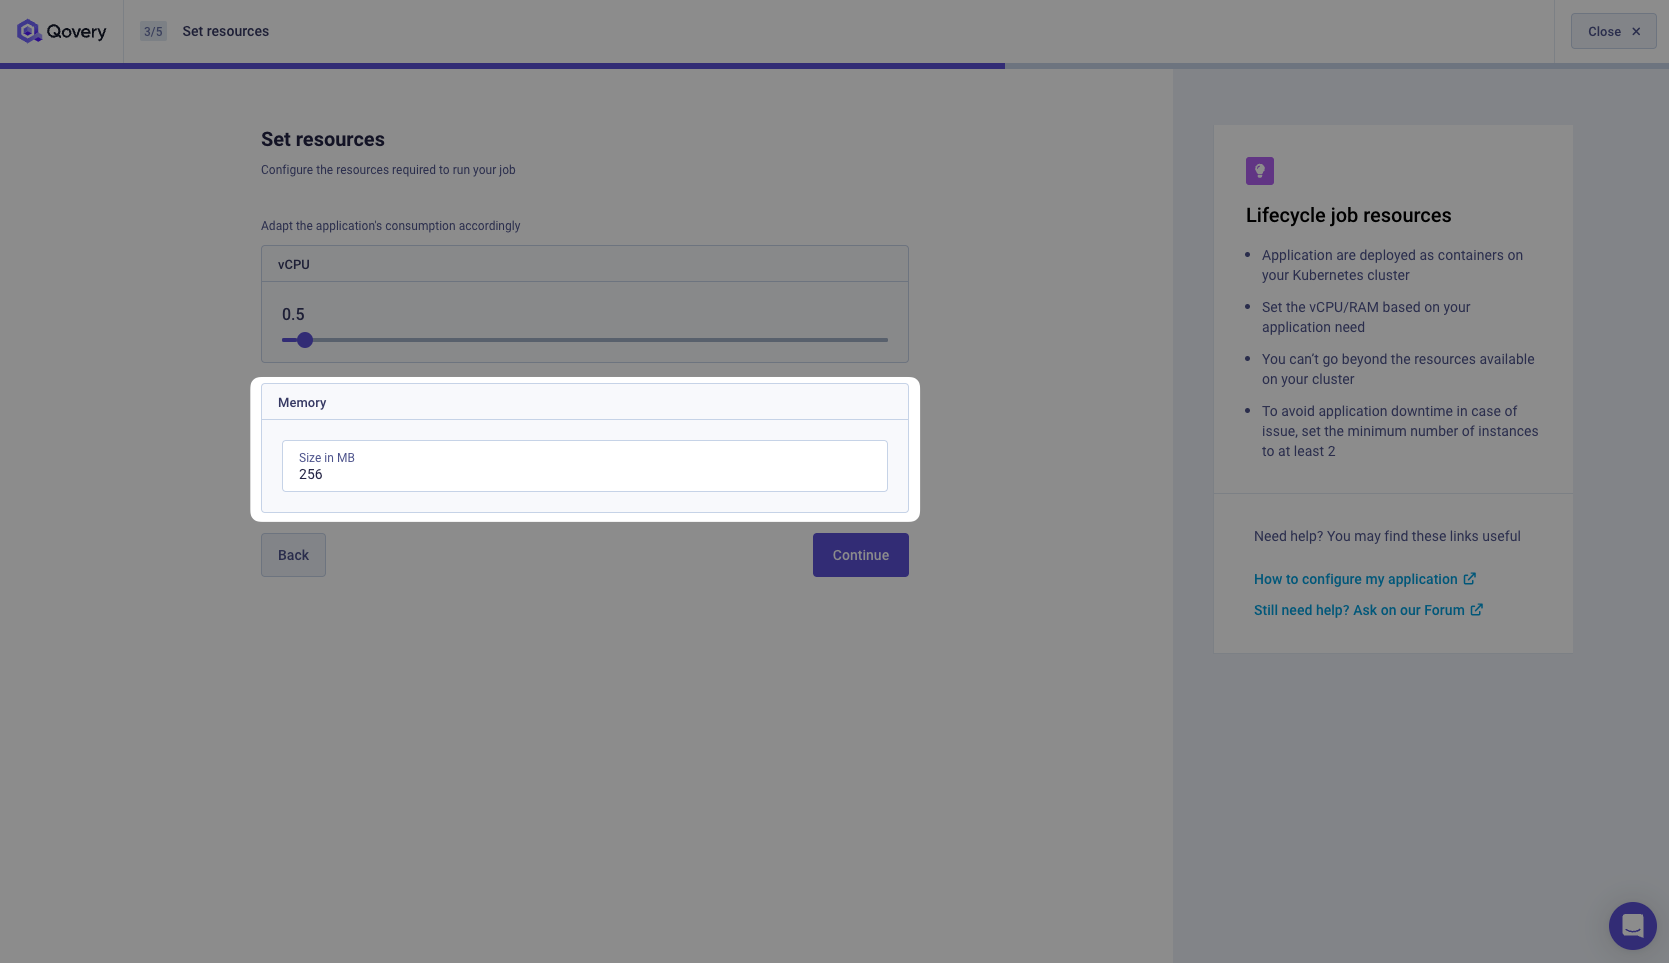
Now we need to set the vCPU and RAM required to run our Job. We can allocate 0.5 CPU and 256 MB of RAM. It's more than enough.
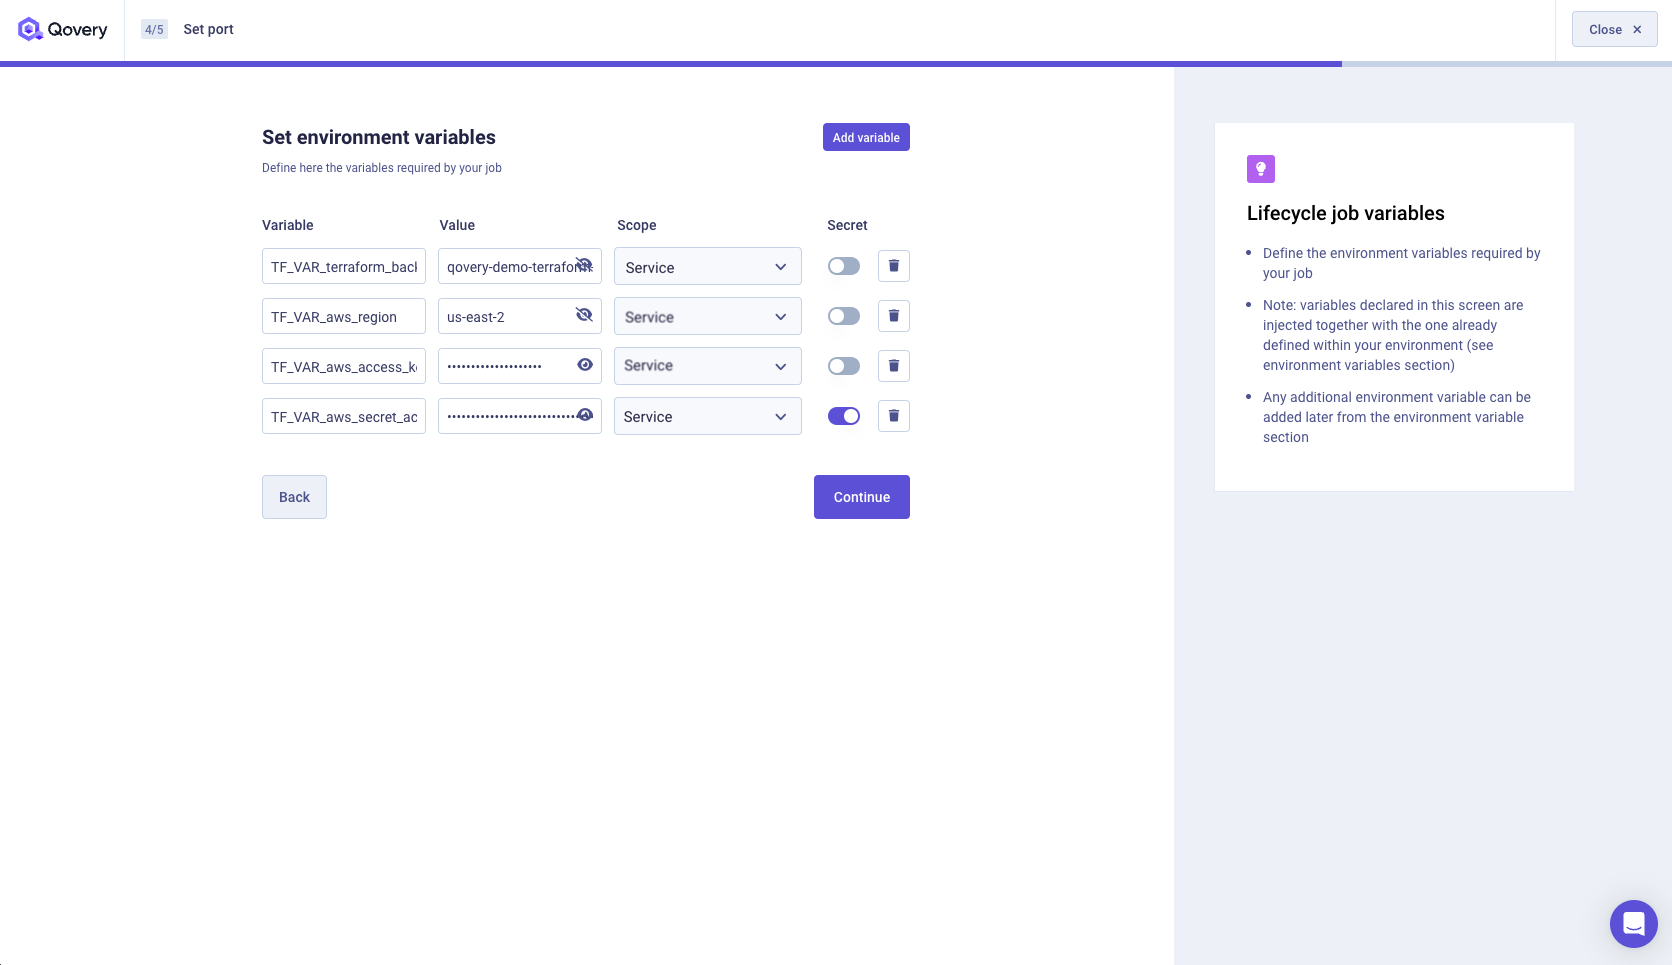
We need to set the Environment Variables required by our Lifecycle Job. In our case, we need to set the AWS credentials and some other environment variables. If you look at our Dockerfile, you will find the declaration of all those environment variables. You can copy/paste them.
Dockerfile...ARG TF_VAR_terraform_backend_bucketARG TF_VAR_aws_regionARG TF_VAR_aws_access_key_idARG TF_VAR_aws_secret_access_keyARG TF_VAR_qovery_environment_id...Those are the ones that we need to set.
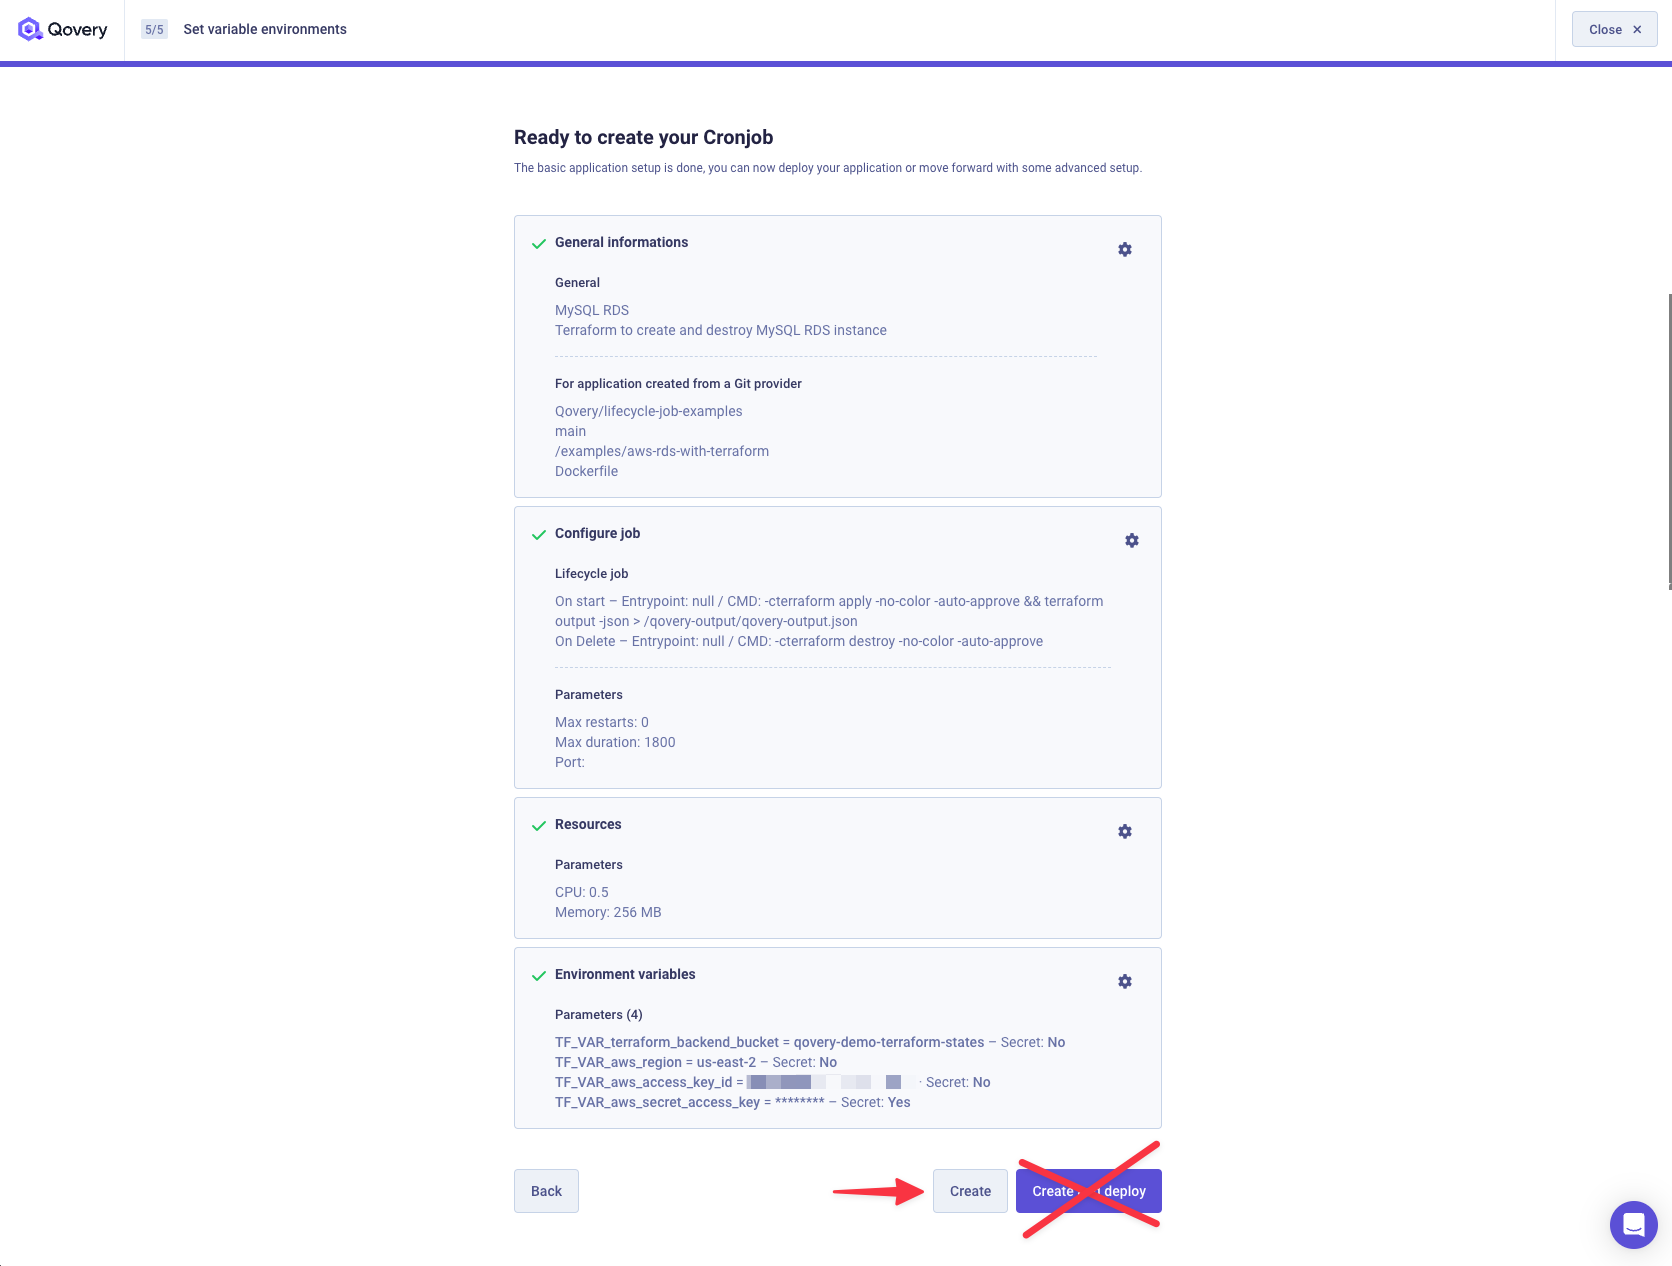
Click on Continue.
Then click on Create (and not Create and Deploy).
Congrats, your Lifecycle Job is created. Now we just need to add the TF_VAR_qovery_environment_id environment variable before launching it.
Make your Terraform deployment multi-environments ready
To support multiple environments, we need to make sure that the name of the S3 object key where Terraform will store the state of your infrastructure is unique. To do that, we will use the TF_VAR_qovery_environment_id environment variable. This environment variable is automatically created by Qovery and contains the ID of your Environment. We just need to create an environment variable alias.
Go inside your MySQL RDS service, click on the Variables tab.
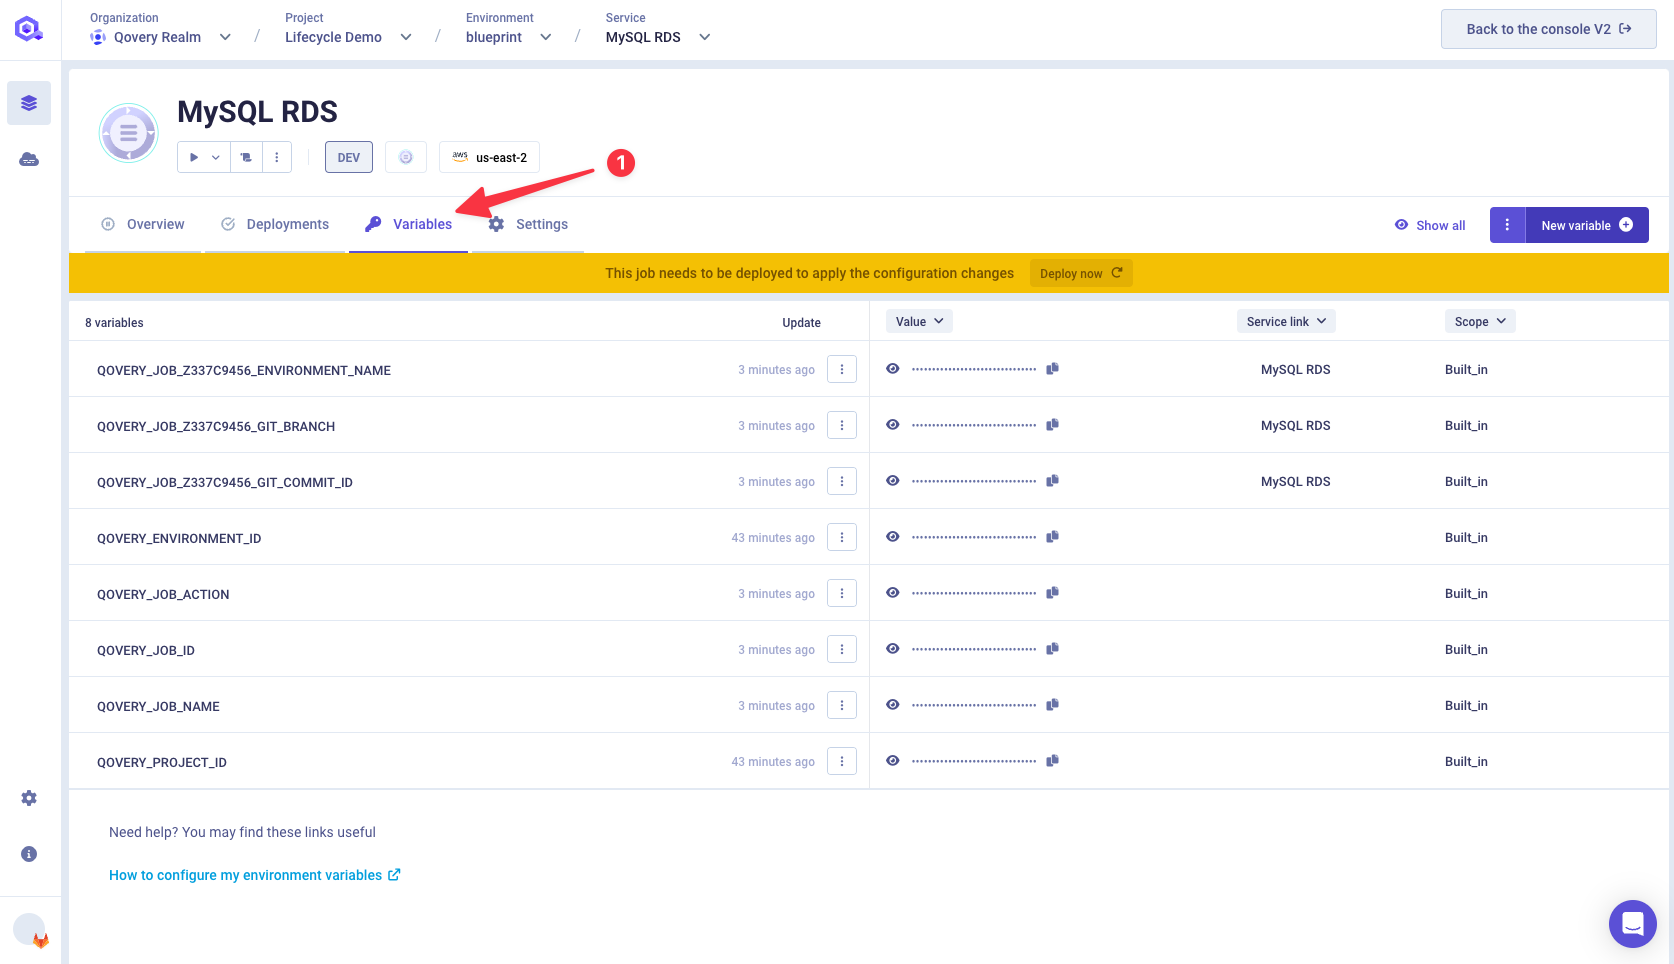
Search for
QOVERY_ENVIRONMENT_IDbuilt-in environment variable. Then click on Creat alias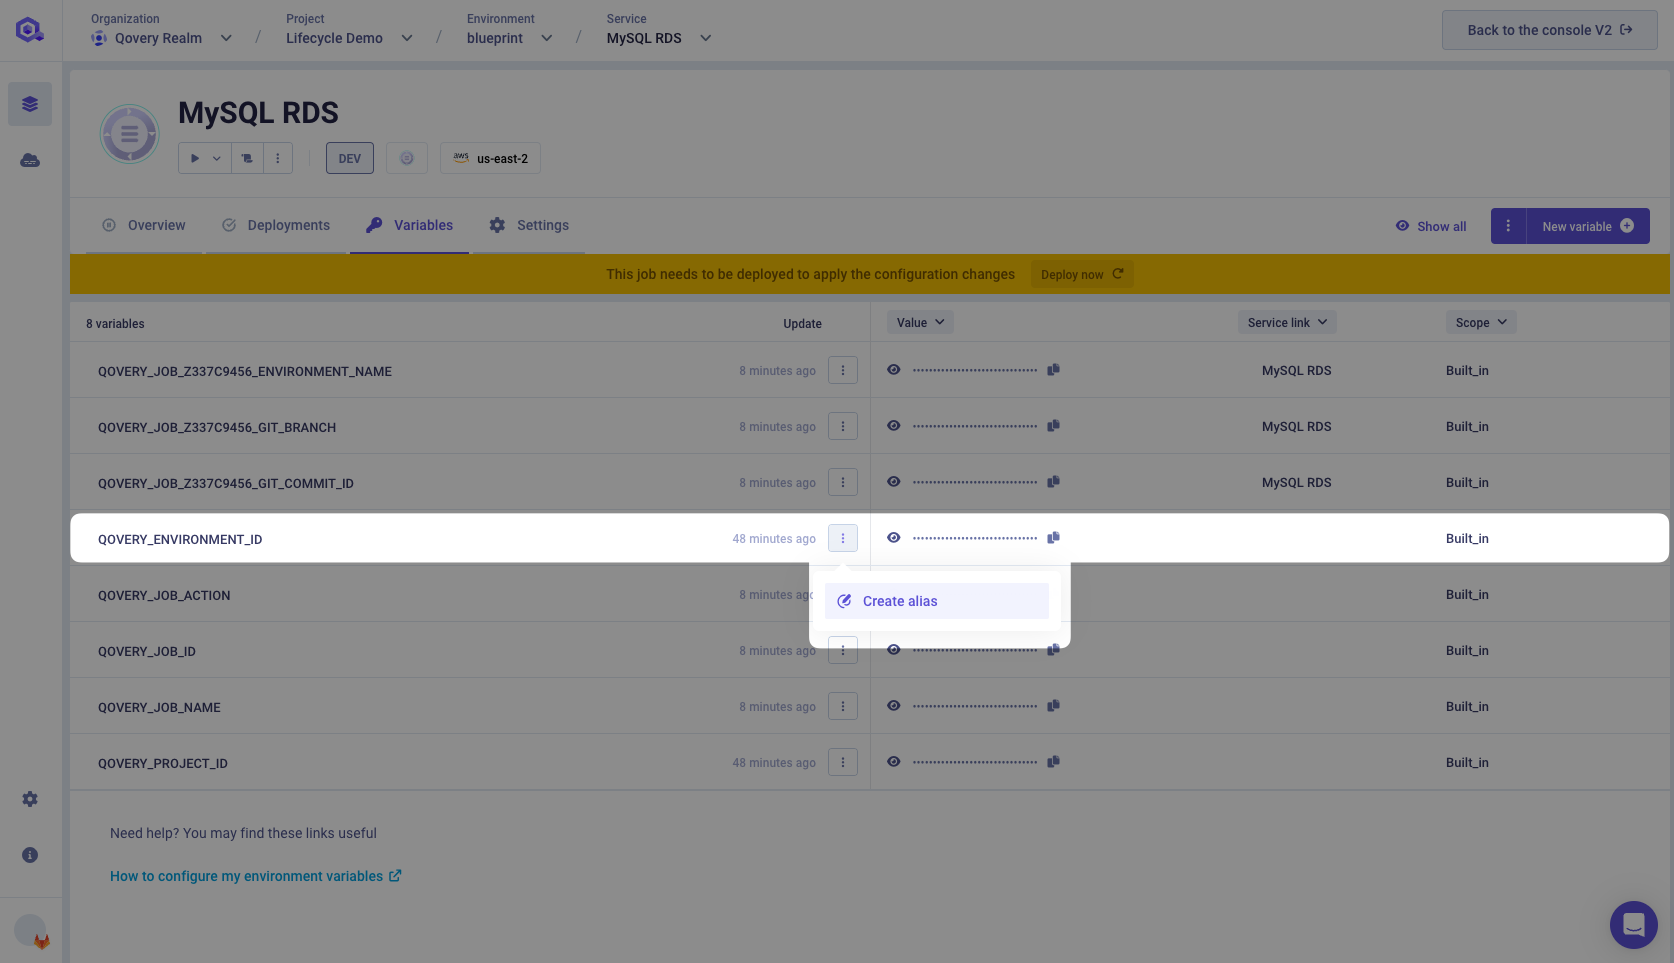
Set the name of the environment variable to
TF_VAR_qovery_environment_idwith a service scope and click on Confirm.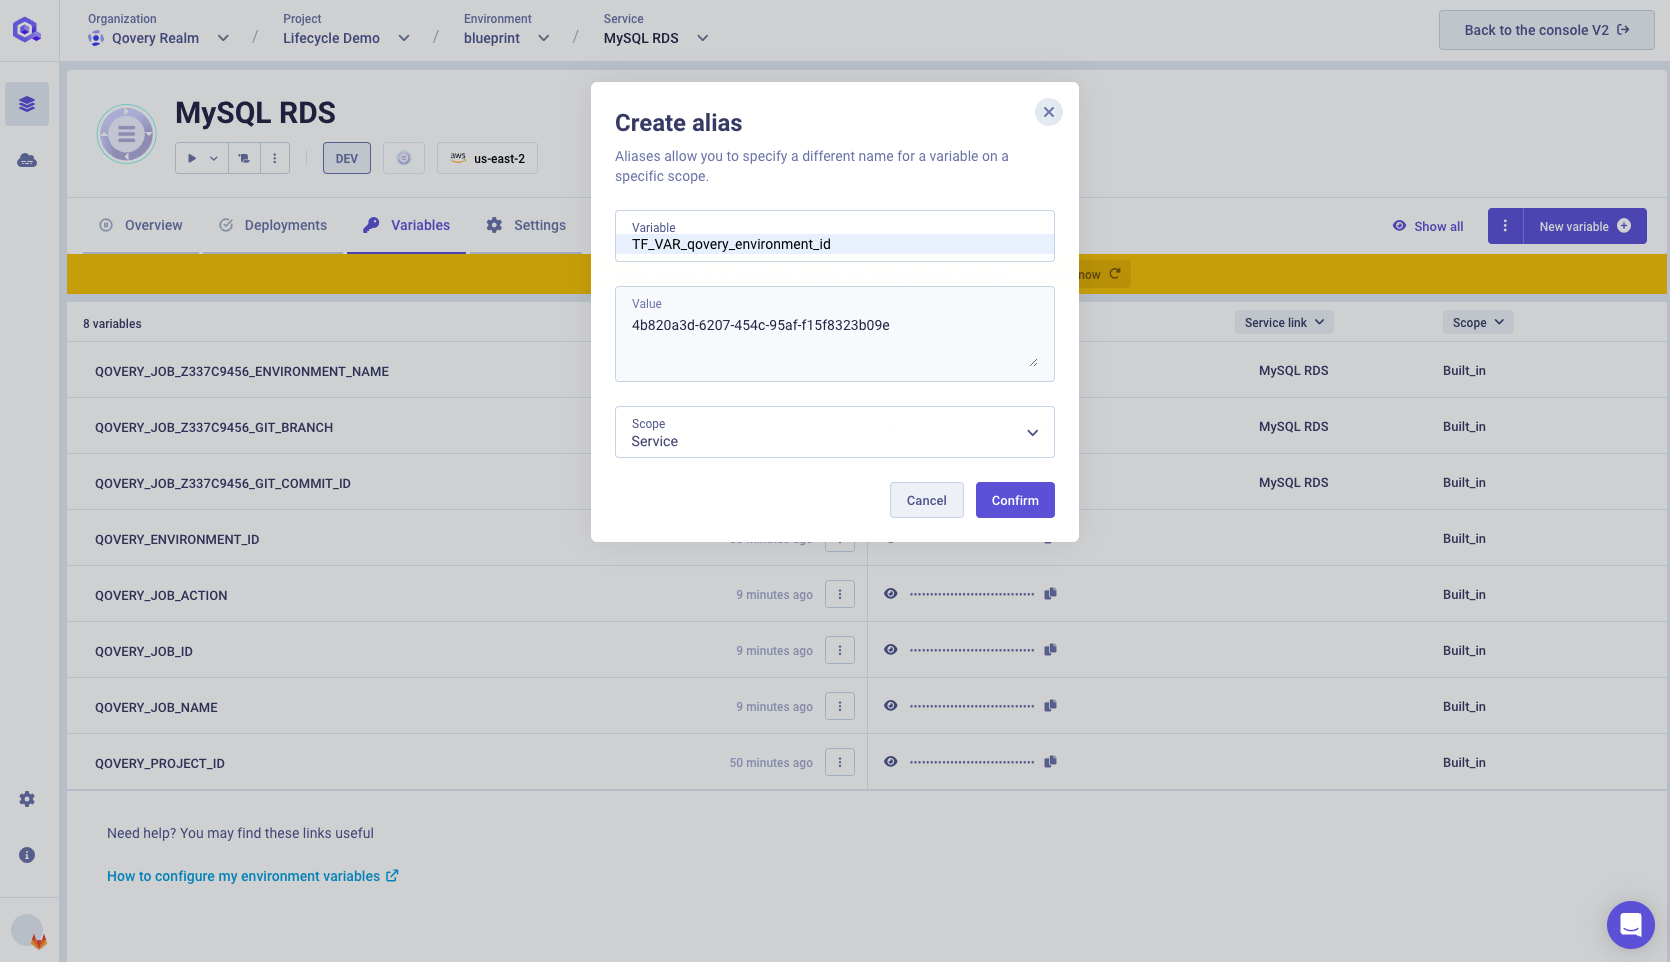
Deploy AWS RDS MySQL instance
Now you are ready to deploy your Lifecycle Job and see what happened.
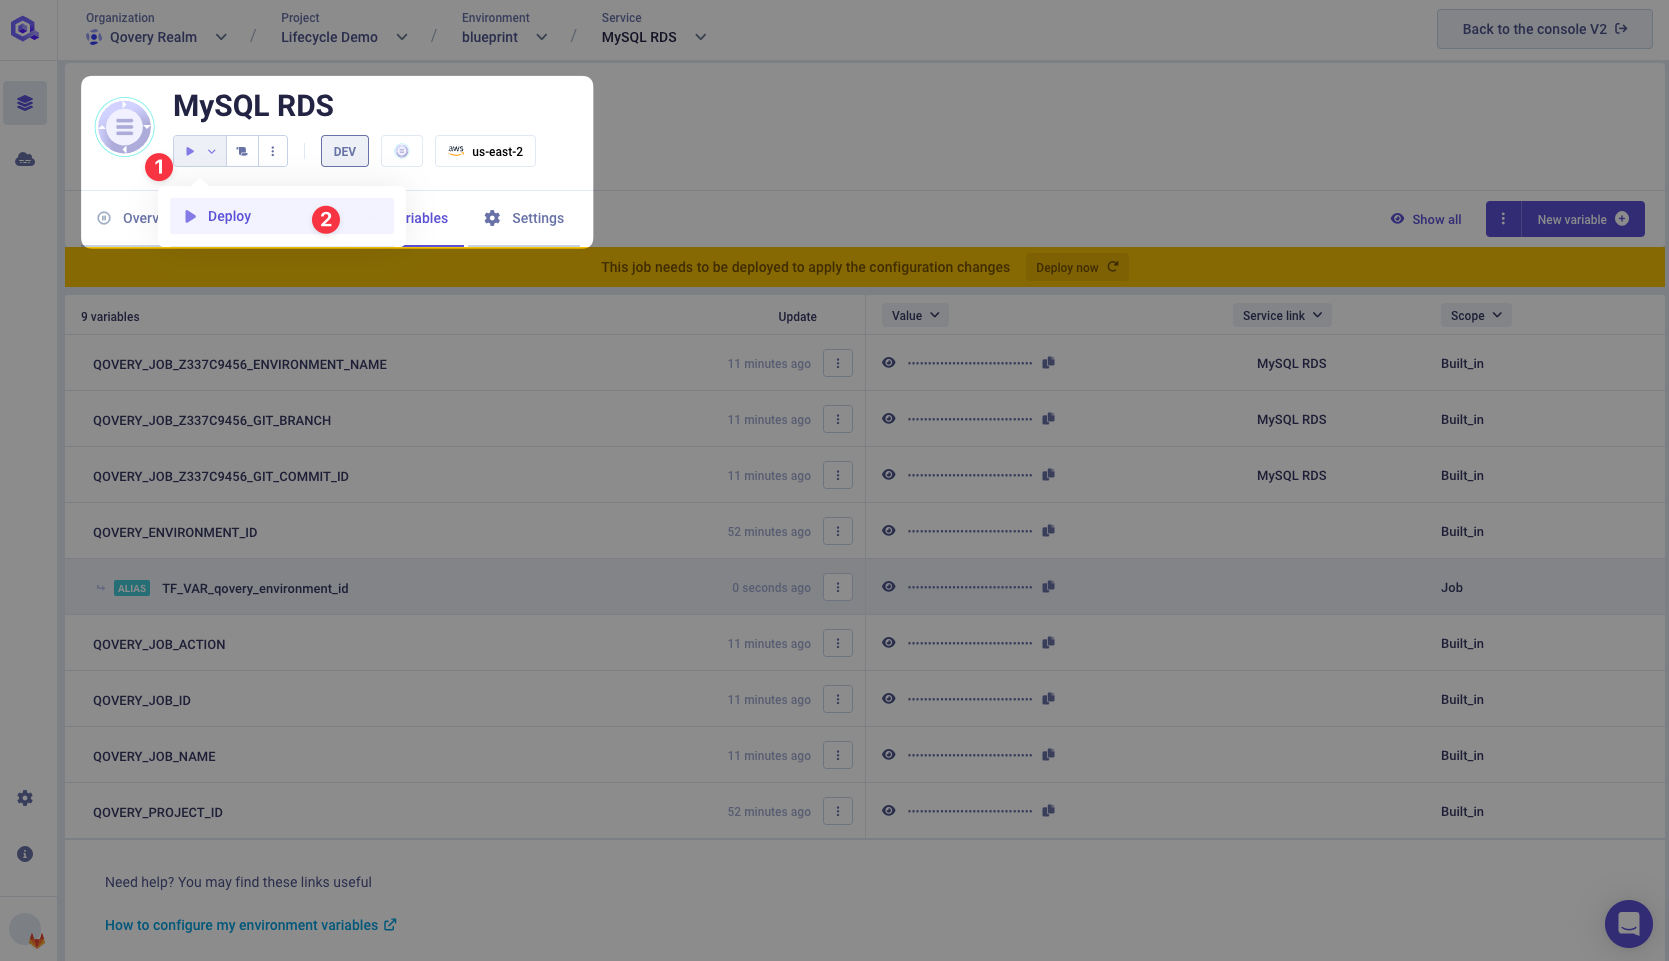
The job execution will take approximately 3 to 10 minutes.
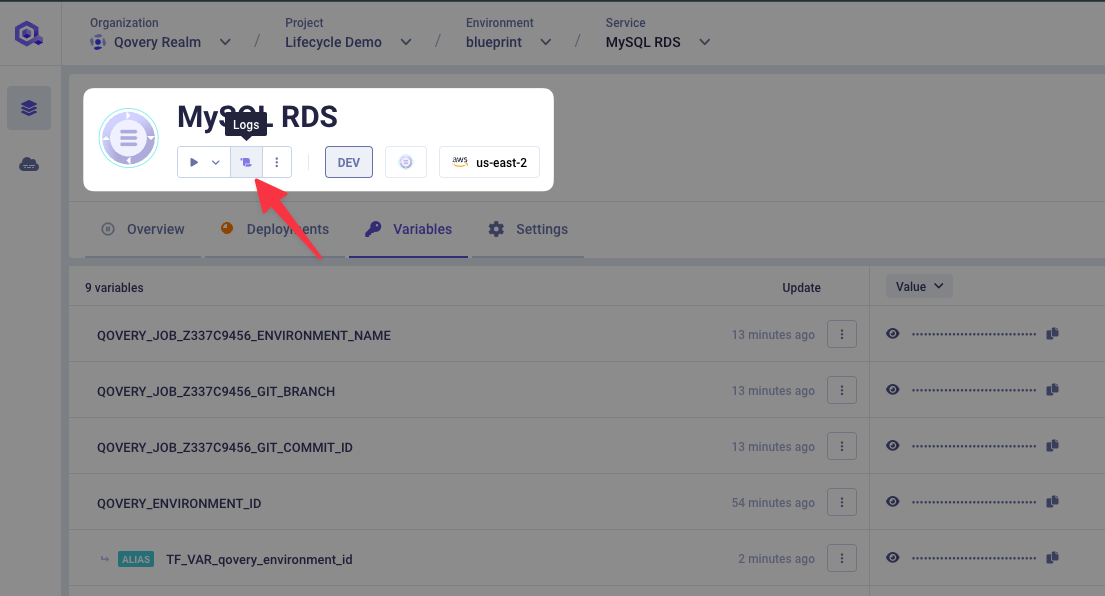
Follow the logs of the job execution by clicking on the Logs button.
From the Deployment logs tab you can see that your Lifecycle Job is built and that the
terraform initcommand is executed.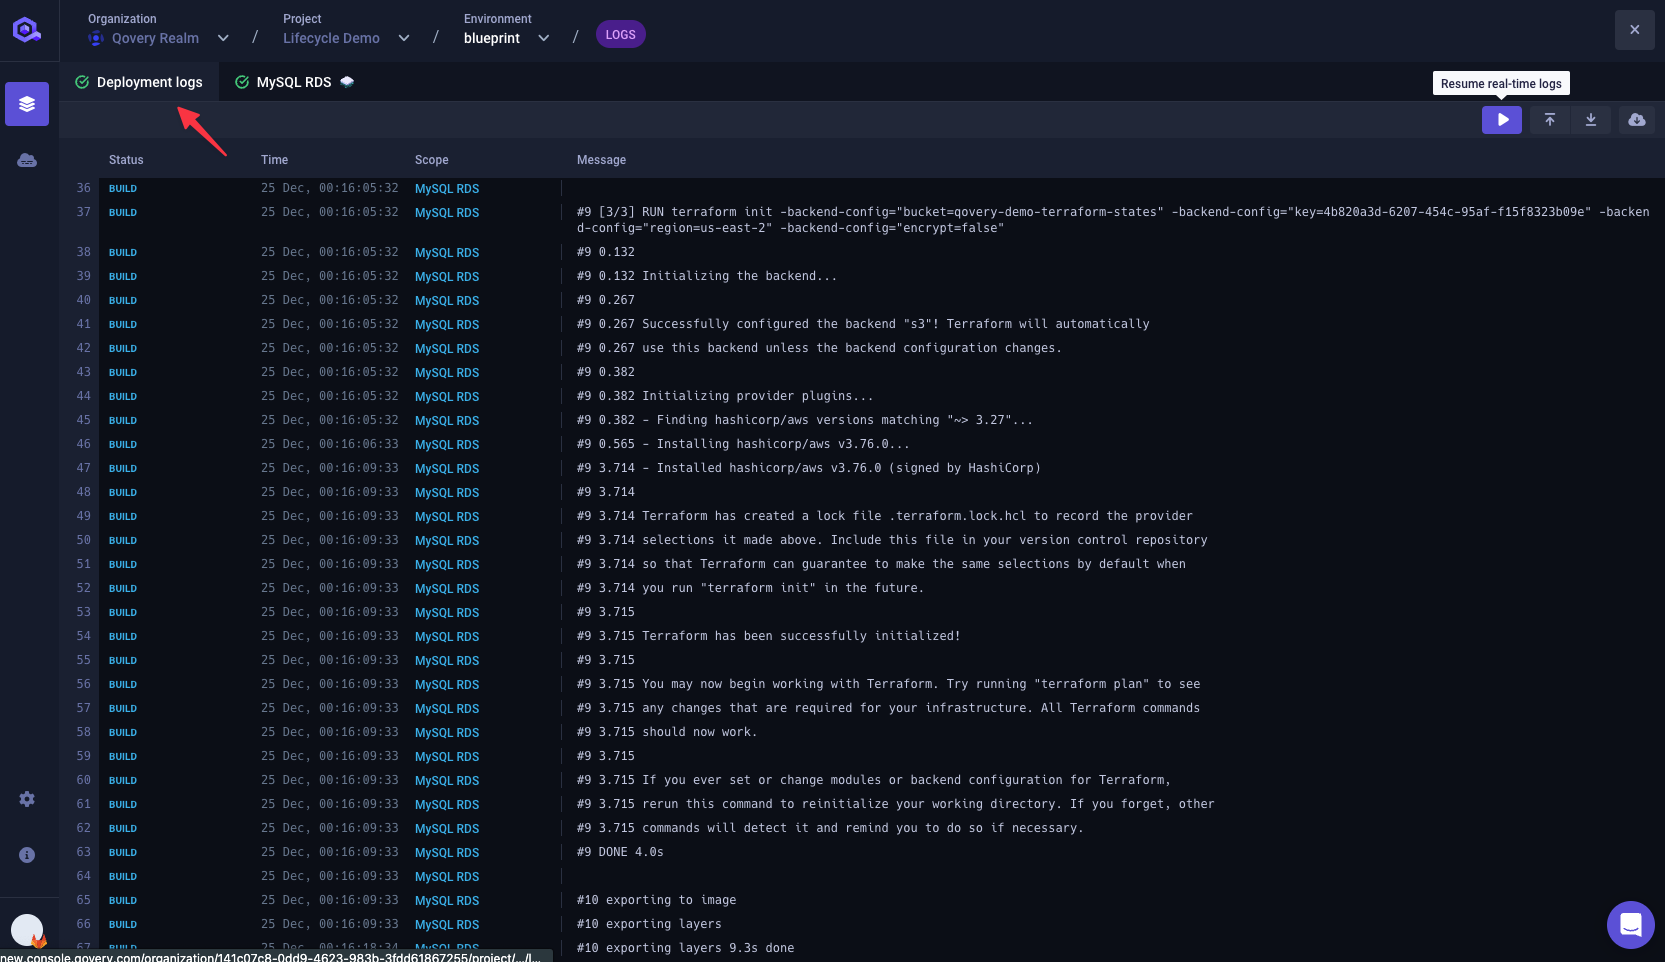
From the MySQL RDS tab you can see that the
terraform apply -no-color -auto-approvecommand is executed. The creation of the AWS RDS MySQL instance is in progress.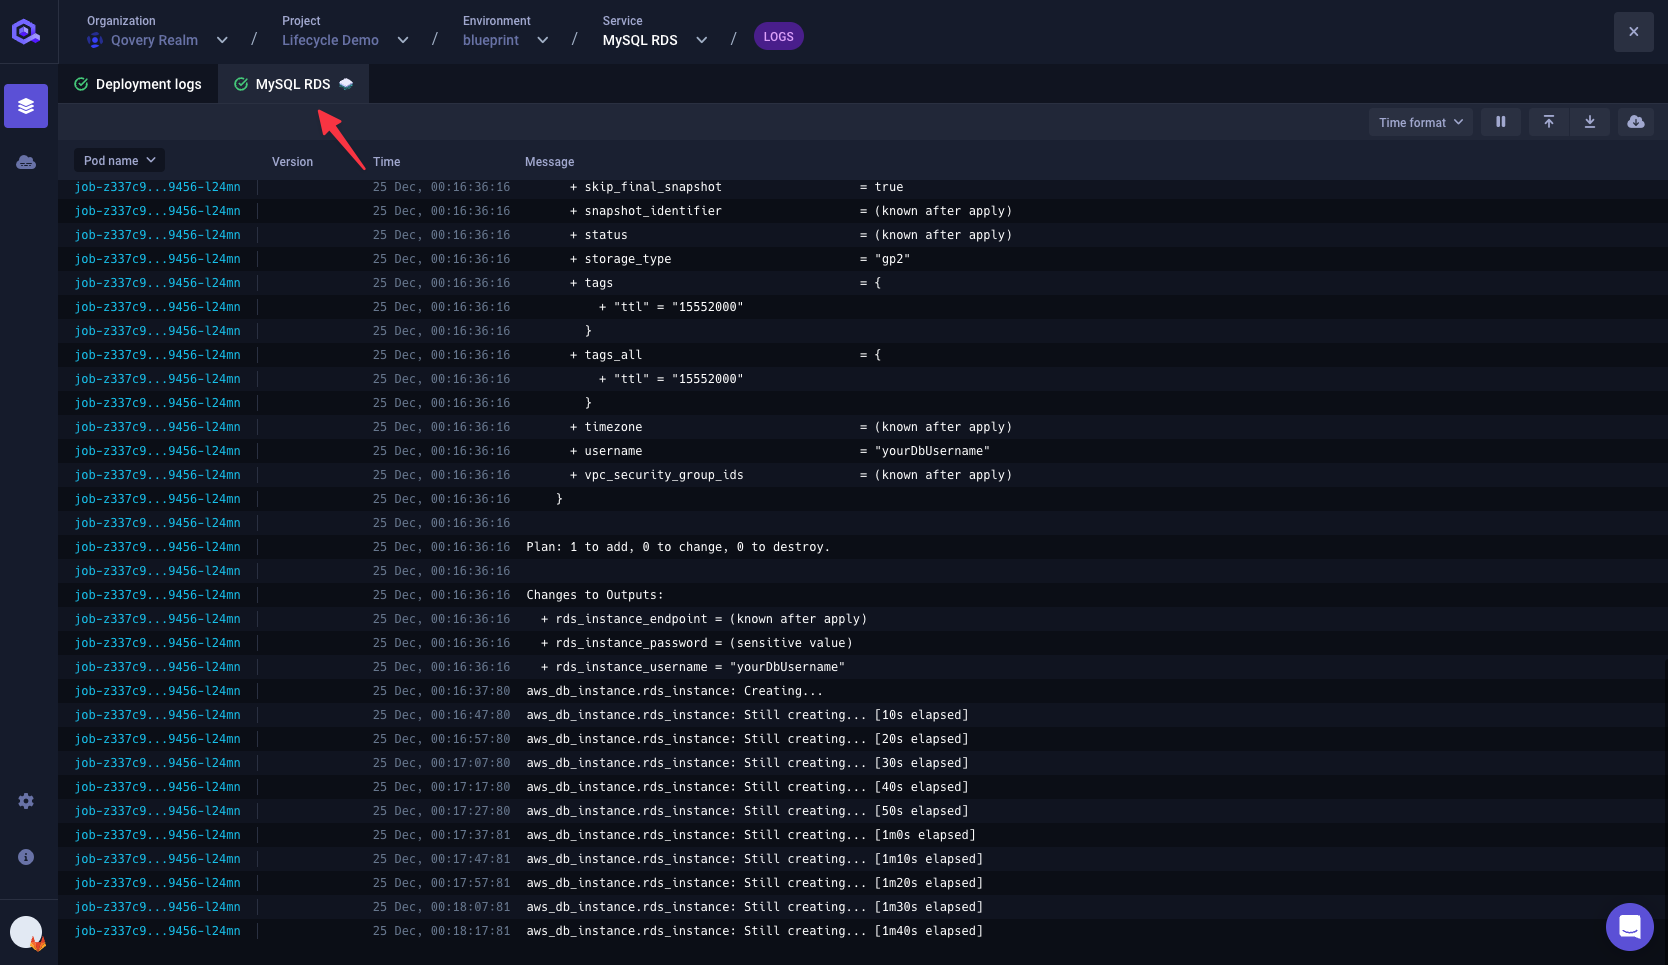
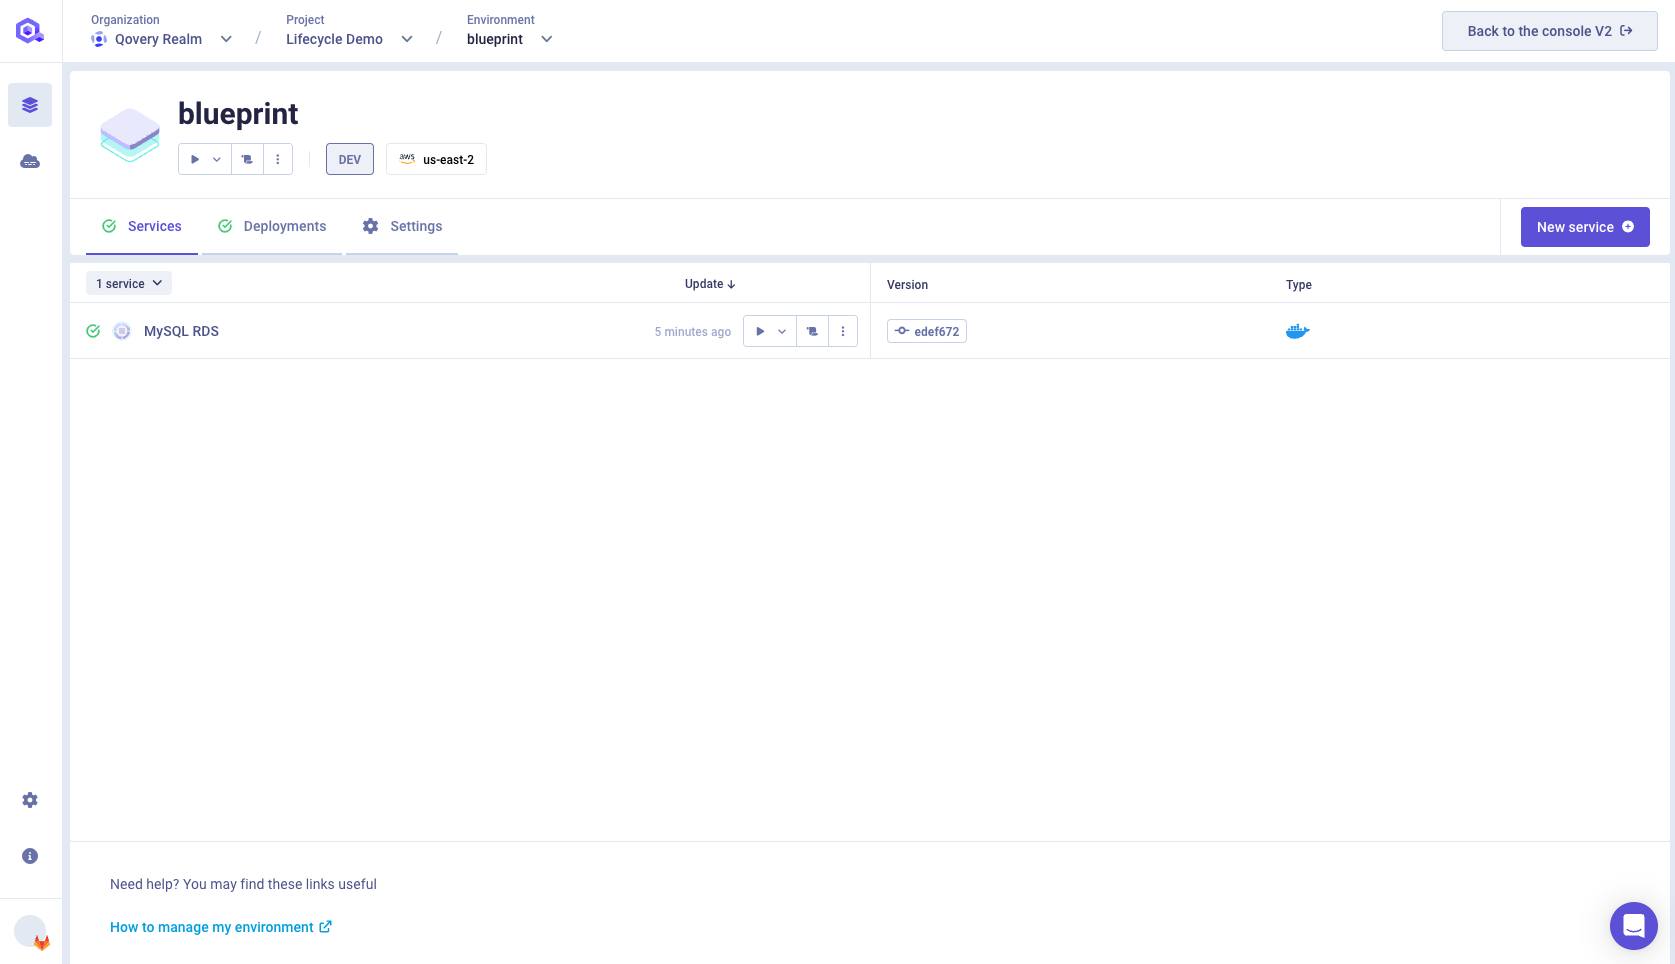
Once the deployment is done, you should see that the AWS RDS MySQL instance is green and completed.
Get the MySQL RDS credentials from the Lifecycle Job
Now that the AWS RDS MySQL instance is created, we need to get the credentials to connect to it. We have use the terraform output -json > /qovery-output/qovery-output.json command to get the credentials. If you go back to the Variables tab of your MySQL RDS service, you will see that the QOVERY_OUTPUT_** environment variables are created.
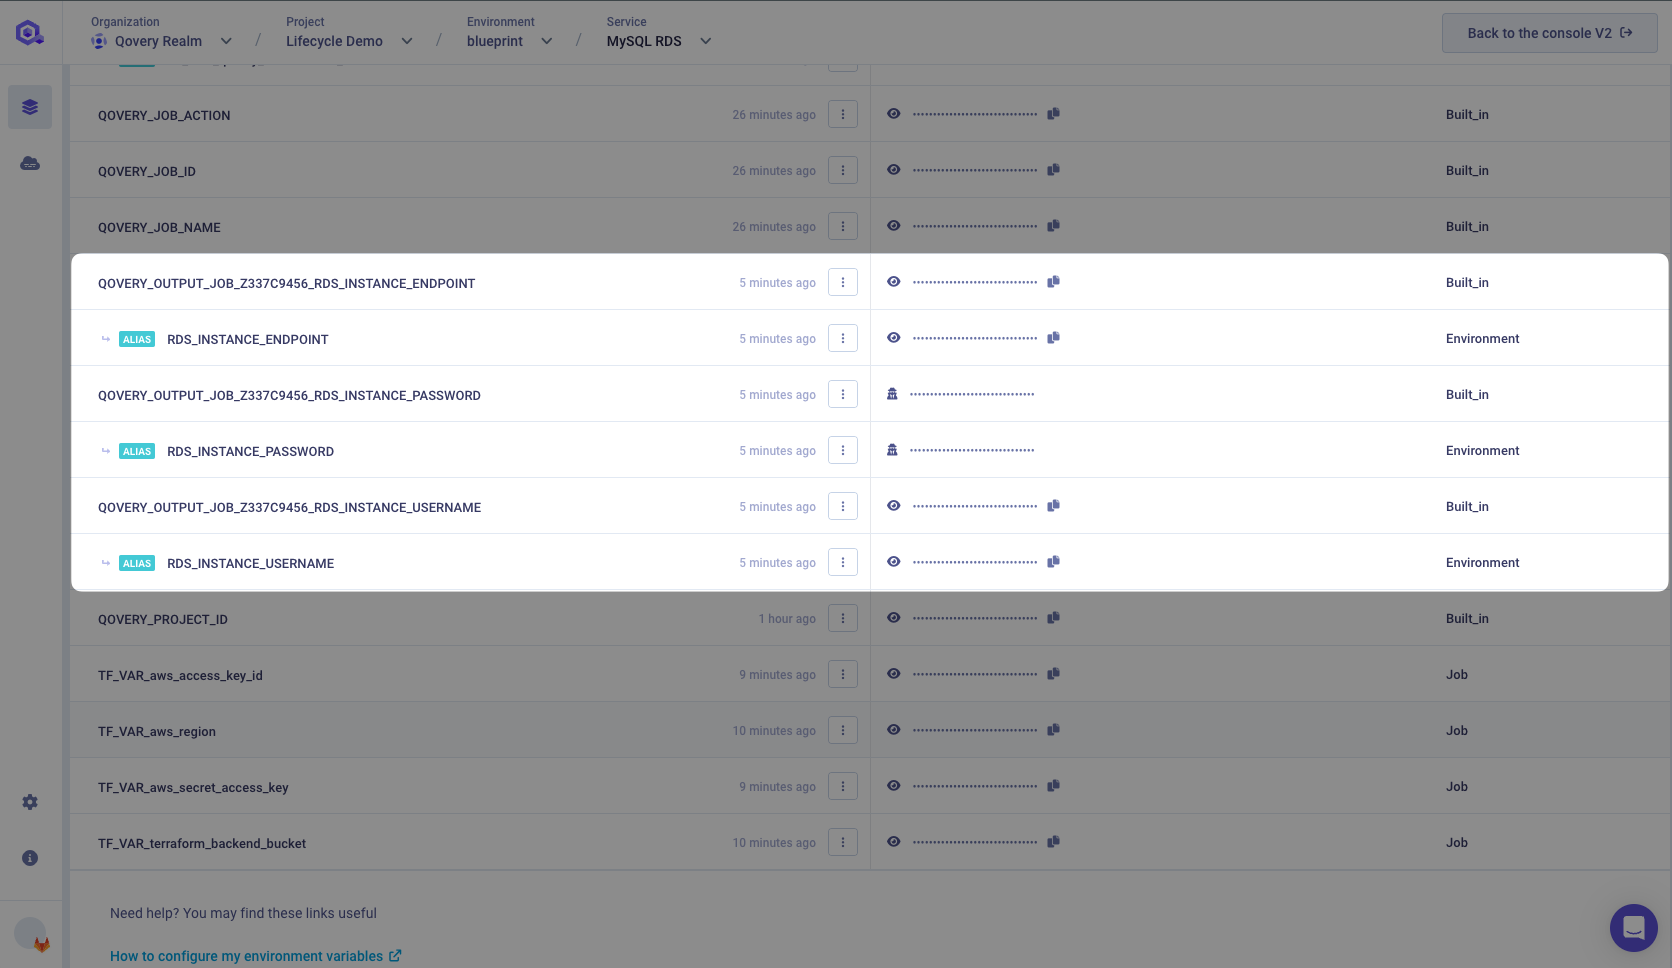
By using terraform output -json > /qovery-output/qovery-output.json Qovery automatically create those environment variables for you. You can use them in your application to connect to the AWS RDS MySQL instance. Learn more on how Lifecycle Job output...
FAQ
What happen if I delete my environment with your example?
If you delete your environment, the AWS RDS MySQL instance will be deleted too. You can see that in the MySQL RDS service logs. You will see that the terraform destroy -no-color -auto-approve command is executed.
Can I use the Lifecycle Job to deploy my application?
Some users ask us if they can use the Lifecycle Job to deploy their application. The answer is yes!. The Lifecycle Job is designed to deploy all type of resources. However, we recommend using the official Qovery way to deploy applications. Learn more on how to deploy your application...
What happen if I clone my Environment with the Lifecycle Job?
If you clone an Environment with the Lifecycle Job, the Lifecycle Job will be cloned too. In our example we have set the TF_VAR_qovery_environment_id environment variable to the QOVERY_ENVIRONMENT_ID built-in environment variable. So when you clone your Environment, the QOVERY_ENVIRONMENT_ID built-in environment variable will be different. That's why you need to create a new alias environment variable for the QOVERY_ENVIRONMENT_ID built-in environment variable. Learn more on how to clone an Environment...
What happen if I modify my Lifecycle Job after my Environment is deployed?
If you modify your Lifecycle Job after your Environment is deployed, the Lifecycle Job will be redeployed. In our example, since the state of our AWS RDS MySQL instance is stored in the S3 bucket, the AWS RDS MySQL instance will not be recreated. However, if you modify the main.tf file, the AWS RDS MySQL instance will be updated.
Wrapping up
In this guide, we have seen how to use the Lifecycle Job to create an AWS RDS MySQL instance with Terraform. We have also seen how to get the credentials of the AWS RDS MySQL instance to connect to it from our application. To learn more about the Lifecycle Job, you can read the Lifecycle Job documentation. To get more examples, check out the Qovery Lifecycle Examples repository.