While Qovery will soon provide basic metrics on apps resources usage, you might need a more advanced view on what happens on your infrastructure. There are many solutions on the market, one of them being Datadog. Datadog is one of the leading platforms for monitoring and observability, and it's pretty easy to integrate it with Qovery.
Before you begin, this guide assumes the following:
- You have a Qovery cluster running
- You have a dedicated Qovery project and environment to deploy Datadog (example: Project=Tooling, Environment=Production)
- You have a Datadog account
- You have already created a Datadog API Key
Installation
In this tutorial, we will install the Datadog agent on a Qovery cluster to gather metrics about infrastructure and applications.
Add the Datadog helm repository
Add the Datadog helm repository in your Qovery settings by following this documentation
- Repository name:
Datadog - Kind:
HTTPS - Repository URL:
https://helm.datadoghq.com
- Repository name:
Create the datadog service within Qovery
Create the Datadog helm service in the Qovery environment of your choice (preferrably within a dedicated Tooling project) by following this documentation and these values:
- General:
- Application name:
Datadog - Source:
- Helm source:
Helm repository - Repository:
Datadog(the name given during the datadog helm repository added in the previous step) - Chart name:
datadog - Version:
3.49.5(this is the version we used for this setup, update it based on the chosen version) - Allow cluster-wide resources ✔️
- Helm source:
- Application name:
- Values
- Values override as file:
- File source:
Raw YAML - Raw YAML:
# The following YAML contains the minimum configuration required to deploy the Datadog Agent# on your cluster. Update it accordingly to your needsdatadog:# here we use a Qovery secret to retrieve the Datadog API Key (See next step)apiKey: qovery.env.DD_API_KEY# Update the site depending on where you want to store your data in Datadogsite: datadoghq.eu# Update the cluster name with the name of your choiceclusterName: qoveryclusterThere are many other values you can set and modify the Datadog agent behaviour. For advanced usage, check: https://github.com/Datadog/helm-charts/blob/main/charts/datadog/values.yaml
Now get to the last step and just
Createthe service on Qovery.- General:
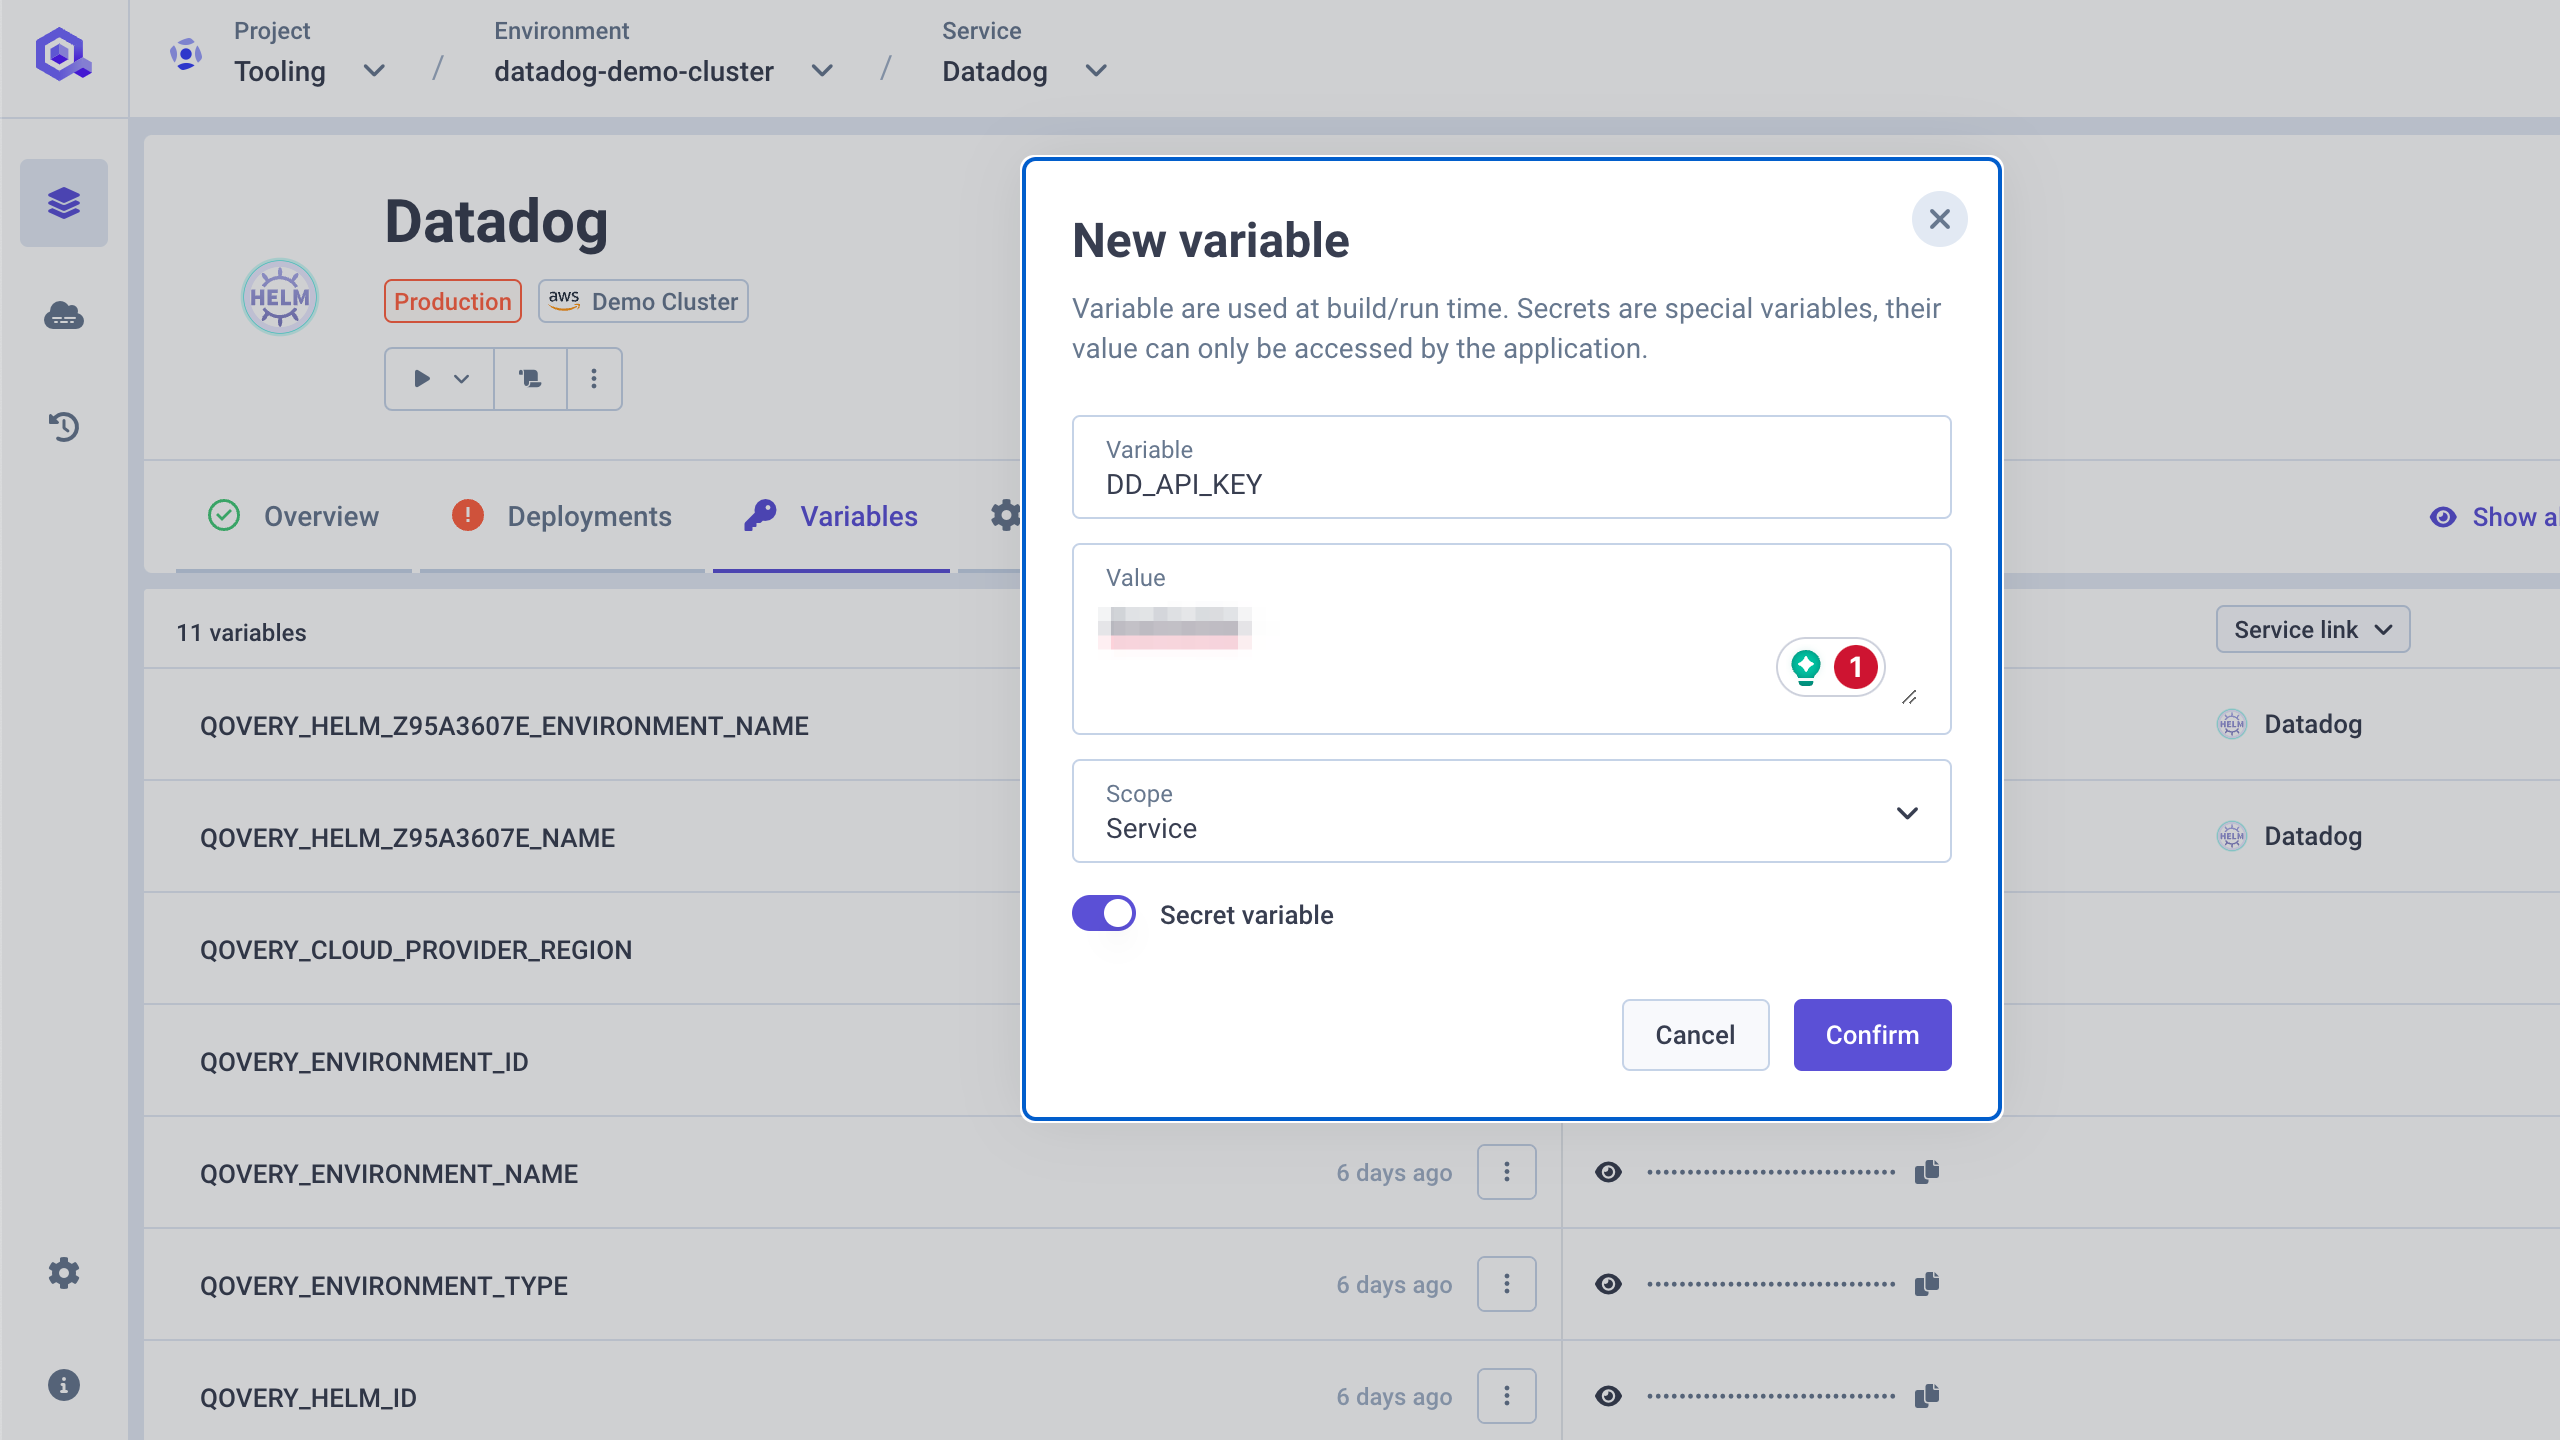
Store the Datadog API Key as secret
In the previous step we have assigned the macro
qovery.env.DD_API_KEYto the API Key value. In this step we will create this secret within the Qovery console.- Open the service overview of the created Datadog service
- Enter the
Variablessection - Add a new Variable with:
- Variable = DD_API_KEY
- Value = <your_API_KEY>
- Scope = Service (so that it is accessible only to this service)
- Secret variable ✔️
If you need more information on how to manage your environment variables, have a look at this documentation
Deploy your chart
Open the
Playbutton and trigger the deployment of your chart (see point 1 in the picture below).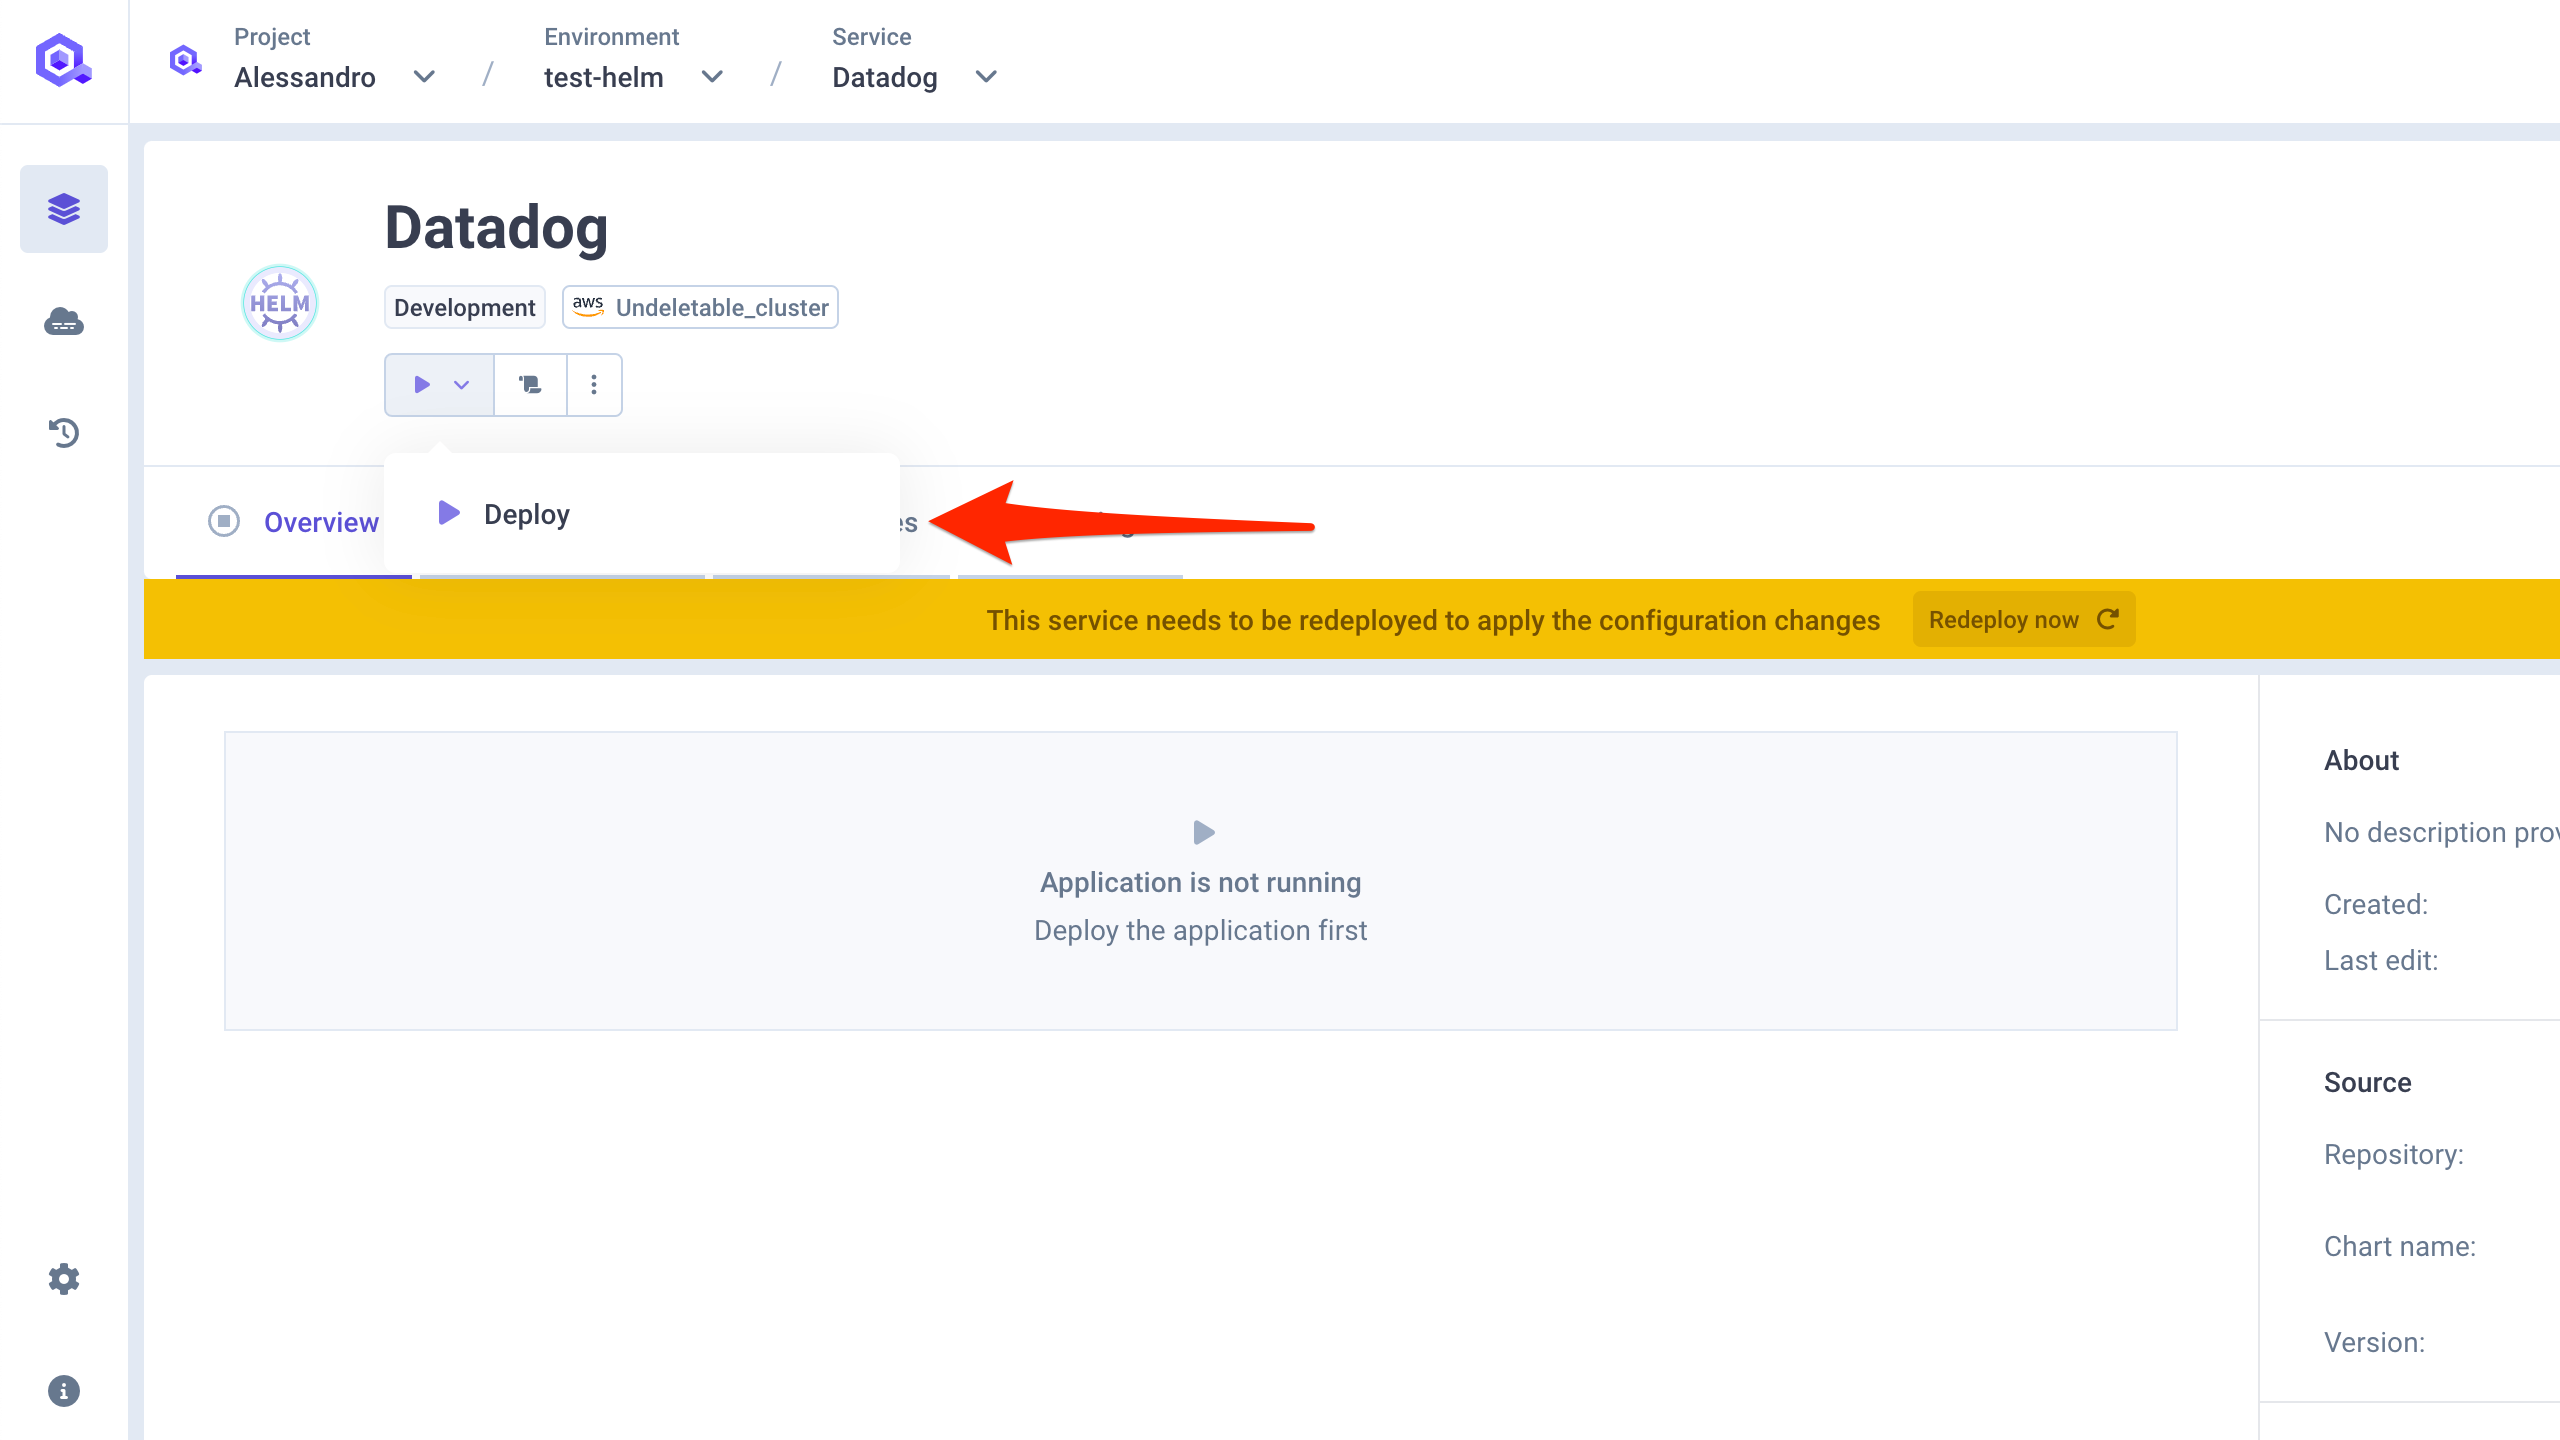
You can follow the deployment and access the deployment logs by pressing the
Logbutton (see point 2 in the picutre above).Once the deployment is completed, you should see the Datadog agent pods and their status directly within the Qovery console.
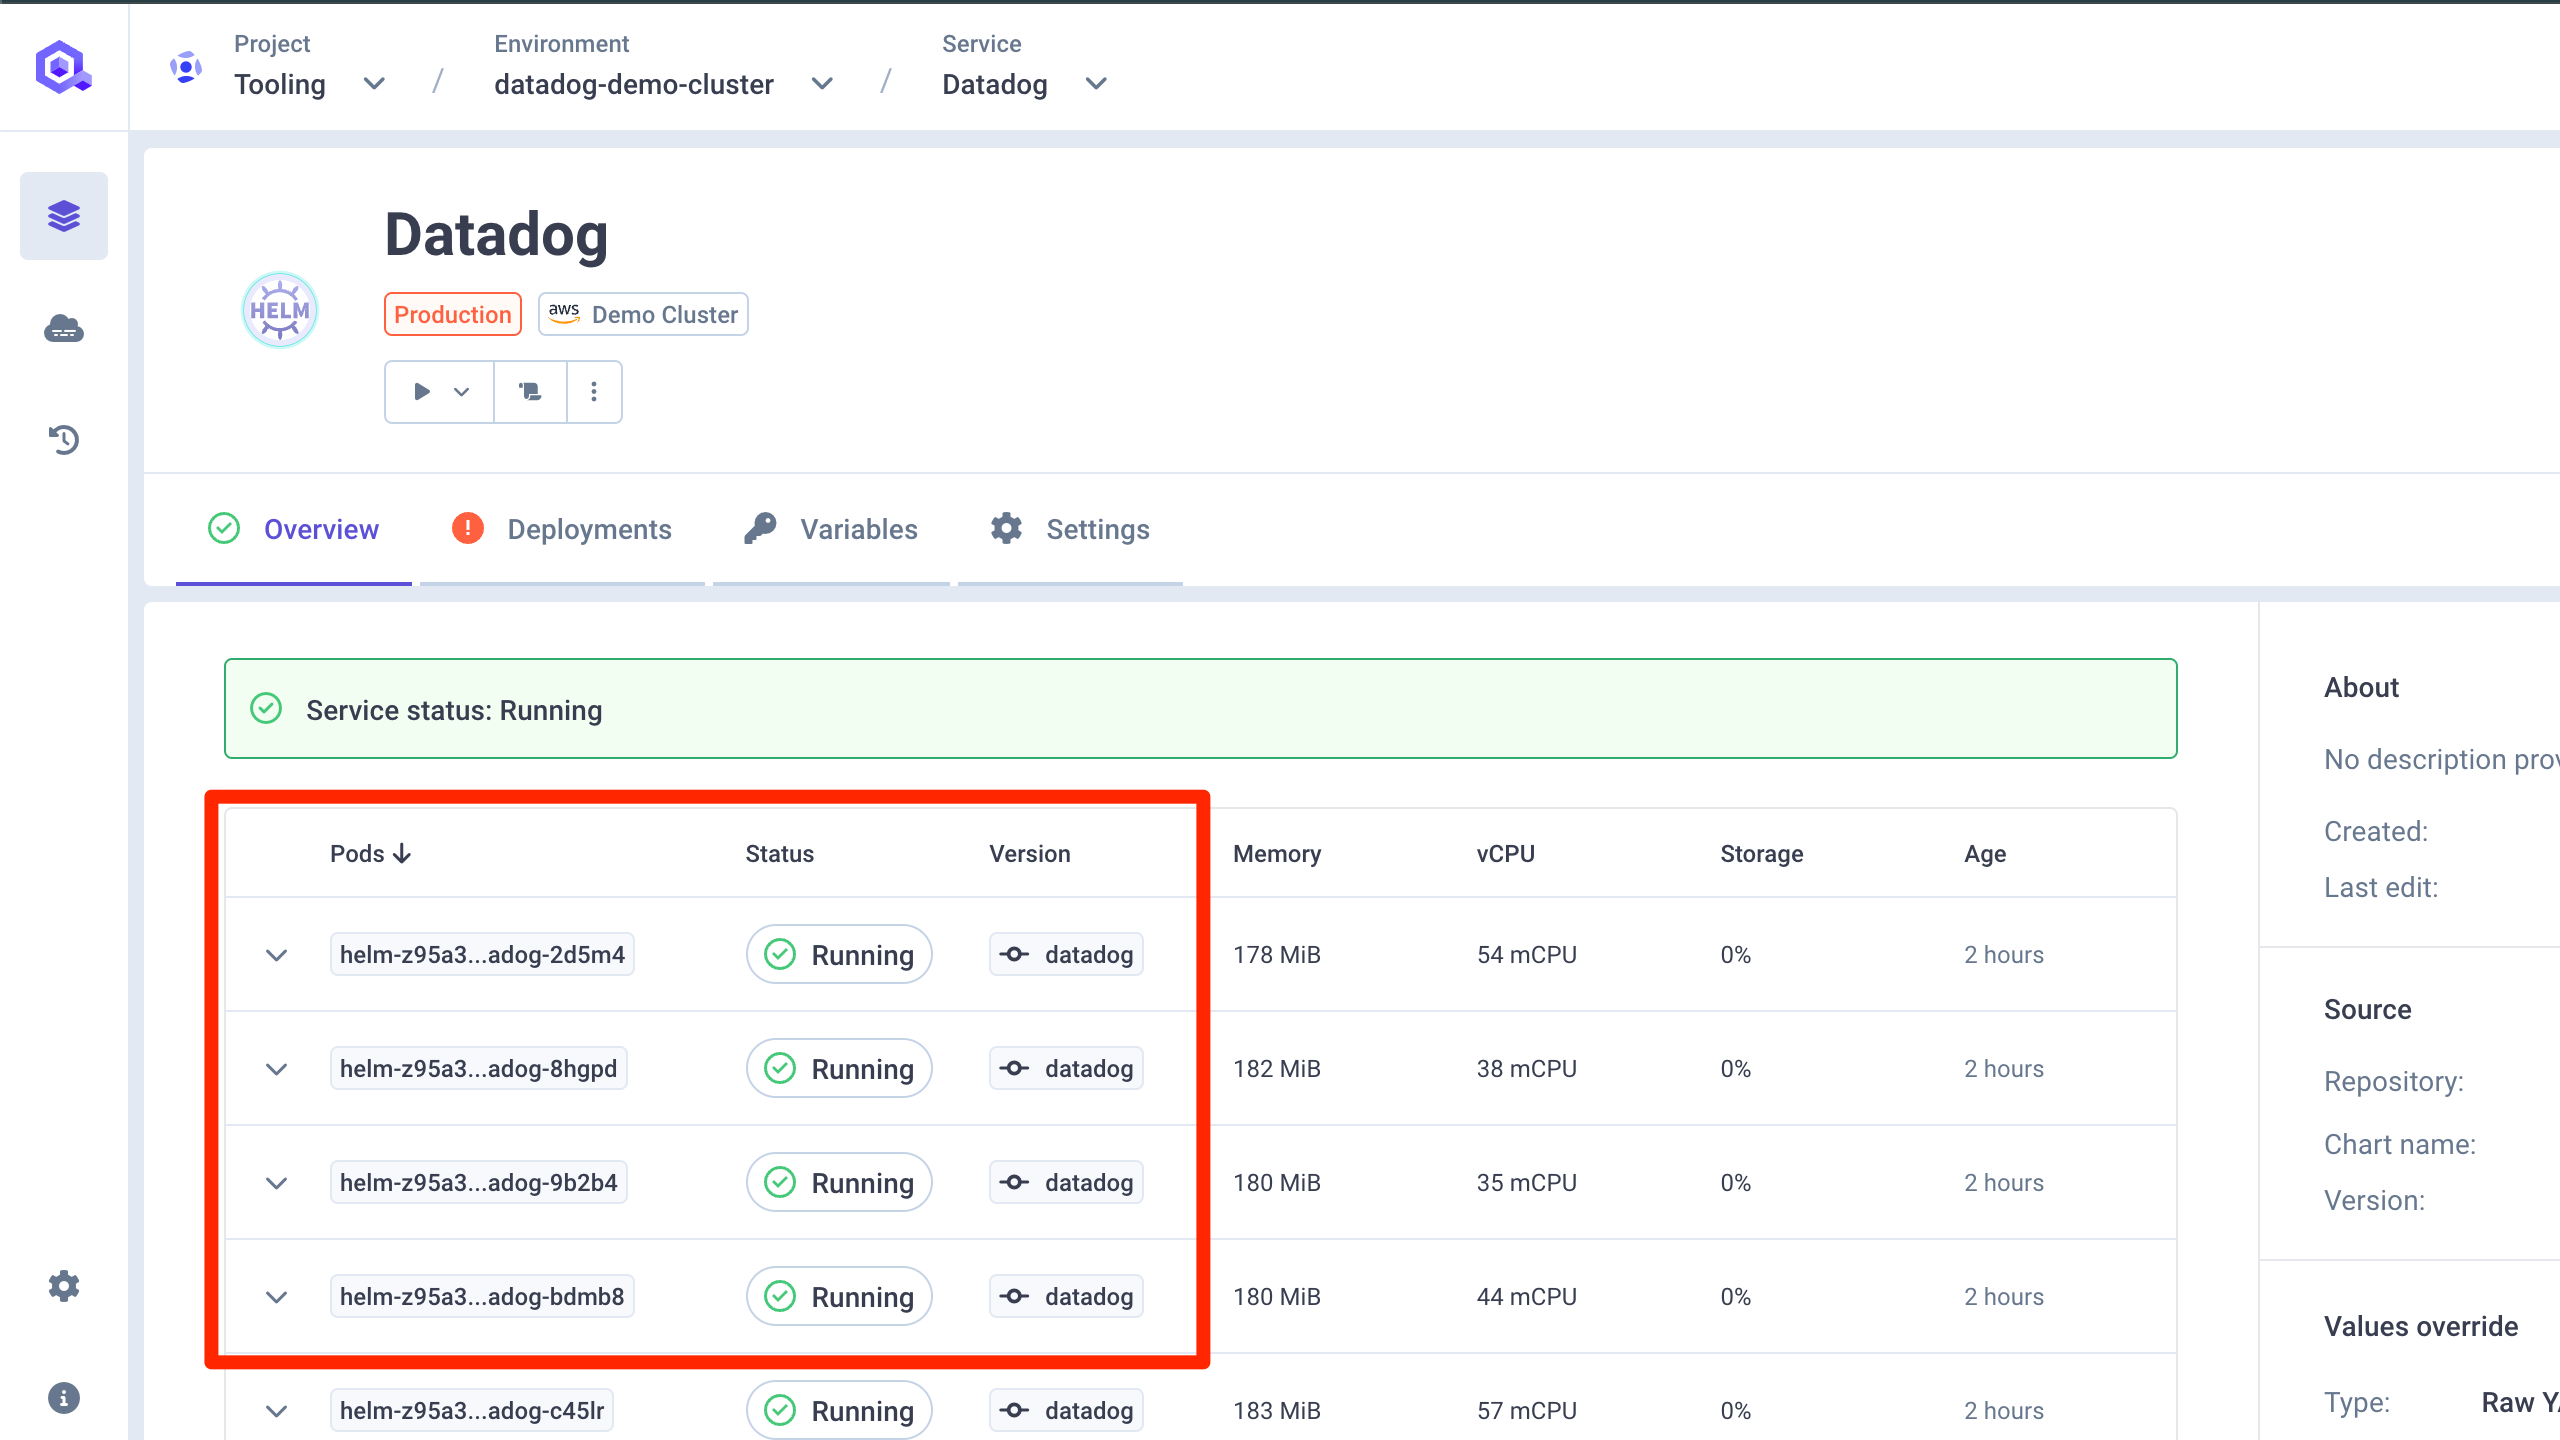
You can also look at the Pod logs by pressing the
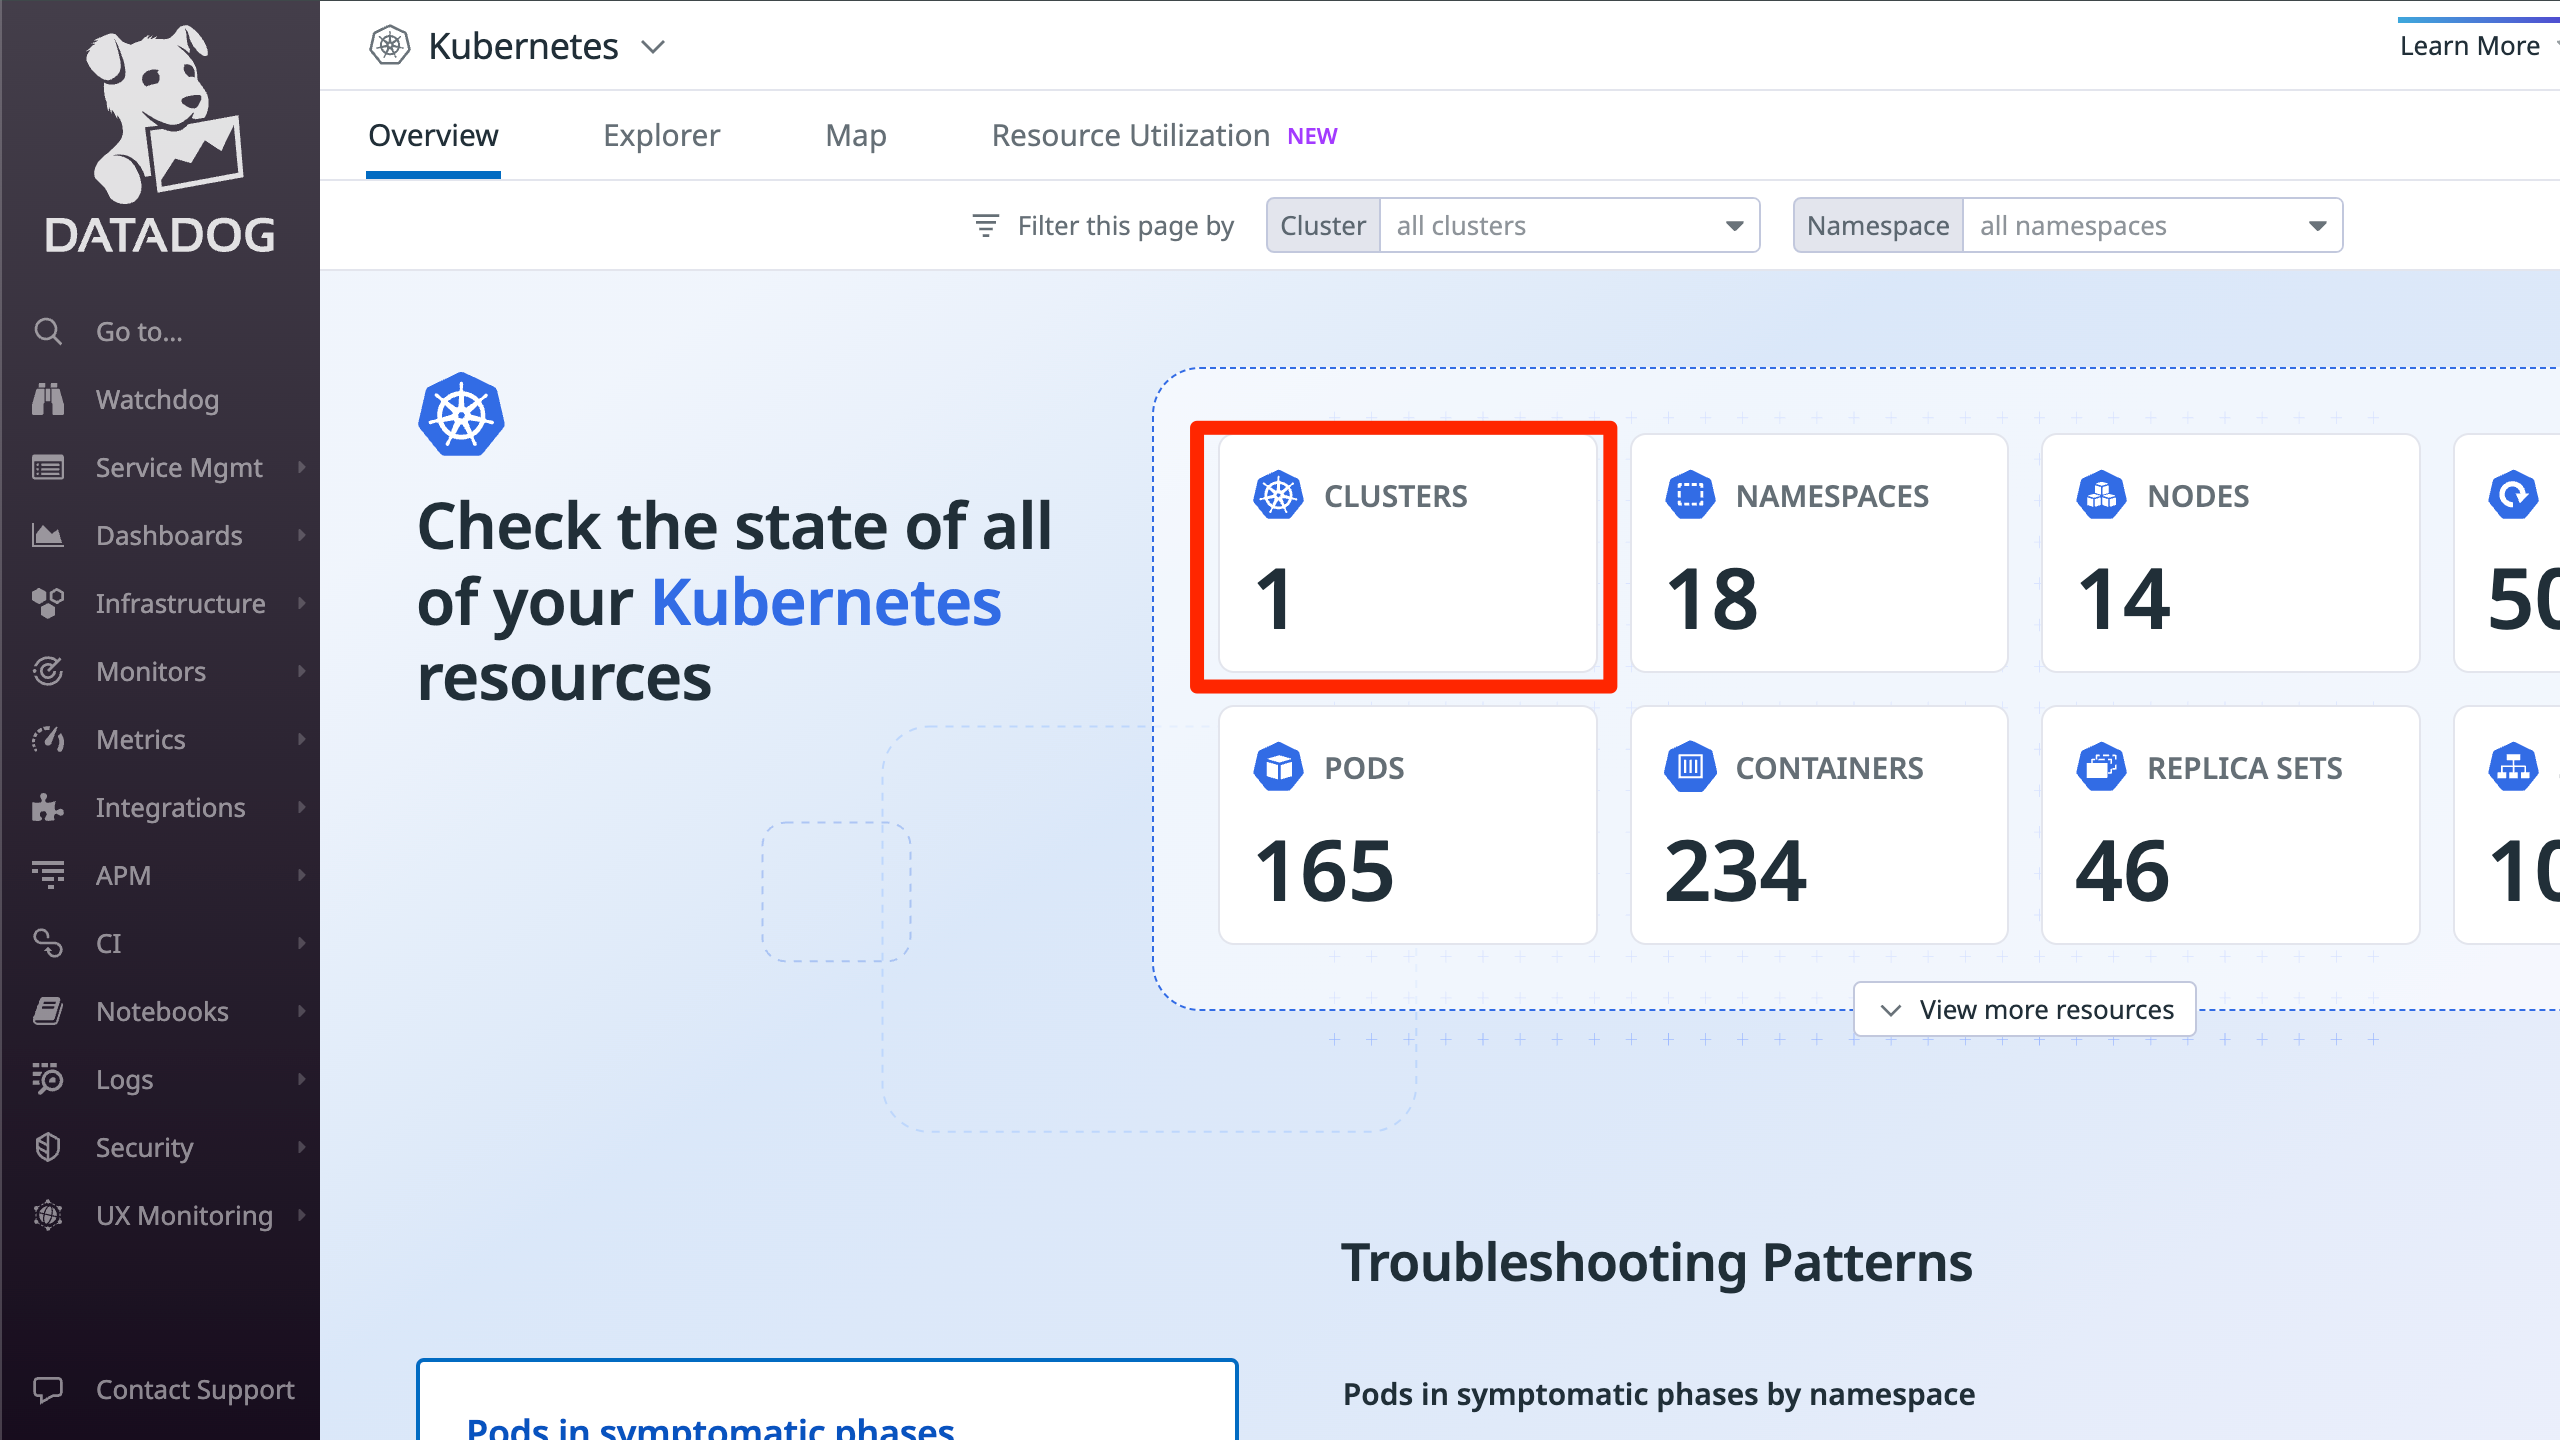
Logbutton.Verify the setup on Datadog
Access again your Datadog interface and access the Infrastructure > Containers > Kubernetes sections. You should now see the data coming from your Qovery cluster
Conclusion
You now have Datadog agent running on your Qovery cluster. You can check their Getting Started guide to familiarize yourself with the product: https://docs.datadoghq.com/fr/getting_started.