Before you begin, this guide assumes the following:
- You have a Qovery cluster running
Goal
In this tutorial, we will install Kubecost on a Qovery cluster to monitor the Kubernetes costs
Add the Kubecost helm repository
Add the Kubecost helm repository in your Qovery settings by following this documentation with these values:
- Repository name:
Kubecost - Kind:
HTTPS - Repository URL:
https://kubecost.github.io/cost-analyzer/
- Repository name:
Deploy the Kubecost helm chart
Deploy the Kubecost helm chart in your Qovery environment by following this documentation with these values:
- General:
- Application name:
Kubecost - Source:
- Helm source:
Helm repository - Repository:
Kubecost(the name given during the kubecost helm repository added in the previous step) - Chart name:
cost-analyzer - Version:
1.108.0(this guide works with the version 1.108.0 and that needs to be adapted if you use another version)
- Helm source:
- Allow cluster-wide resources ✔️
- Application name:
- Values
- Values override as file:
- File source:
Raw YAML - Raw YAML:
- File source:
- Values override as file:
kubecostToken: qovery.env.KUBECOST_TOKEN #Used only if you have a Kubecost TokenThen click on
Create and Deploy- General:
Expose Kubecost
Check the cost-analyzer service name in the deployment logs, example:
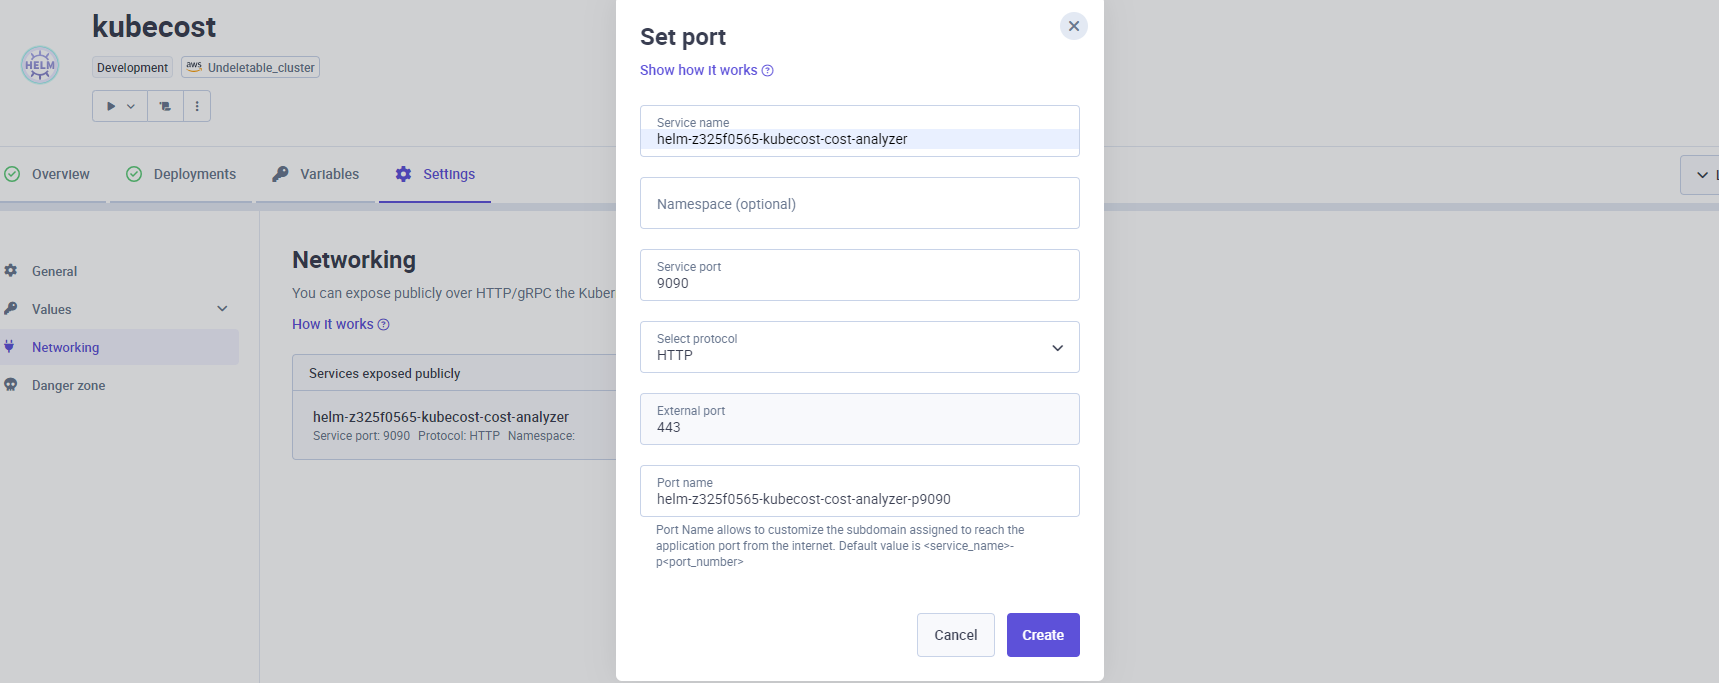
helm-z325f0565-kubecost-cost-analyzer
Go in your helm chart settings under the
Networkingsection and add a new port by clicking onAdd port, and set these values:- Service name:
helm-z325f0565-kubecost-cost-analyzer(the service name taken from the deployment logs) - Service port:
9090 - Select protocol:
HTTP - Port name: You can customize it or let the default port name.

Then click on Create and redeploy your helm in Qovery.
A URL will be generated to access the Kubecost frontend application:

- Service name:
Conclusion
You now have Kubecost running on your Qovery cluster. You can check their Getting Started guide to familiarize yourself with the product: https://docs.kubecost.com/#getting-started.