Git Repository access
On you first sign in to the Qovery Console, you need to login via your Git provider account. This allows you to manage the access permission within your Qovery organization but it also allows Qovery to access the repositories linked to your Git account.
When you create an application on the repository X within the Qovery console, Qovery bounds your git account to the application and creates a webhook on your git repository X to receive the events happening on it (push, PR creation, commit etc..).
This is the default behaviour but if you want to manage the permission access in a centralized way and decoupled from the users belonging to your organization, you can instead use the Git Token feature.
Git Tokens
Git tokens are configured within the Git provider interface and then added to your Qovery organization to manage the access permission to your repositories.
In the following sections you will understand how to:
- create a token within your git provider
- access the token configuration within the Qovery console
- add/modify and delete the tokens within the Qovery console
Managing tokens on your git provider
The process to create a token and the permissions to assign depend on the chosen git provider
Github
GitHub offers two types of tokens: Personal access tokens (classic) and Fine-grained personal access tokens. You can read more about them and how to create them here.
Depending on the selected token type, the required permission is slightly different.
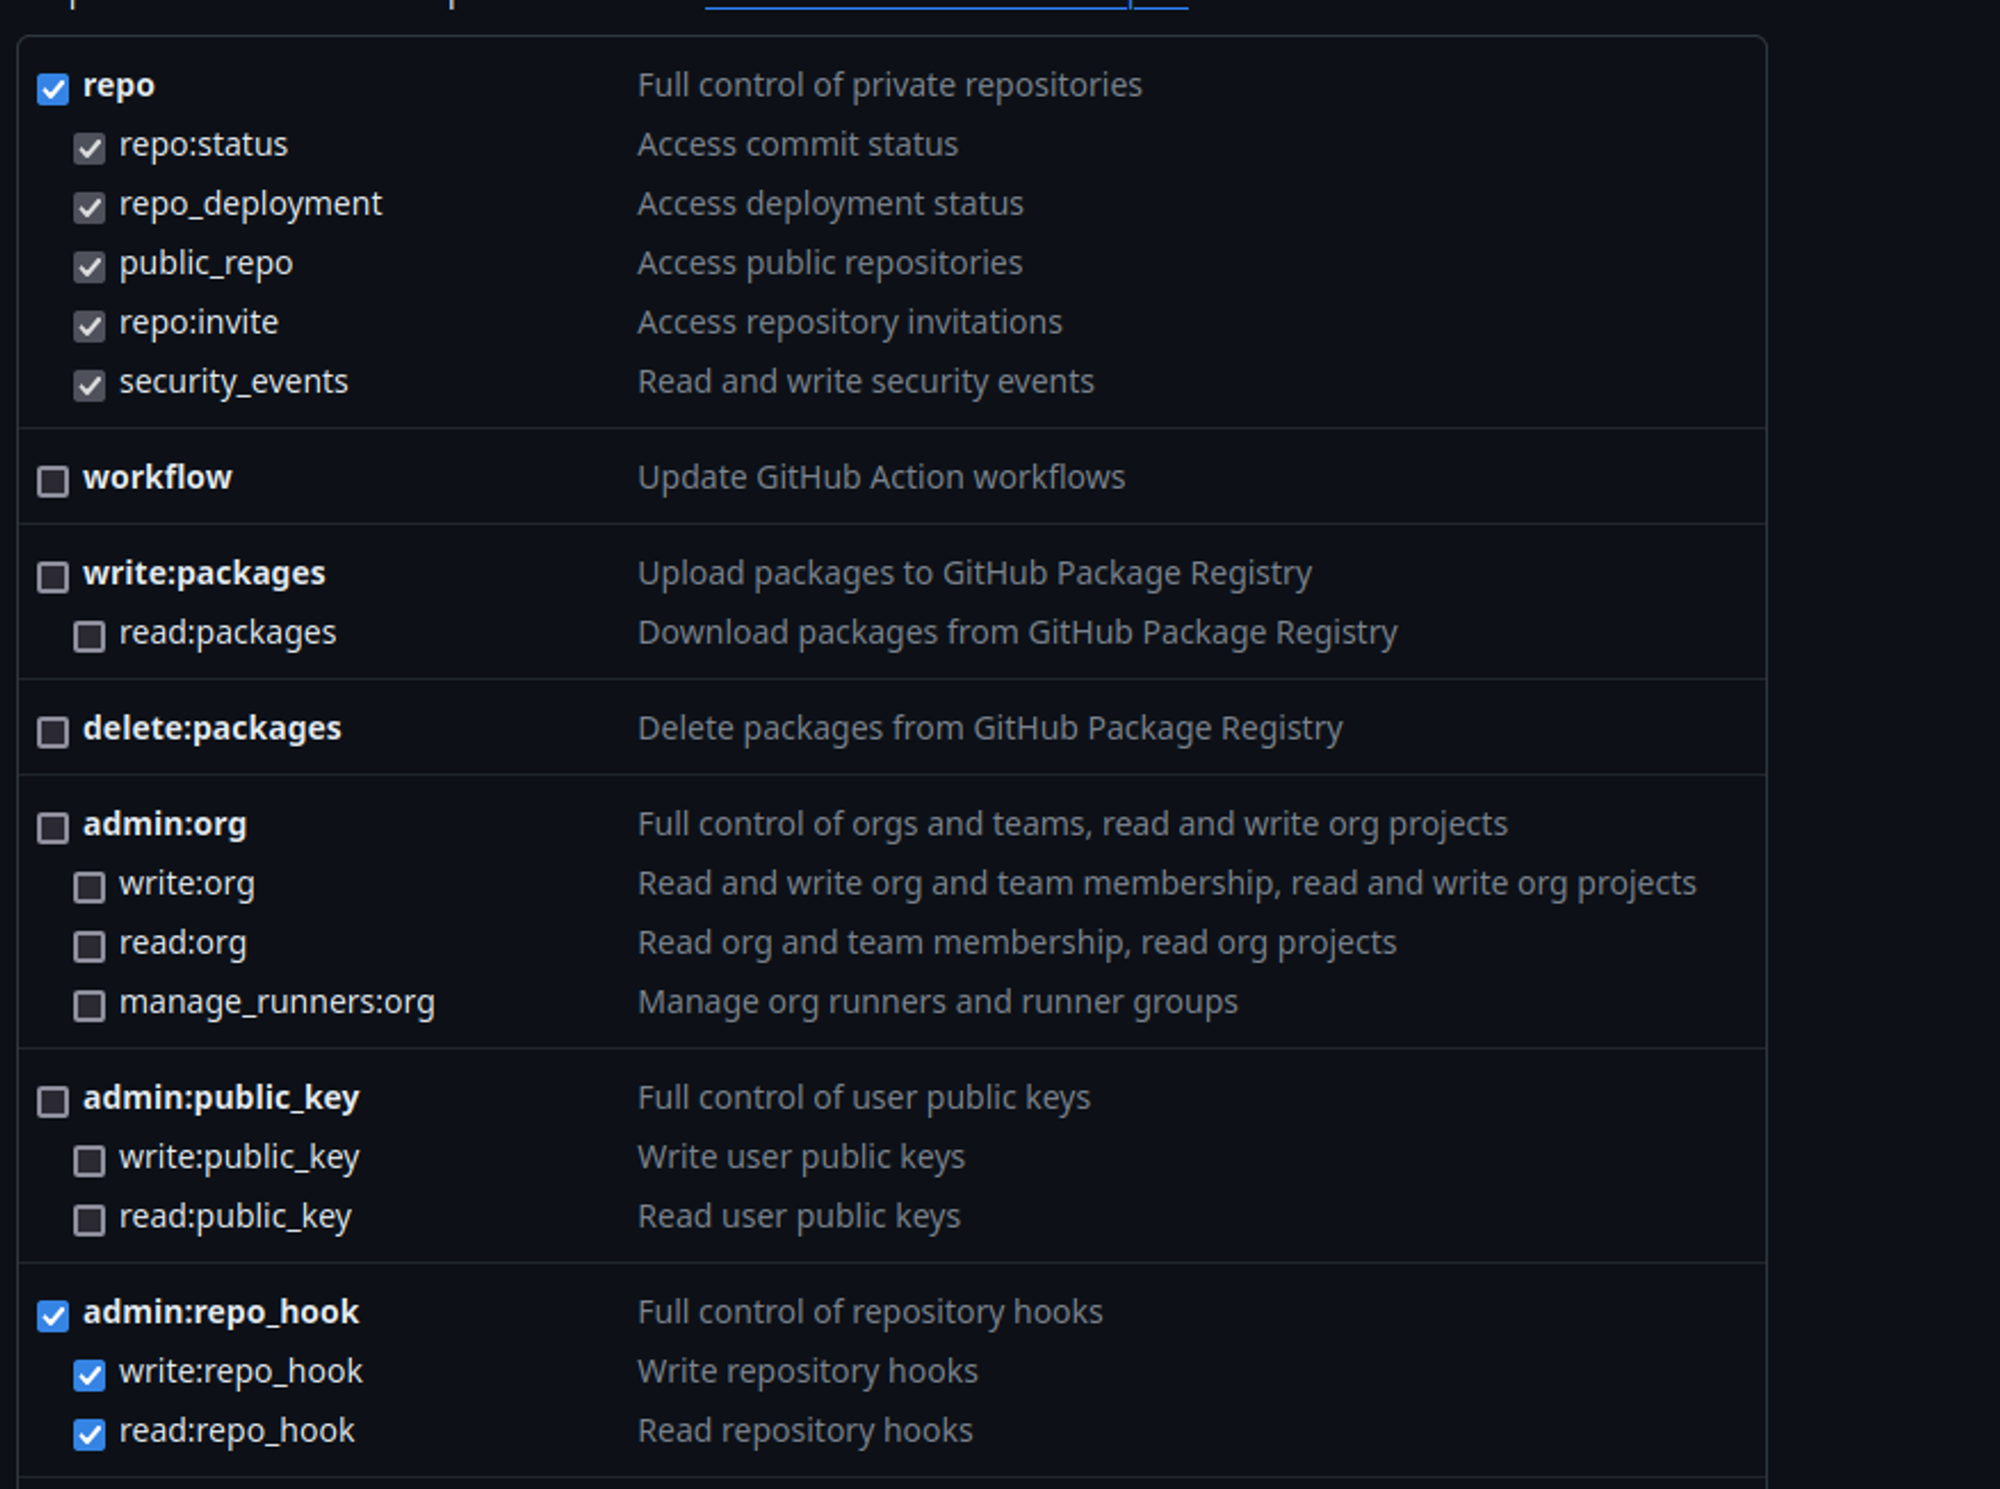
Personal access tokens (classic)
- Repository: full control of private repositories
- Admin:repo_hook: read + write
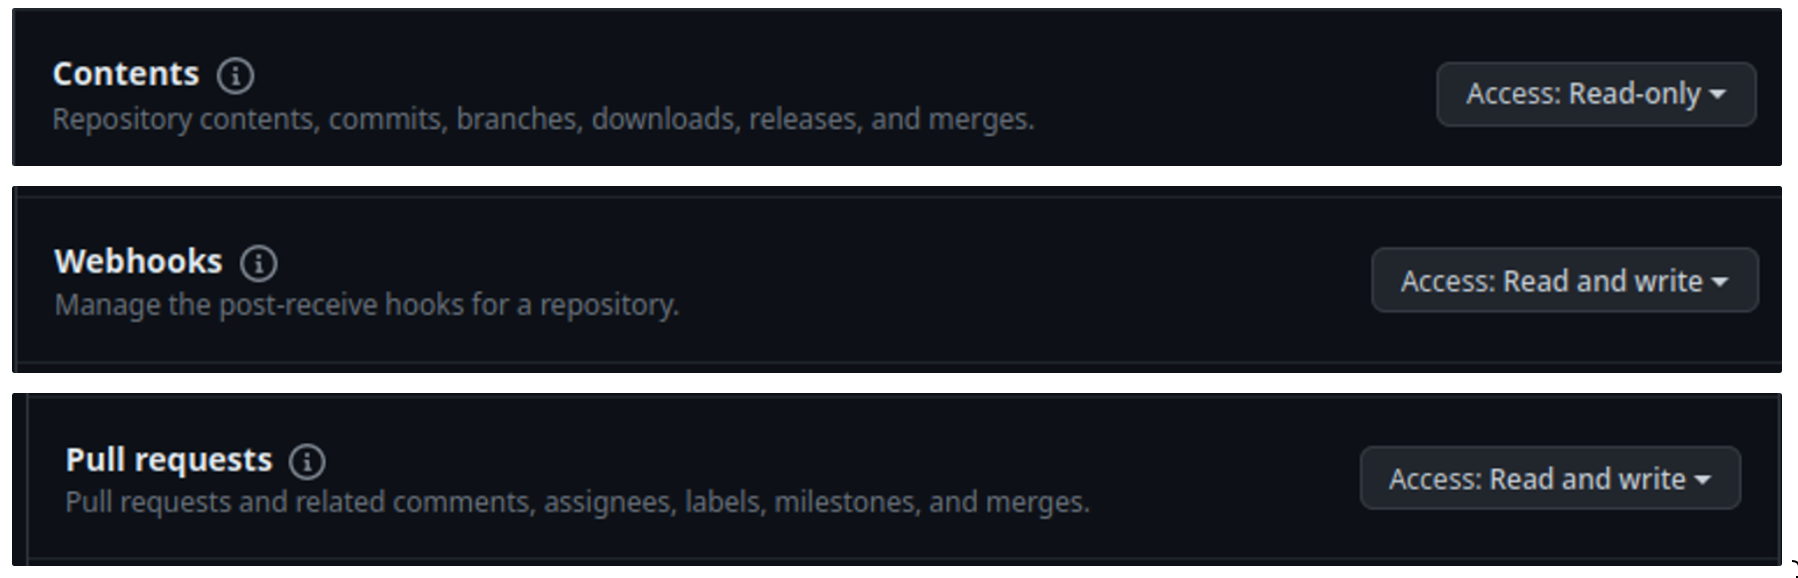
Fine-grained Personal access tokens
- Contents: Read-only
- Webhooks: Read and write
- Pull requests: Read and write
Gitlab
GitLab provides multiple types of tokens but Qovery supports two: Project Tokens and Group Tokens. You can find how to create them within these sections:
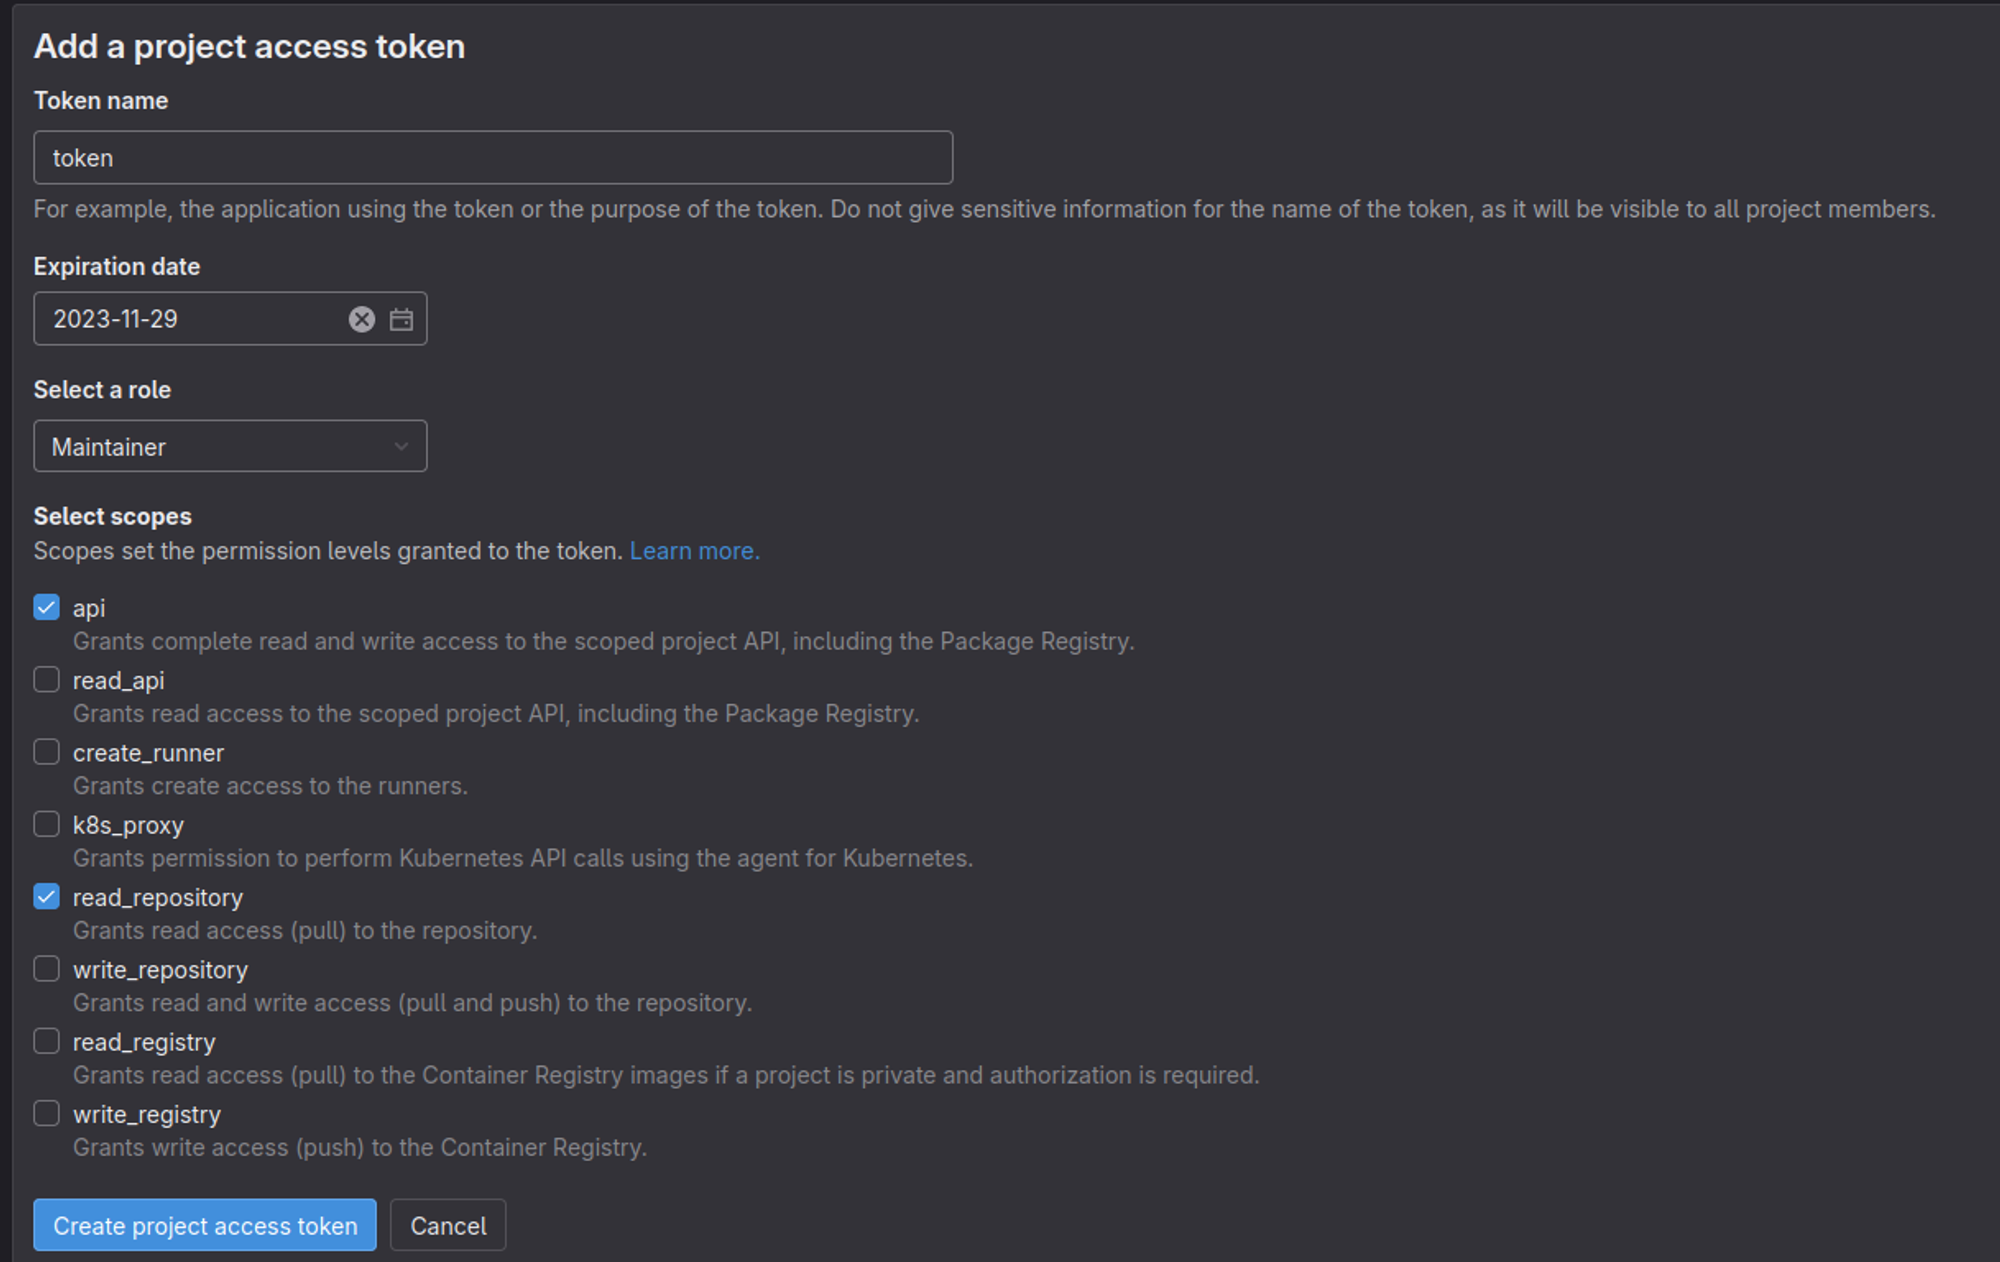
The permission configuration is the same for the two types:
- Role: Maintainer or Owner
- scopes: api, read_repository
Bitbucket
Bitbucket offers two types of tokens: Repository access tokens and Workspace access tokens (only with Bitbucket Cloud Premium plan). You can read more about them and how to create them here:
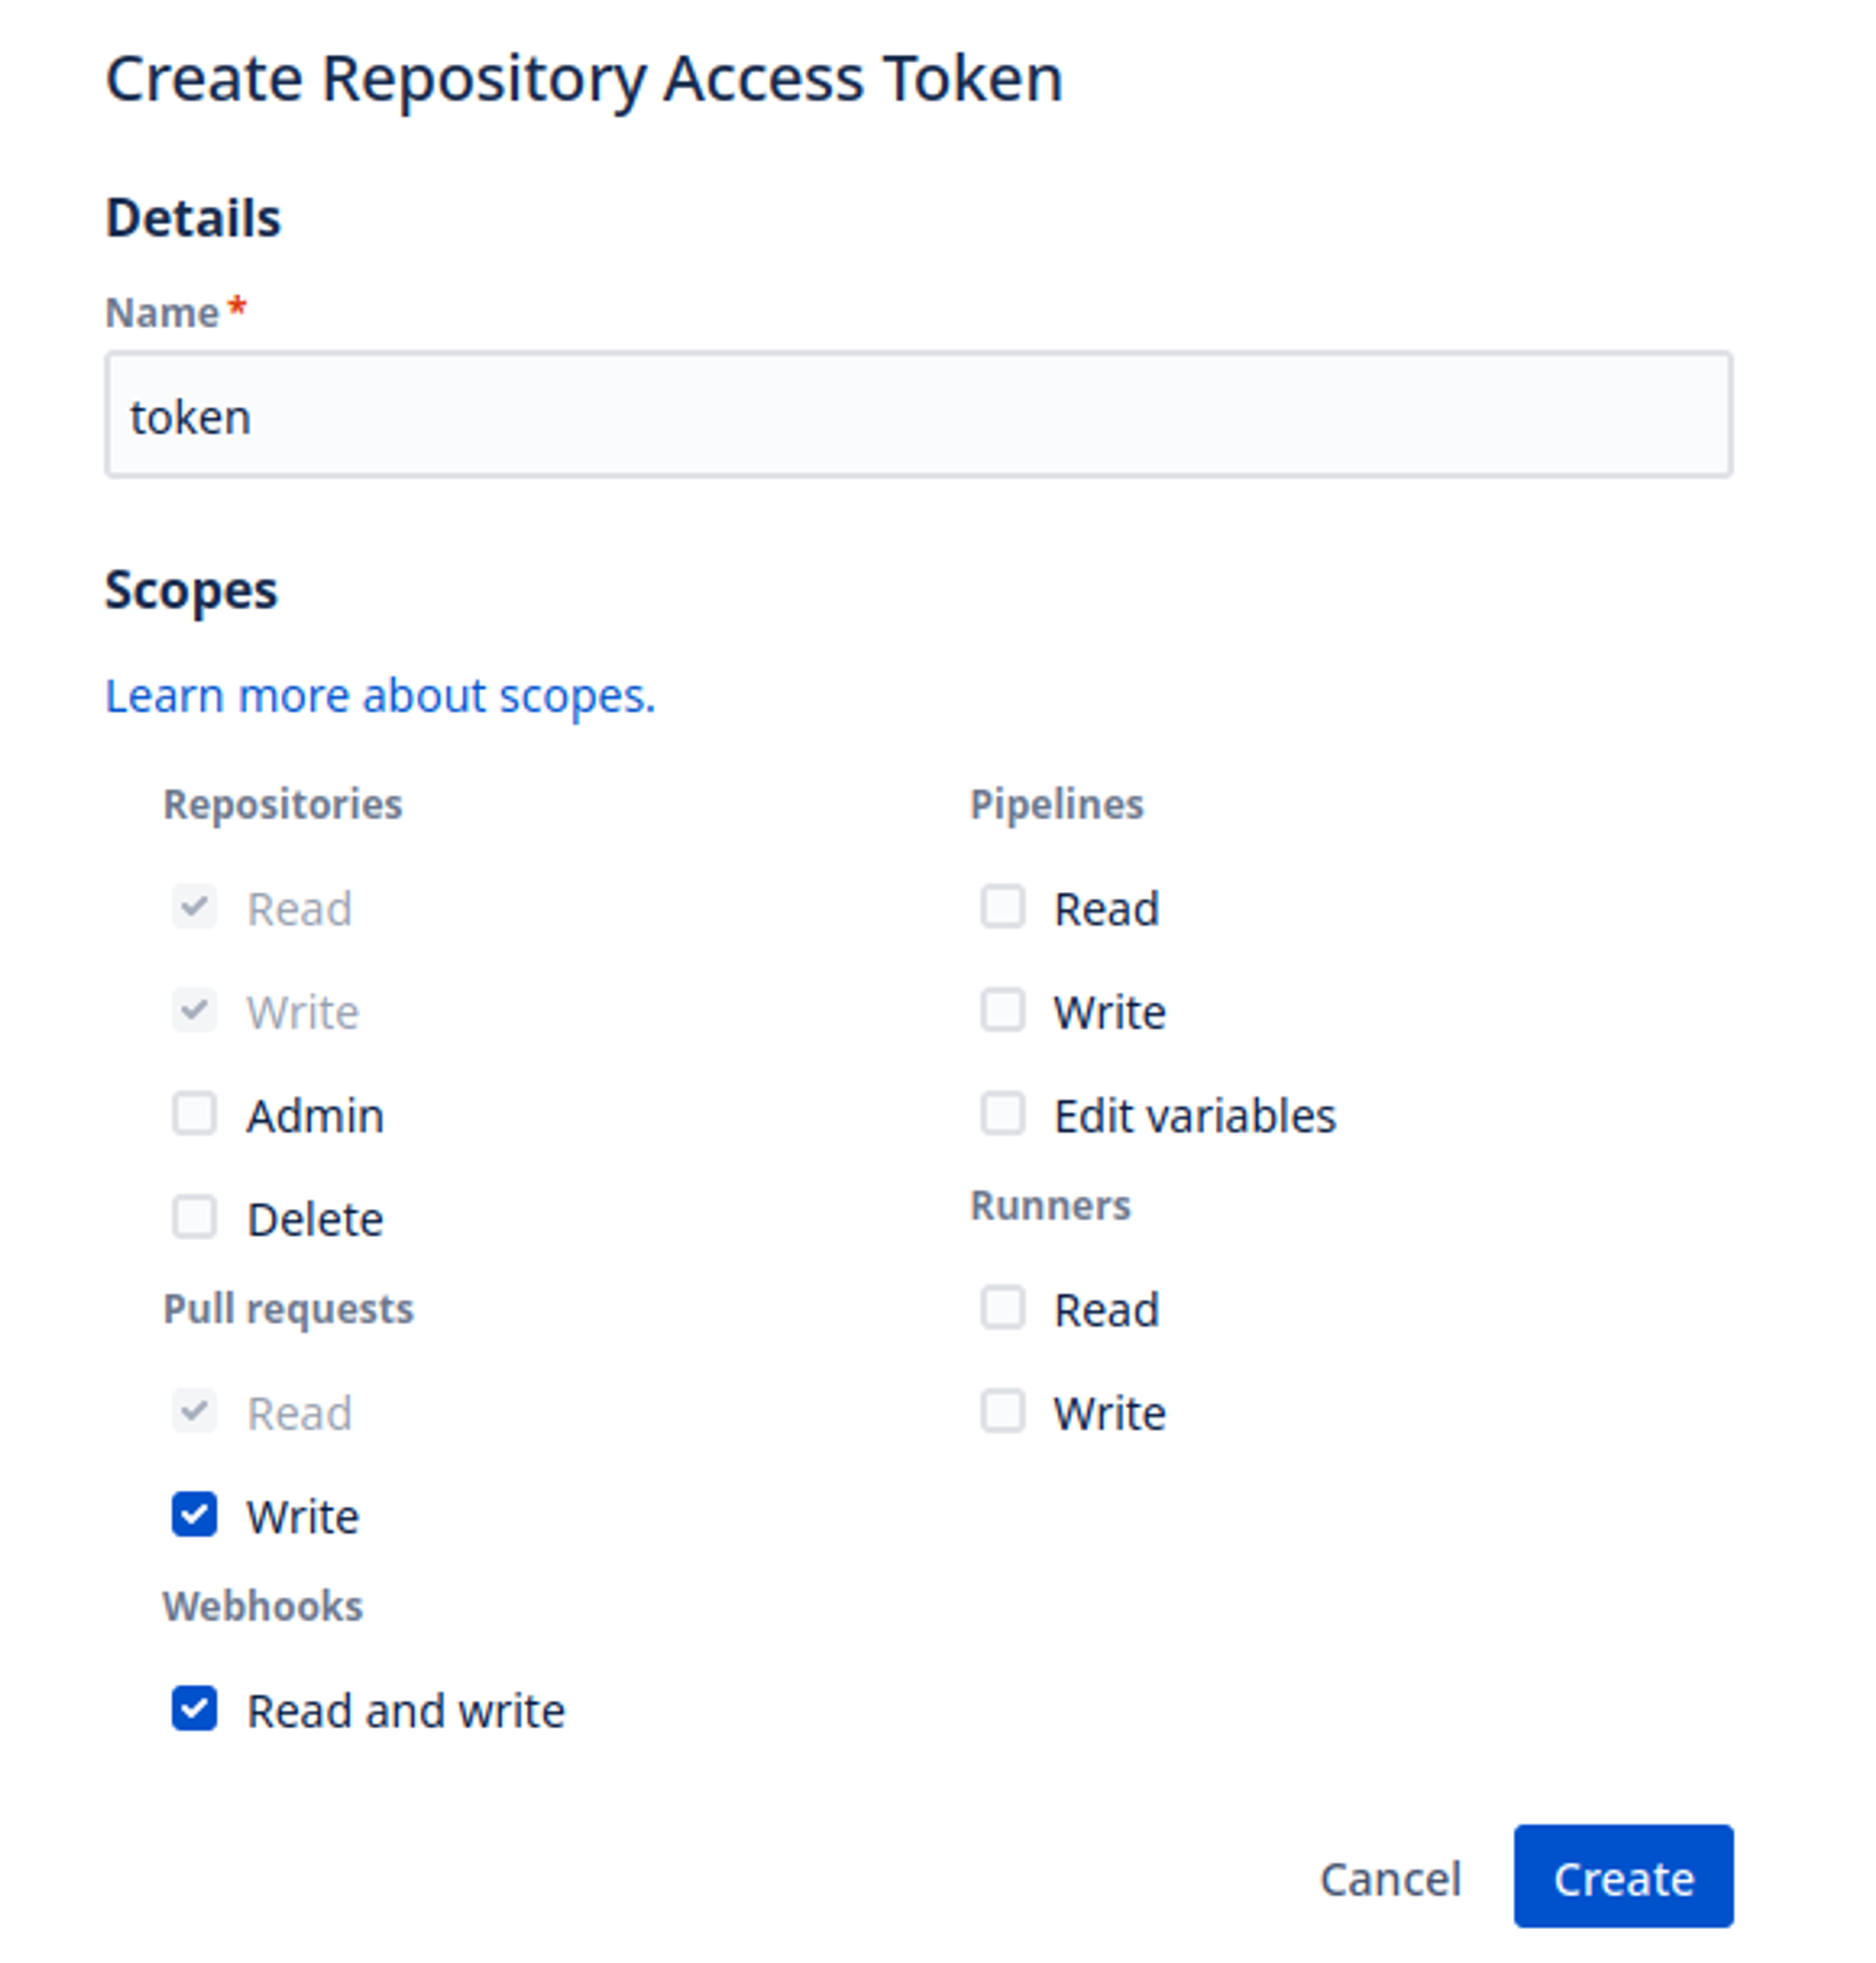
The permission configuration is the same for the two types:
- Repositories: Read (Write auto set by Pull requests Write)
- Pull requests: Read & Write
- Webhooks: Read and write
Token expiration
Most of the time, the tokens created within your git provider have an associated expiration date. Once the expiration date is reached, Qovery will lose access to your git account so be sure to renovate your git token before its expiration (usually the git provider sends you a reminder email).
If your token reaches its expiration date but your git provider account does not support the expiration date extension, you can: 1. Create a new token on your git account 2. Modify the existing token on the Qovery console by updating its value with the token created in step 1.
Managing the tokens on Qovery
Tokens are centrally managed within your organization settings under the Git repository access section:
- Open your Qovery Console and access your organization settings:

- In the
Organization settingsmenu, clickGit Repositories Access:
Create the token
- Press the
Add new Tokenbutton - Fill the form with:
- your git provider
- Token name: this is the display name used in every Qovery interface.
- Description (optional)
- Token Value: the token value as returned by your git provider.
- Workspace: Only for bitbucket, provide the workspace where the token has been created.
- Press the
Createbutton.
Using the token
Once the token is created, you can configure your Qovery services.
In the creation flow of your service, you will be able to either select your own git account or one of the git tokens configured within your organization.
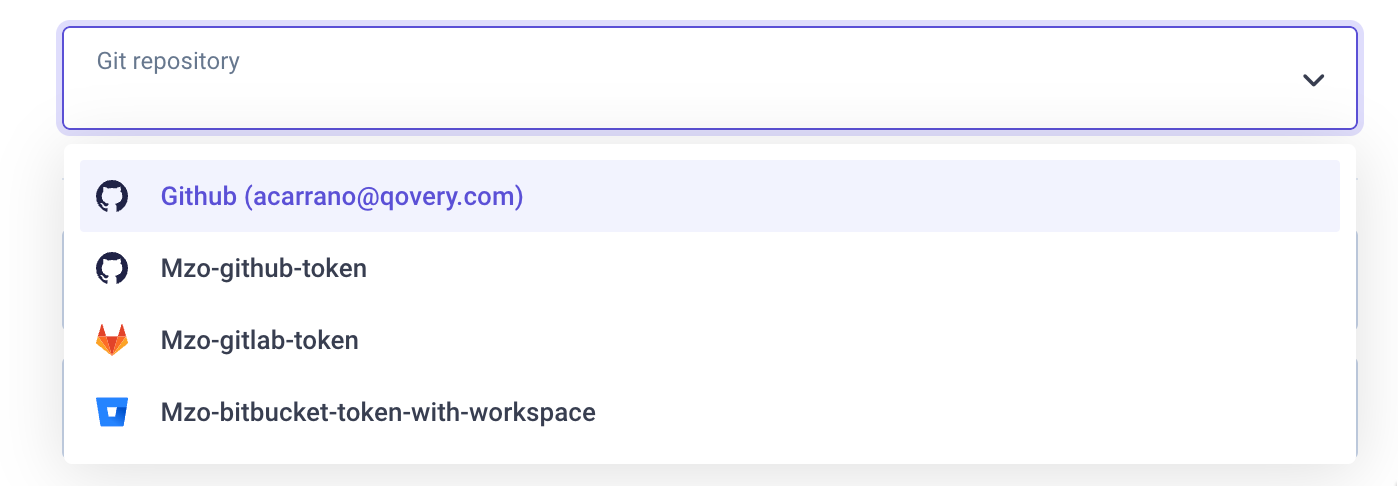
If a git token is selected, Qovery will use that token to access the git repository as long as the token does not expire (see the Token expiration section)
Update the token
- Press the
wheelbutton on the token you want to modify. - Modify the token.
- Press the
Savebutton.
Note: If you want to modify the git token configured in Qovery, you can directly edit the token value. It will prevent you from manually updating every application using the old token.
Delete the token
- Press the
binbutton next to the token you want to delete - Confirm the operation by writing
delete
Deprecated - Qovery Github App
For better control, as a GitHub user, you can install the Qovery Github App, and define which Github repositories Qovery can access.
Installing the Qovery Github App
To install the Qovery Github App:
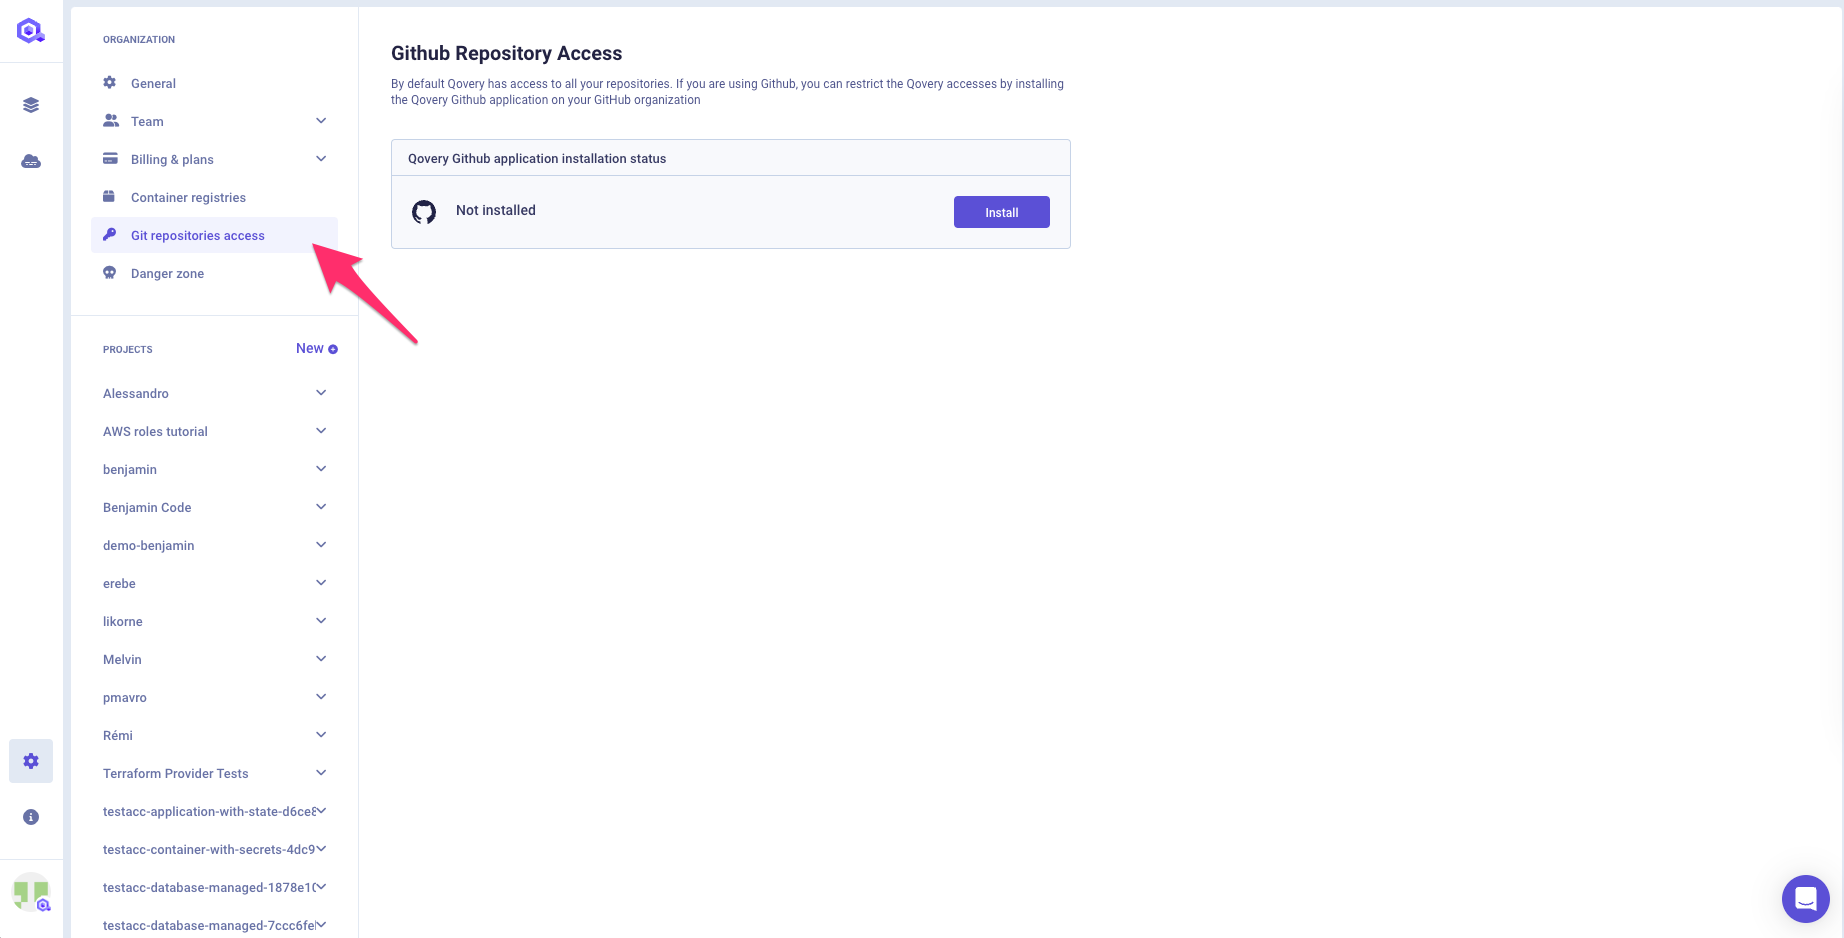
Open your Qovery Console and access your organization settings:
In the
Organization settingsmenu, clickGit Repository Access:To start the installation process click
Install:A new window opens in your browser so you can install the Qovery Github App on your Github account.
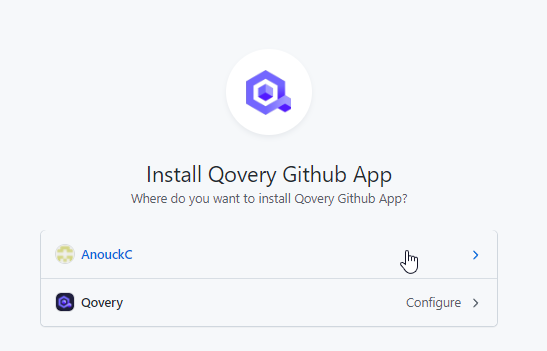
Click the Github account on which you want to install the Qovery Github App:
Click
Only select repositoriesand, in the dropdown menu, define which Github repositories you want to give Qovery access to: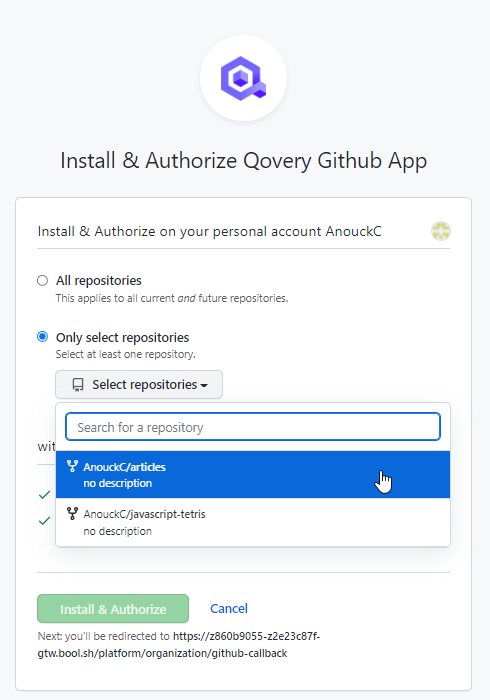
To confirm, click
Install & Authorize: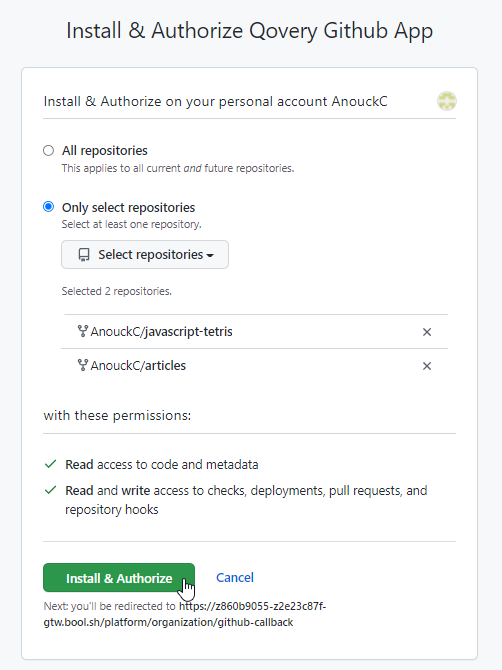
You are redirected to your Qovery Console, where the list of authorized Github repositories is updated.
Managing the Github permissions
To add or remove access to one of your repositories:
Open your Qovery Console and access your organization settings:

In the
Organization settingsmenu, clickGit Permission: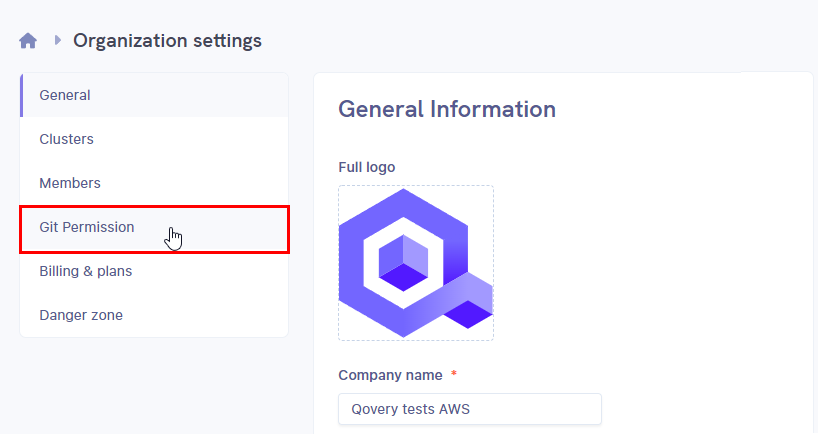
Next to your Git provider account, click
Manage permission: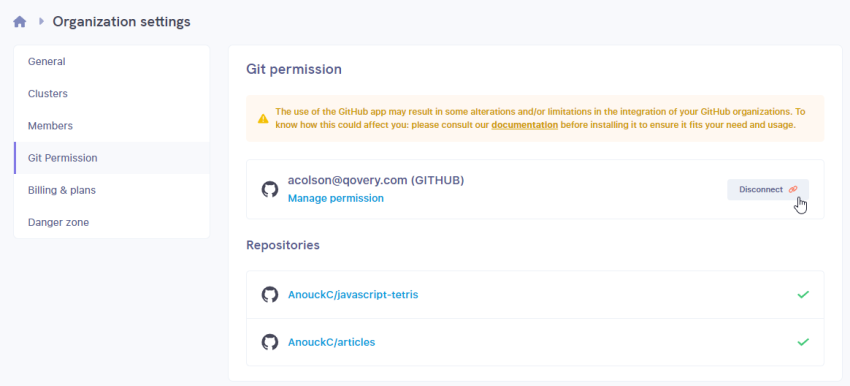
Click the Github account on which you want to manage the Qovery Github App access:
Add or remove the repositories you want to give Qovery access to:
Uninstalling the Qovery Github App
To uninstall the Qovery Github App:
Open your Qovery Console and access your organization settings:
In the
Organization settingsmenu, clickGit Permission:Next to your Git provider account, click
Disconnect:The list of authorized Github repositories is updated, meaning Qovery now has access to all of your Github repositories again.
From your browser, access your Github account and open your
Settings:
In the navigation menu, click
Applications: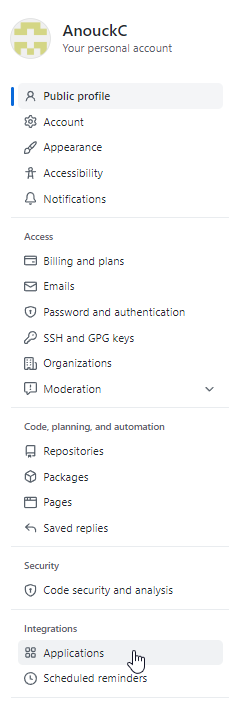
At the bottom of the page, click
Uninstall: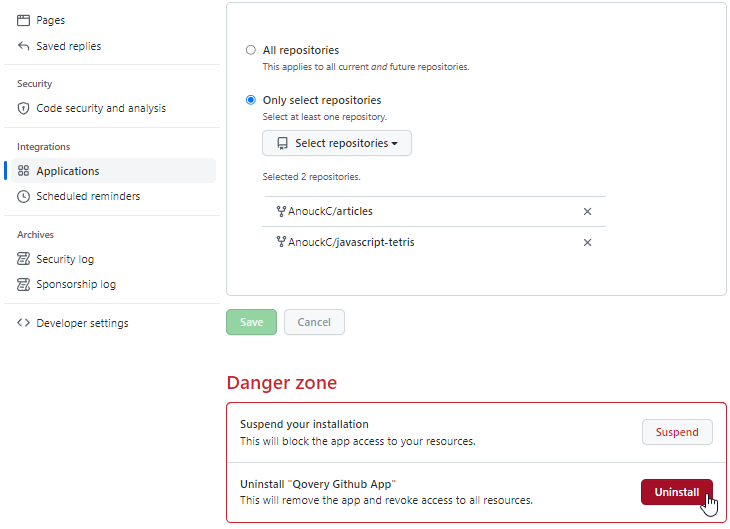
A confirmation pop-up window opens.
Click
OK:The Qovery Github App is uninstalled.