Installing on AWS EKS
In this section, we will explain how to install Qovery on an EKS cluster running on your AWS account.
Requirements
Have a look at the Requirements section.
Install your cluster
If you don't have already an EKS cluster, create one on your AWS account and create a set of worker nodes with enough resources to run Qovery and your applications.
For the Kubernetes requirements, check the requirements section.
For your EKS cluster, make sure that:
- you have the Kubeconfig of the cluster
- (only if you want to use databases of type
containerwith Qovery) the EKS worker nodes have a role assigned with the permissionAmazonEBSCSIDriverPolicy
Get the AWS credentials
Create IAM user for Qovery
Create an IAM user on your AWS account and add the following in-line permissions to the user:
{"Statement": [{"Action": ["ecr:*","s3:ListAllMyBuckets"],"Effect": "Allow","Resource": "*"},{"Action": ["s3:*"],"Effect": "Allow","Resource": ["arn:aws:s3:::qovery*","arn:aws:s3:::qovery*/*"]},{"Action": ["eks:AccessKubernetesApi","eks:Describe*","eks:List*"],"Effect": "Allow","Resource": "*"}],"Version": "2012-10-17"}Create access keys
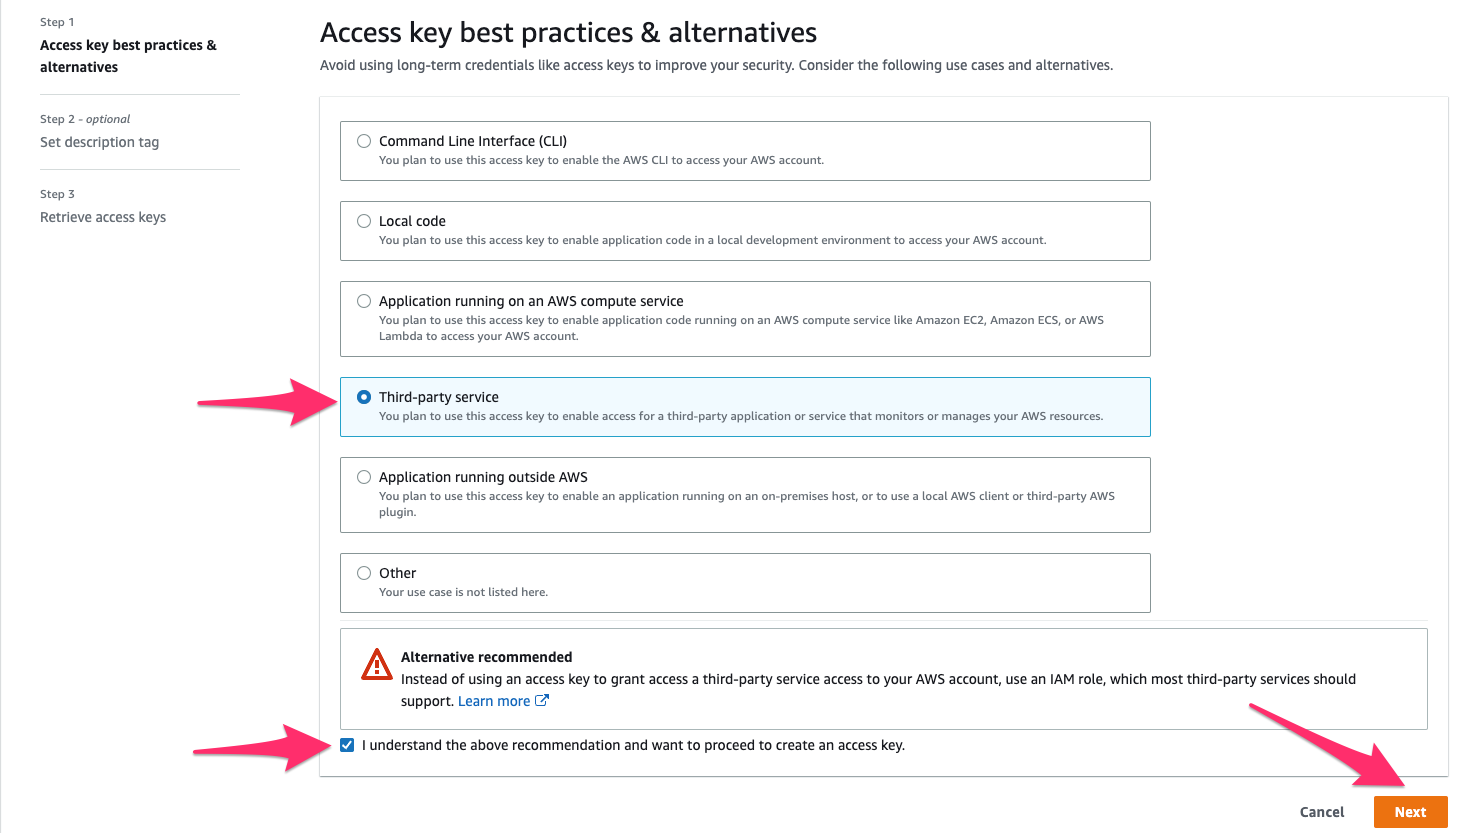
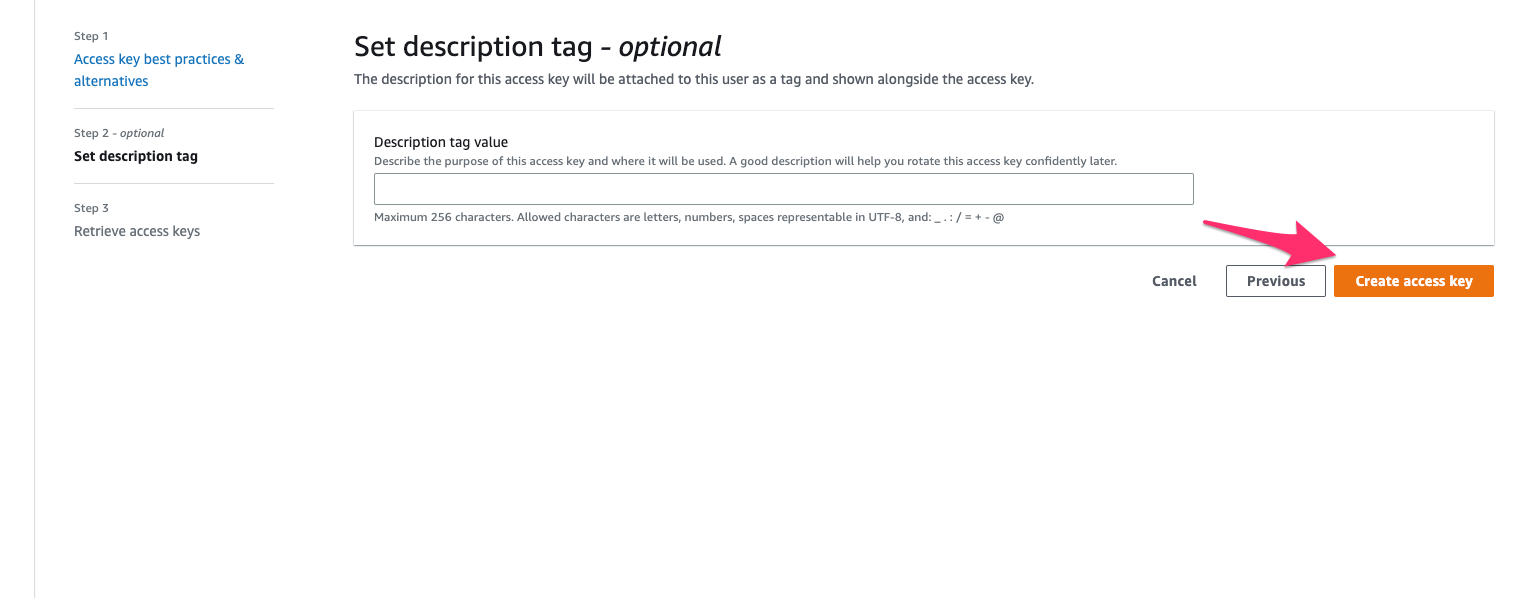
To create an
access key idandsecret access key, go to the Security Credentials tab of theQoveryuser and pressCreate access key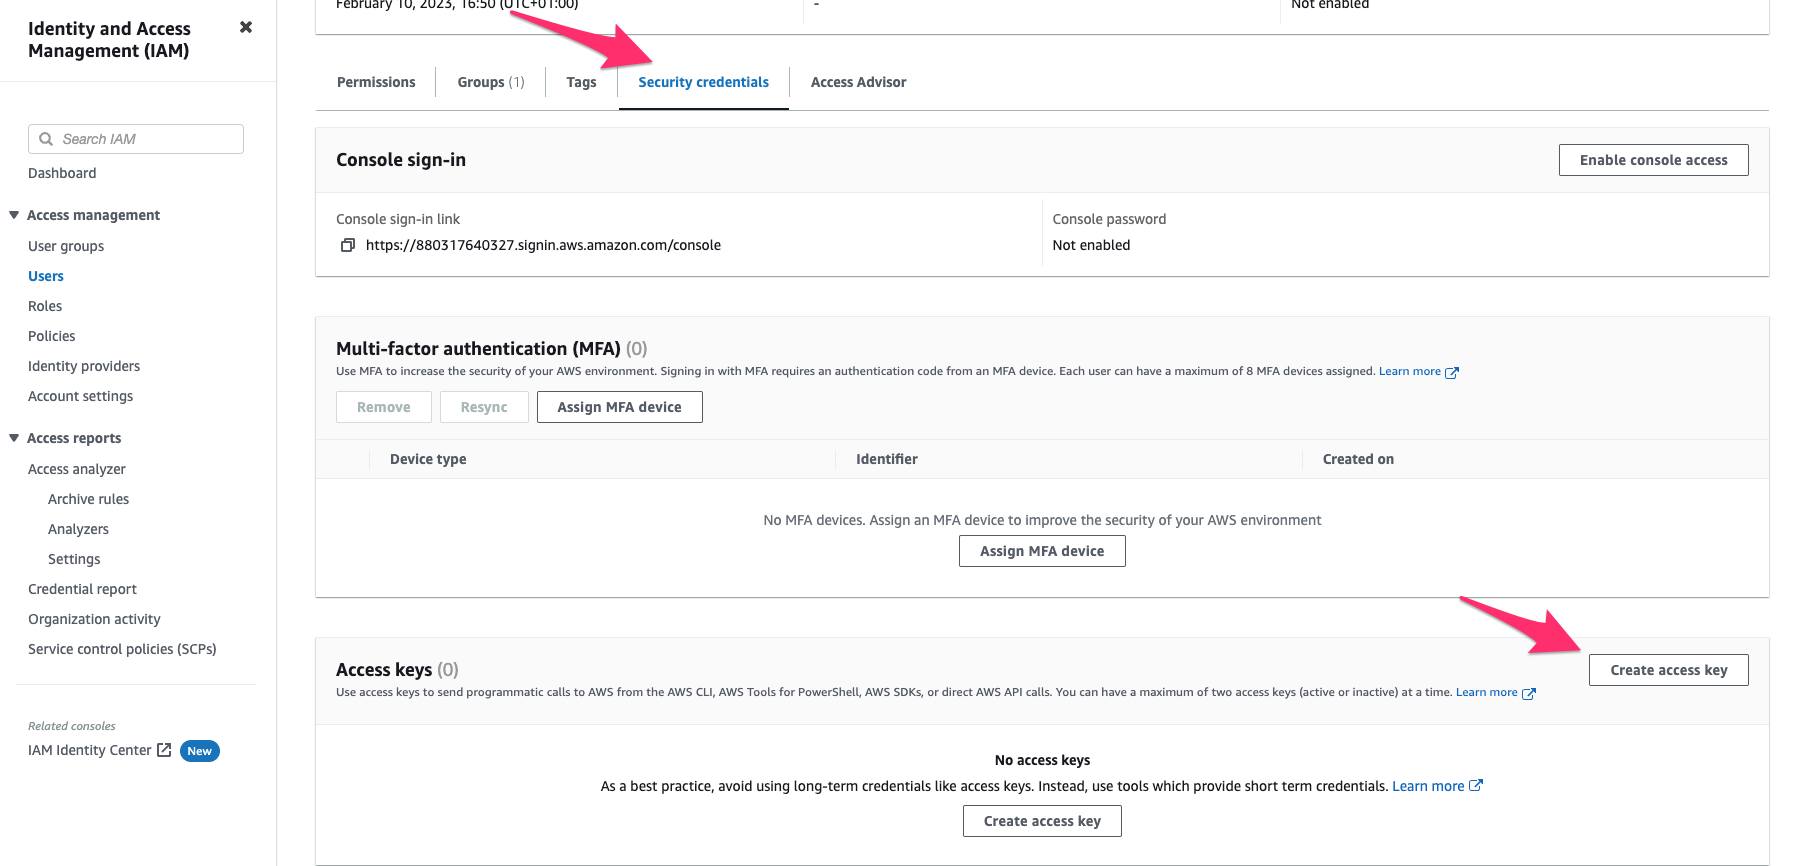
You can now save the
access key idandsecret access key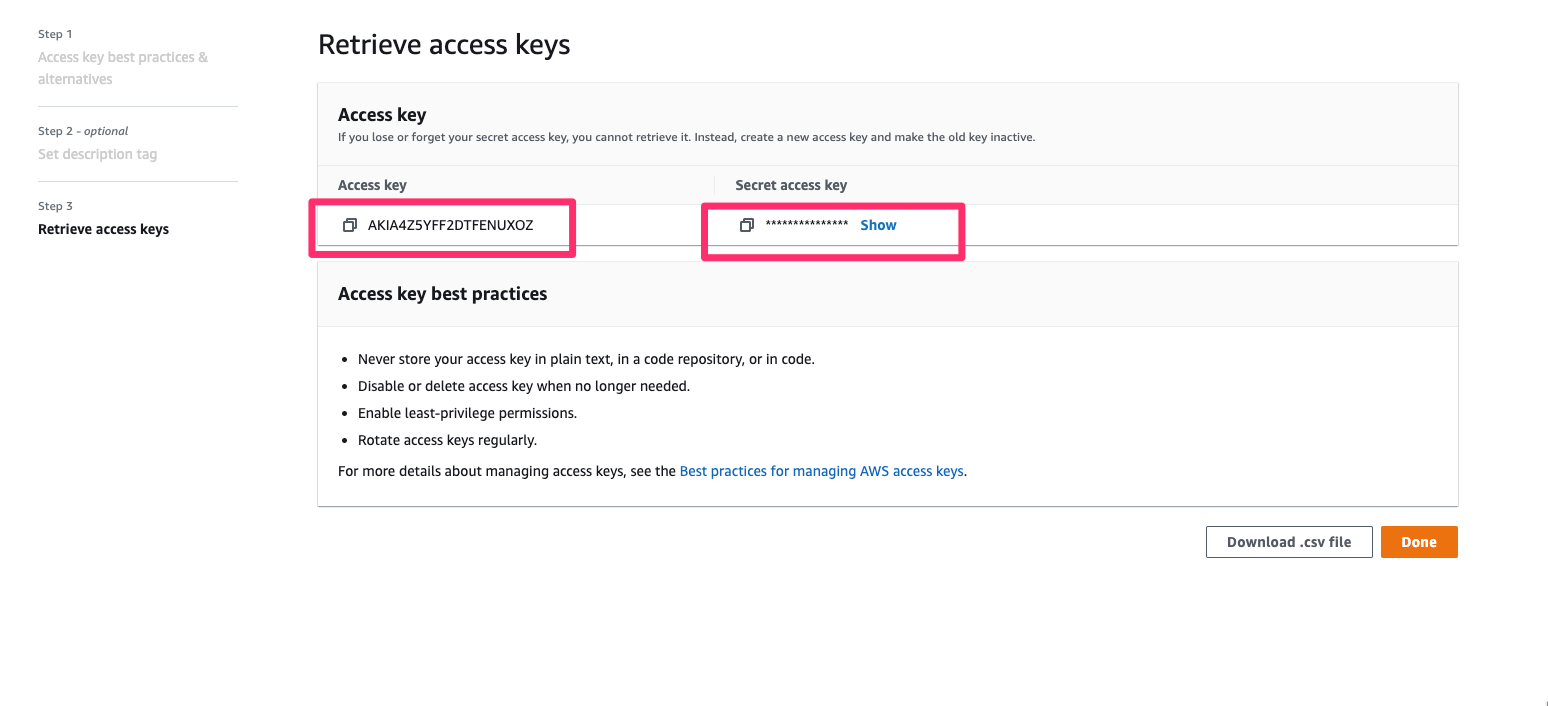
Allow access to the cluster
Once the user is created, make sure it has the proper access permissions on the EKS cluster (
system:masters). Example witheksctleksctl create iamidentitymapping --arn <iam_user_arn> --region <cluster_region> --username <user_name> --cluster <cluster_name> --group system:masters
Install Qovery
Create a cluster on the Qovery console
Login to the Qovery console, and create a "Self-Managed" cluster.
Set the name of the cluster (1), the installation type
Self-Managed(2) and add asCredentials(3) the AWS key that you have created in the previous step.
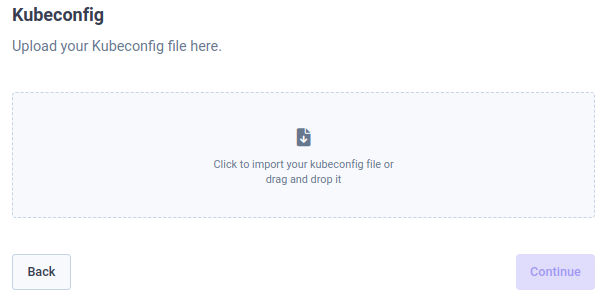
Add your cluster kubeconfig file, and click on "Continue".
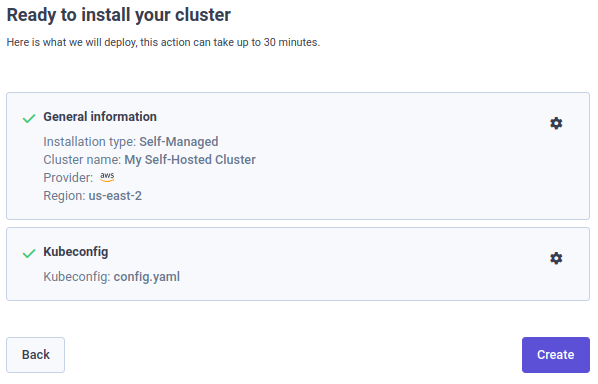
Verify your setup and create the cluster. At the end of this step, the cluster is created on the Qovery platform but not yet running on your AWS account.
After creation, you'll finally be able to download a file containing the Qovery configuration for your cluster. The content of this file will be used later.
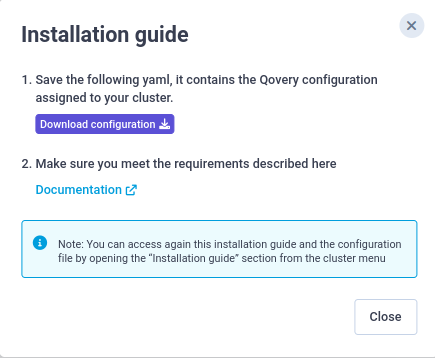
Here is an example of the content override of the file:
qovery:clusterId: &clusterId XXXXXXX-XXX...clusterShortId: &shortClusterId zXXXXorganizationId: &organizationId XXXXXXX-XXX...jwtToken: &jwtToken "..."domain: &domain "xxx.domain.org"domainWildcard: &domainWildcard "*.xxx.domain.org"qoveryDnsUrl: &qoveryDnsUrl https://xxxlokiUrl: &lokiUrl http://loki.qovery.svc:3100promtailLokiUrl: &promtailLokiUrl http://loki.qovery.svc:3100/loki/api/v1/pushacmeEmailAddr: &acmeEmailAddr "set-by-customer" # set your email address here for Let's encyrpt notificationexternalDnsPrefix: &externalDnsPrefix "qvy-zxxx-"architectures: &architectures "AMD64Note: you can access again this installation section using the
3 dotsbutton next to the cluster name.Prepare the values.yaml file
Now we have to build a values.yaml file to be used during the installation of the Qovery Helm charts on your cluster.
You will find in the helm chart git repository a non exhaustive list of
valuesexample files that you can use to build your own configuration. The full list of parameters that can be configured within a values file can be found in the Configuration page.In the repository we provide two examples for AWS:
values-demo-aws.yaml: this a pre-configured version to quickly setup Qovery on a demo cluster (do not use this configuration in production)values-aws.yaml: in this version you have to customize the entire Qovery installation. Adapt it based on your needs.
Once you have downloaded the example values file that you want to use:
- replace the
qoveryconfiguration part with the configuration retrieved from the Qovery console (see previous step) - update the configuration based on your needs. You can find all the possible parameters and configurations within the Configuration page.
- make sure that every parameter has a value, there's a placeholder
set-by-customerwhen your input is required.
Install Helm command line tool.
Add Qovery Helm repository.
helm repo add qovery https://helm.qovery.com/helm repo updateInstall Qovery on your Kubernetes cluster.
helm upgrade --install --wait --atomic --create-namespace -n qovery -f <your-values-file.yaml> \--set services.certificates.cert-manager-configs.enabled=false,services.certificates.qovery-cert-manager-webhook.enabled=false \qovery qovery/qovery-n qovery: the namespace where Qovery and its dependencies will be installed--set...: override (only for the first deployment time, if you want to use Cert-Manager) to let cert-manager install its CRDs-f your-values-file.yaml: the values file you've downloaded, overrided with the Qovery config and your custom configqovery/qovery: name of the chart to deployqovery: name of the release
If you want to use Cert-Manager, you can remove the
--set...for the future updates (or if already installed):helm upgrade --install --create-namespace -n qovery -f <your-values-file.yaml> qovery qovery/qoveryThat's it, you can now use Qovery on your own Kubernetes cluster!
Validate the installation
Follow the steps here.
Further configuration
Now that you have installed Qovery on your cluster, you can modify its configuration based on your need following the Qovery BYOK configuration guide.