Clusters
Managing your Clusters with Qovery
From the Qovery Console, you can manage the clusters you want to run on your infrastructure.
Creating a Cluster
To create a cluster:
Open your Qovery Console.
On the left menu bar, click on the Cluster page and click
Add Cluster: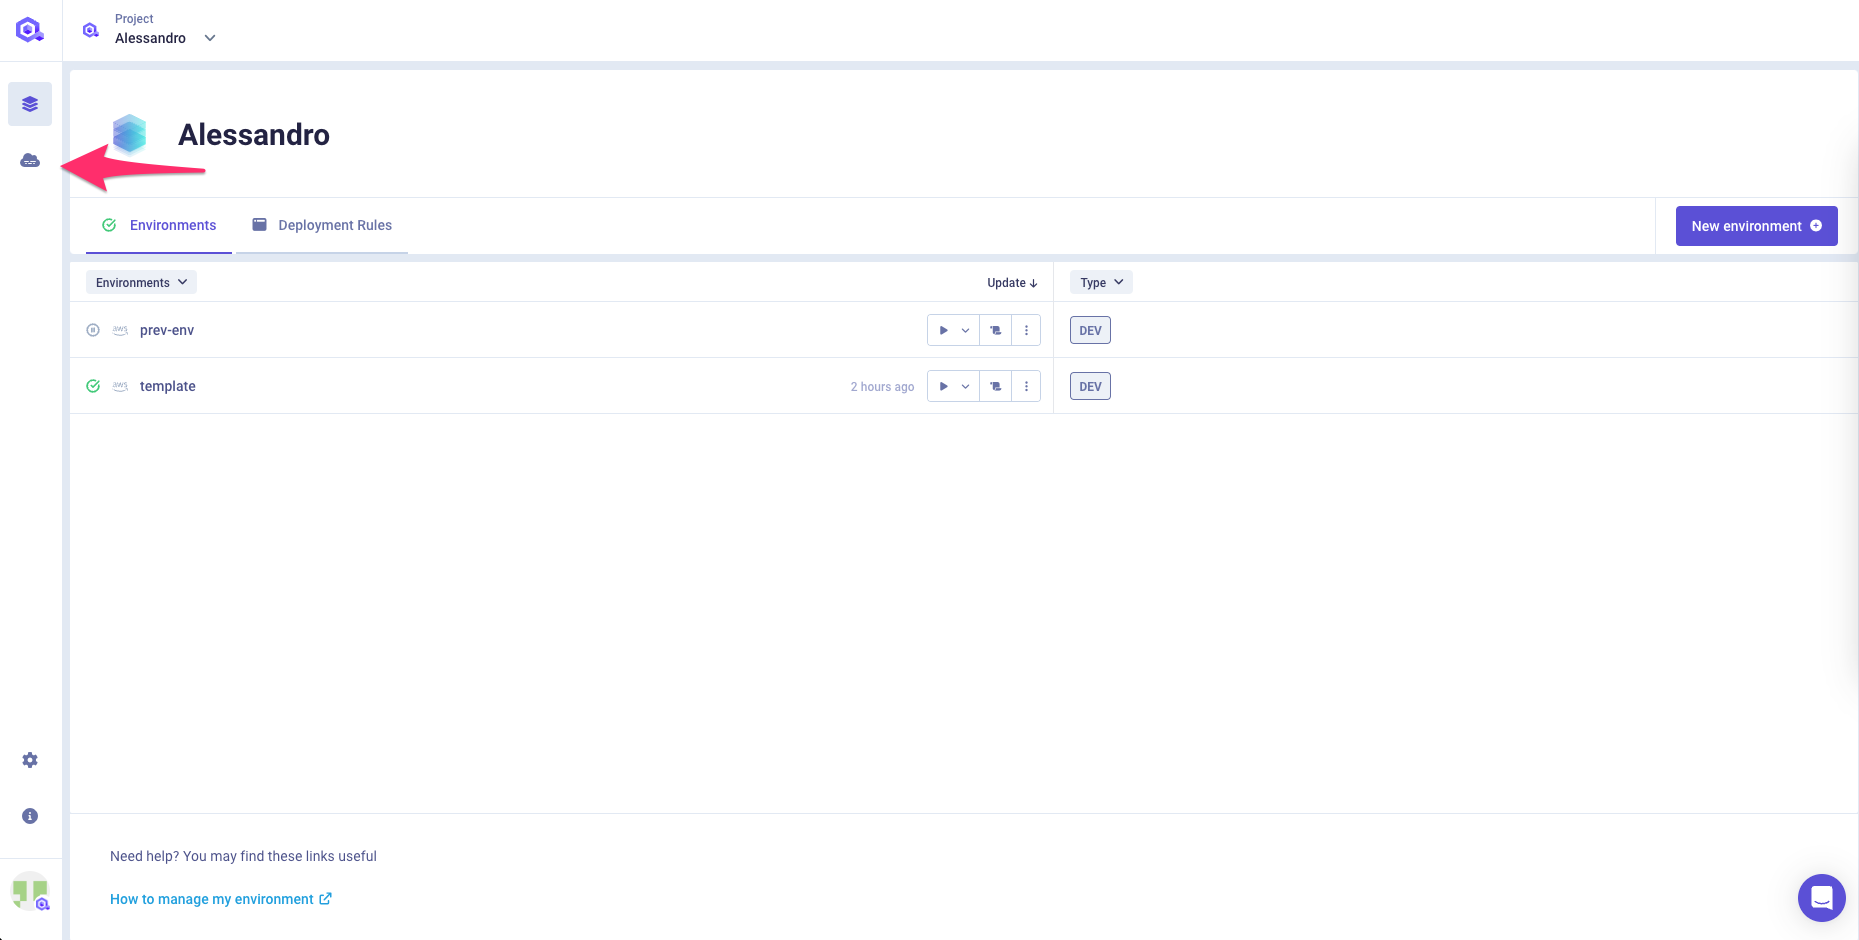
Refer to the specific installation guide for your cloud provider:
Overview
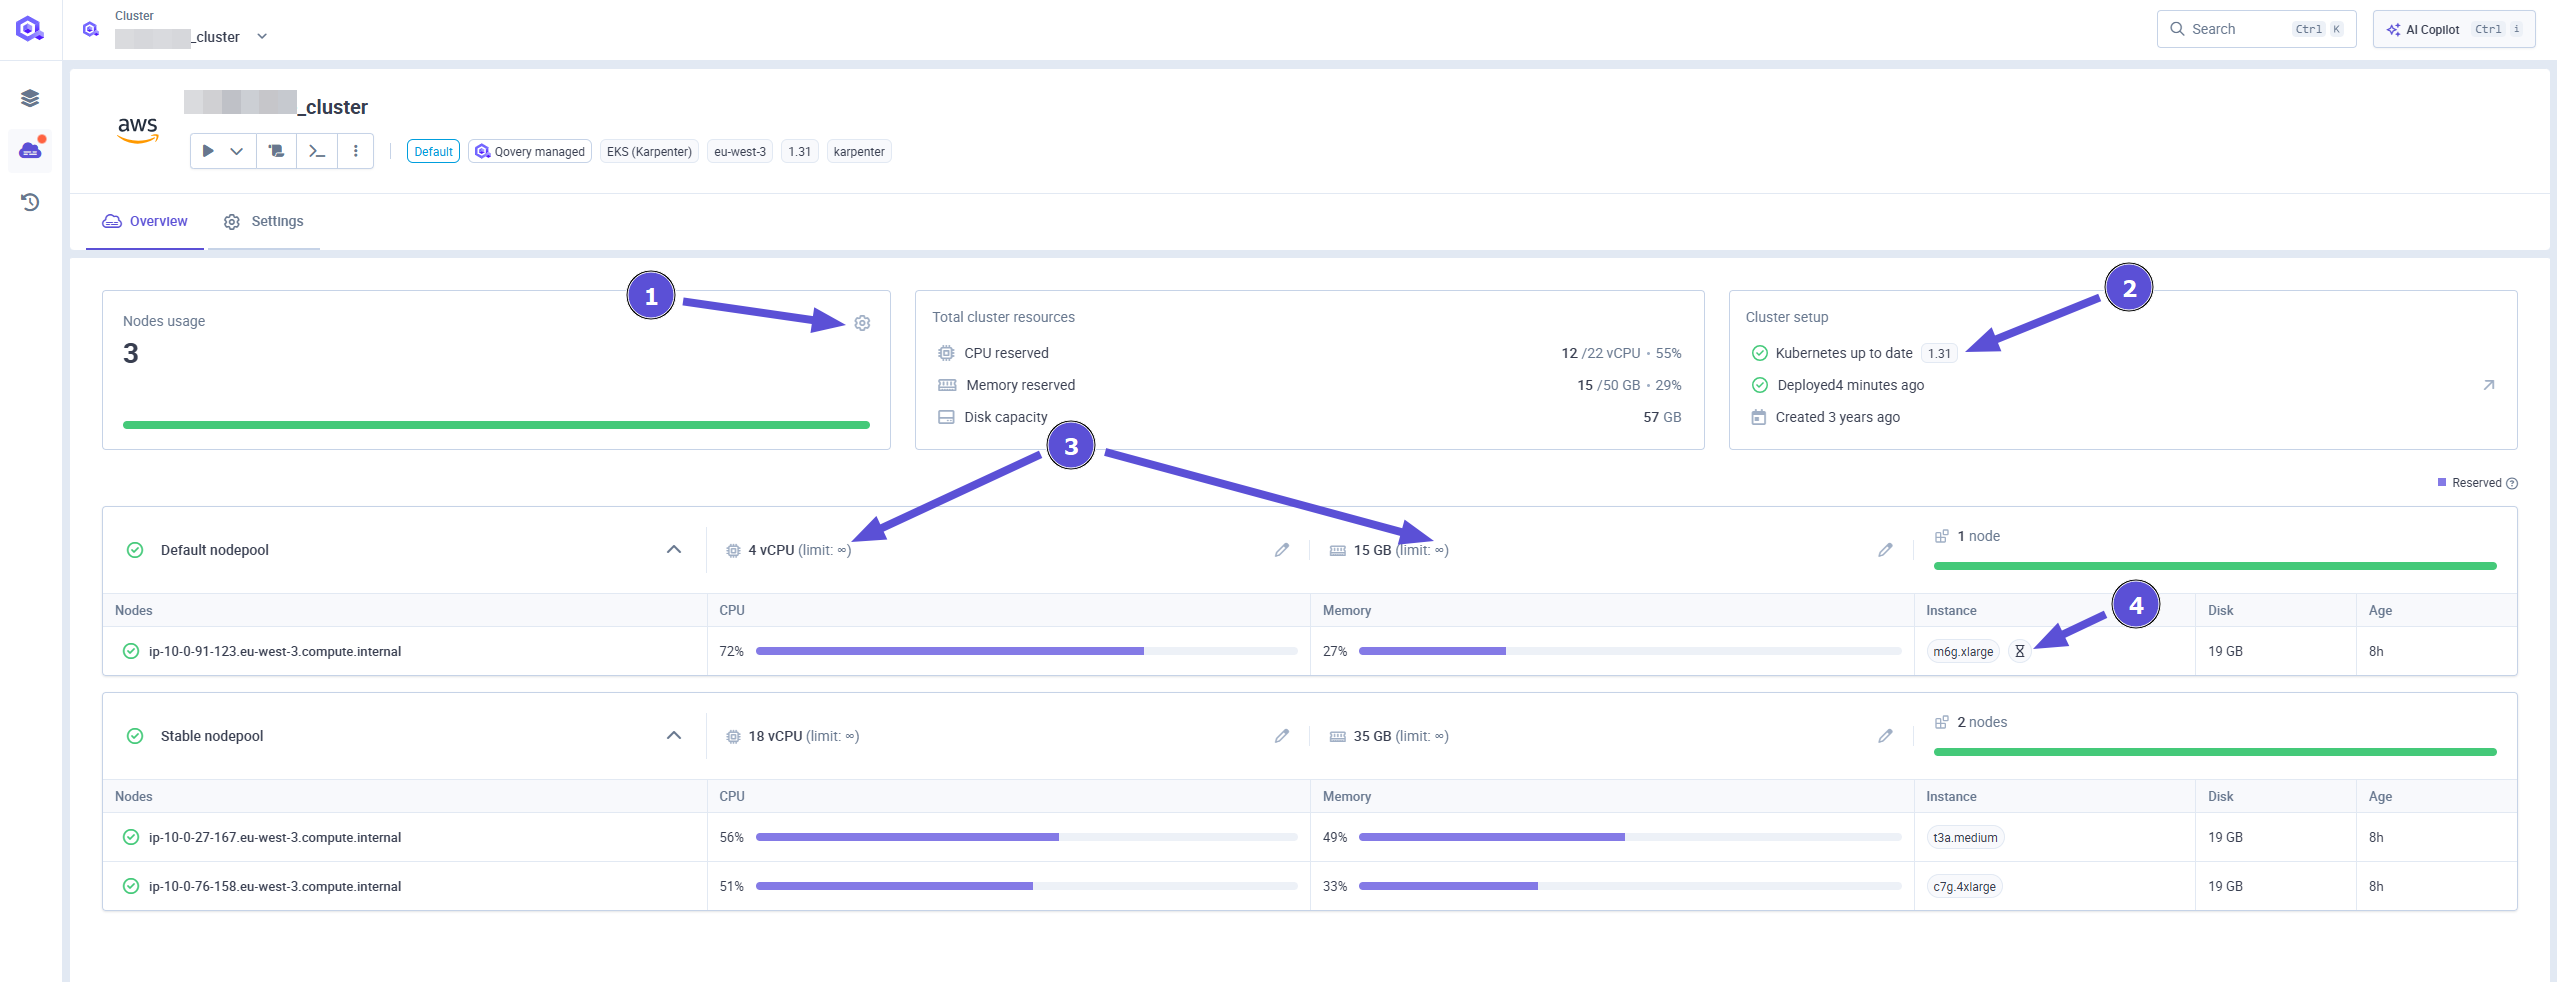
When clicking on a cluster card from the list, you'll be redirected to the Cluster Overview page. This page gives you a detailed, real-time view of your cluster's configuration and status.
At the top, you can:
- See the number of currently deployed nodes and their statuses.
- Edit instances configurations: instance type, minimum and maximum number of instances (see tag 1).
- View the total reserved resources for the cluster: including CPU, memory, and disk capacity.
- Check the installed Kubernetes version. If it's unsupported or too recent compared to the Qovery-supported version, a warning will be displayed (see tag 2).
- Track the current deployment status and see when the cluster was created.
For clusters using Karpenter, instances are grouped by nodepool. Each pool may show defined limits if configured (see tag 3).
Within each nodepool:
- You’ll find the number of vCPUs and memory reserved (not usage) per node.
Each node displays:
- The reserved resources (CPU and memory)
- Its instance type
- A spot instance indicator (hourglass icon) if applicable (see tag 4)
- Disk size
- Node age
This overview helps you easily monitor how your cluster is configured and scale it appropriately as needed.
Statuses
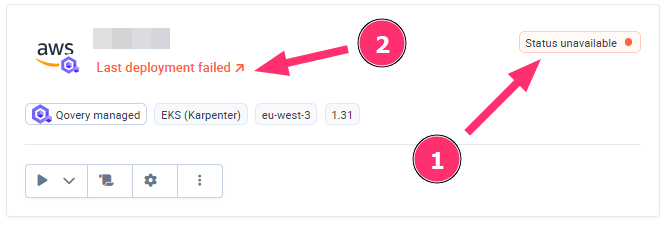
In Qovery, you may see two types of statuses:
- Cluster status (1): Indicates the actual health and connectivity state of your Kubernetes cluster.
- Deployment status (2): Reflects the outcome of the latest deployment operation (initial install, update, or upgrade). It shows whether your last deployment succeeded, failed, or is still in progress.
These tables list and explain the possible cluster statuses and deployment statuses.
Cluster Statuses
| Status | Meaning | What You Should Know |
|---|---|---|
| ✅ Running | Everything is working correctly. | Everything is working correctly. |
| 🟡 Warning | Something is not quite right. | The cluster is still functional but may need attention (e.g., resource limits, outdated versions). |
| 🔴 Error | A serious problem is preventing normal operation. | One or more Qovery components are in error. Action is required. |
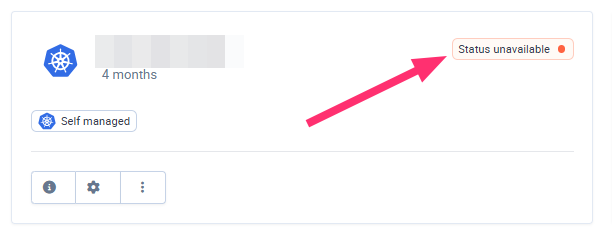
| ⚪️ Status unavailable | The cluster is unreachable, stopped or not responding. | The agent is not responding. Check the cluster status in your cloud provider. |
Deployment Statuses
| Status | Meaning | What You Should Know |
|---|---|---|
| ⏳ Deployment Queued | A deployment has been requested and is waiting to start. | The operation will begin shortly. |
| 🚀 Deploying | The deployment is currently in progress. | You can view the logs by clicking on the status link. |
| ❌ Last Deployment Failed | The latest deployment did not succeed. | Check the logs via the status link to understand the cause. |
| ✅ Last Deployment Succeeded | The last deployment was successful. | The last update timestamp will be displayed. No action is needed. |
Performing Actions on your Clusters
Qovery allows you to update, stop, restart or delete your clusters at organization level.
| Action | Description | Cloud provider |
|---|---|---|
| Updating a cluster | To redeploy your cluster after a change has been made to it. |    |
| Stopping a cluster | To temporarily stop your cluster. Some services you have subscribed to via your cloud provider may still be active and incur costs when your cluster is stopped. For more information, see Stopping a cluster. | |
| Restarting a cluster | To restart your cluster after it has been temporarily stopped. | |
| Deleting a cluster | To delete your cluster. This is final and needs to be done properly to ensure all the services deployed by Qovery on your cloud provider's account are disabled, with no leftover cloud-related costs. For more information, see Deleting a cluster. | |
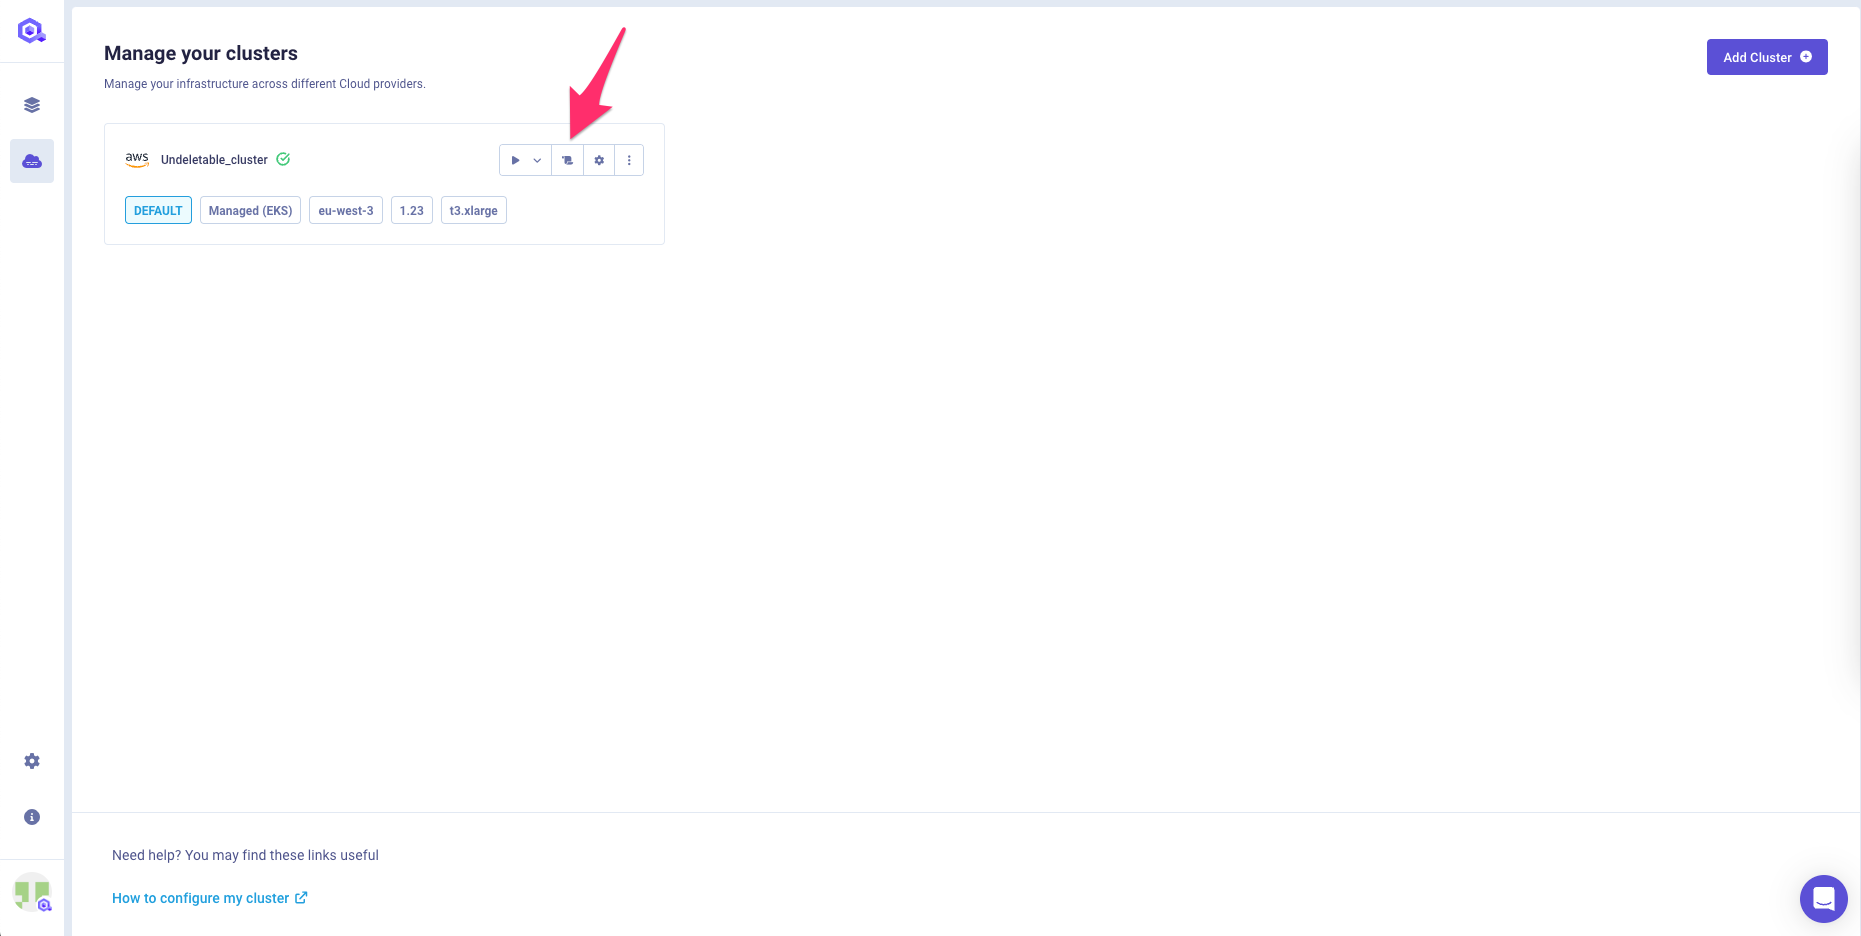
To access these actions:
Open your Qovery Console.
On the left menu bar, click on the Cluster page.
To view your cluster actions, click
Playbutton: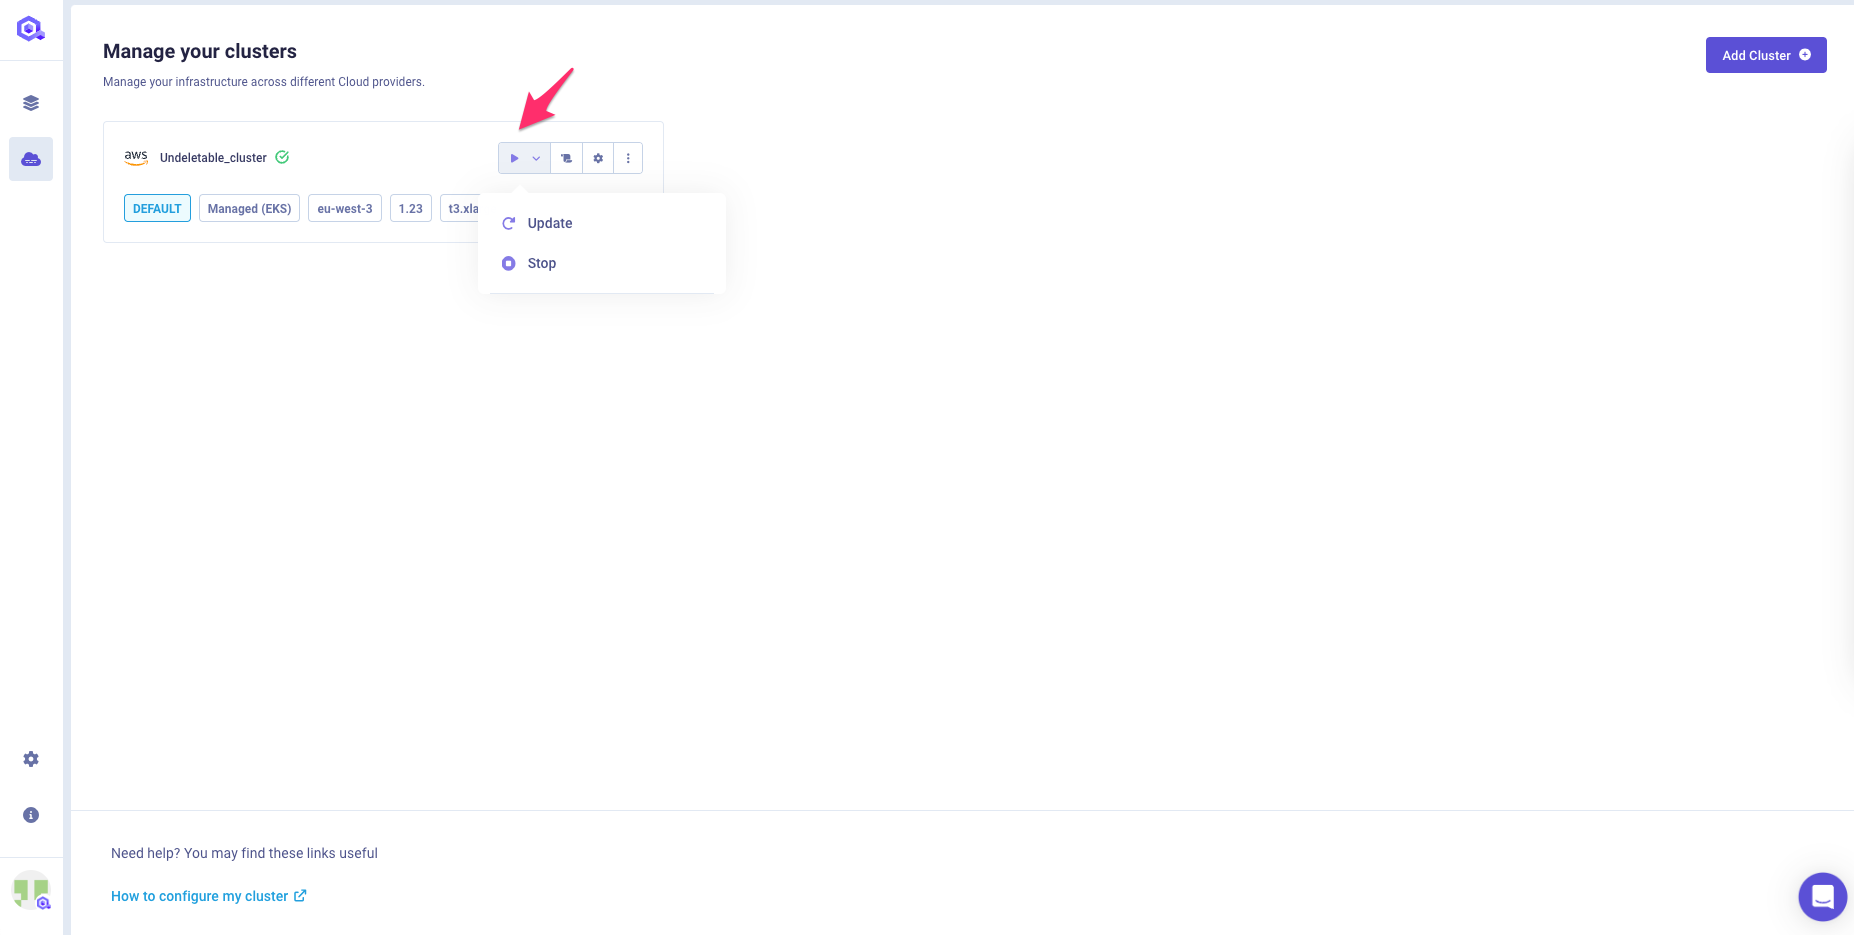
A dropdown menu unfolds, featuring all the actions available on your cluster.
You can follow the execution of the action via the cluster status and/or by accessing the Cluster Logs
Updating a Cluster
If you made a change on your cluster, you need to run an update on your cluster to propagate remotely the new configuration.
To update your cluster, select the action Update from the drop-down menu.
A confirmation pop-up window opens before triggering the action.
Once confirmed, the status of your cluster turns Updating... (orange status).
Once the update is complete, the status dot next to your cluster turns green.
Stopping a Cluster
Qovery allows you to temporarily stop your cluster instead of deleting it.
To temporarily stop a cluster, select the Stop action from the drop-down menu.
A confirmation pop-up window opens before triggering the action.
Once confirmed, the status of your cluster turns to Pausing... (orange status).
Once the stop is complete, the status dot next to your cluster turns to grey, and the status of your cluster turns to Paused (gray status).
Restarting a Cluster
You can restart a cluster after it has been temporarily stopped.
To restart your cluster, select the action Resume from the drop-down menu.
A confirmation pop-up window opens before triggering the action.
Once confirmed, the status of your cluster turns to Updating... (orange status).
Once your cluster has restarted, the status dot next to your cluster turns to green.
Deleting a Cluster
To delete a cluster, open the ... section and press Delete Cluster.
3 options can be chosen to delete a cluster:
1) Default This is the default behaviour, this option shall be chosen every time you want to delete properly a cluster from the Qovery console AND your cloud provider account.
This operation will delete:
- Cloud provider: any resource created by Qovery on your cloud provider account to run this cluster will be deleted, including any application running on it.
- Qovery organization: the configuration of this cluster and any linked environment.
2) Delete Cluster on cloud provider and Qovery configuration
This option shall be chosen when the cluster delete operation with the Default option fails since you have manually modified/deleted the RDS instances created by Qovery on your cloud provider account.
This operation will delete:
- Cloud provider: any resource created by Qovery on your cloud provider account to run this cluster will be deleted, including any application running on it.
- Qovery organization: the configuration of this cluster and any linked environment.
3) Delete Qovery config only
This option shall be chosen when you have already deleted any Qovery resource on your cloud account and you want to delete the cluster object from your Qovery console.
This operation will delete:
- Cloud provider: nothing will be removed from your cloud account. You will have to manually delete any resource created by Qovery directly from your cloud provider console.
- Qovery organization: the configuration of this cluster and any linked environment.
Once confirmed, the cluster status turns to Deleting... (red status) and once the deletion is complete, the cluster is removed from your organization settings.
Audit logs
To get the cluster filtered audit logs, open the ... section and press See audit logs.
You will be redirected to the audit logs section. A filter on the dedicated cluster will be applied. You only see the audit logs regarding cluster operations.
Get your cluster id
To get your Qovery cluster id, open the ... section and press Copy identifier.
The cluster id in Qovery will be in your clipboard.
Get your cluster kubeconfig file
If you need to get your kubeconfig file, open the ... section and press Get Kubeconfig.
Then the kubeconfig yaml file will be automatically downloaded.
Logs
Qovery allows you to access the logs of your cluster in order to follow its installation or investigate any issue happening on it.
To access the logs you need to open the cluster, click the log button
A new window is opened, displaying the logs of the cluster.
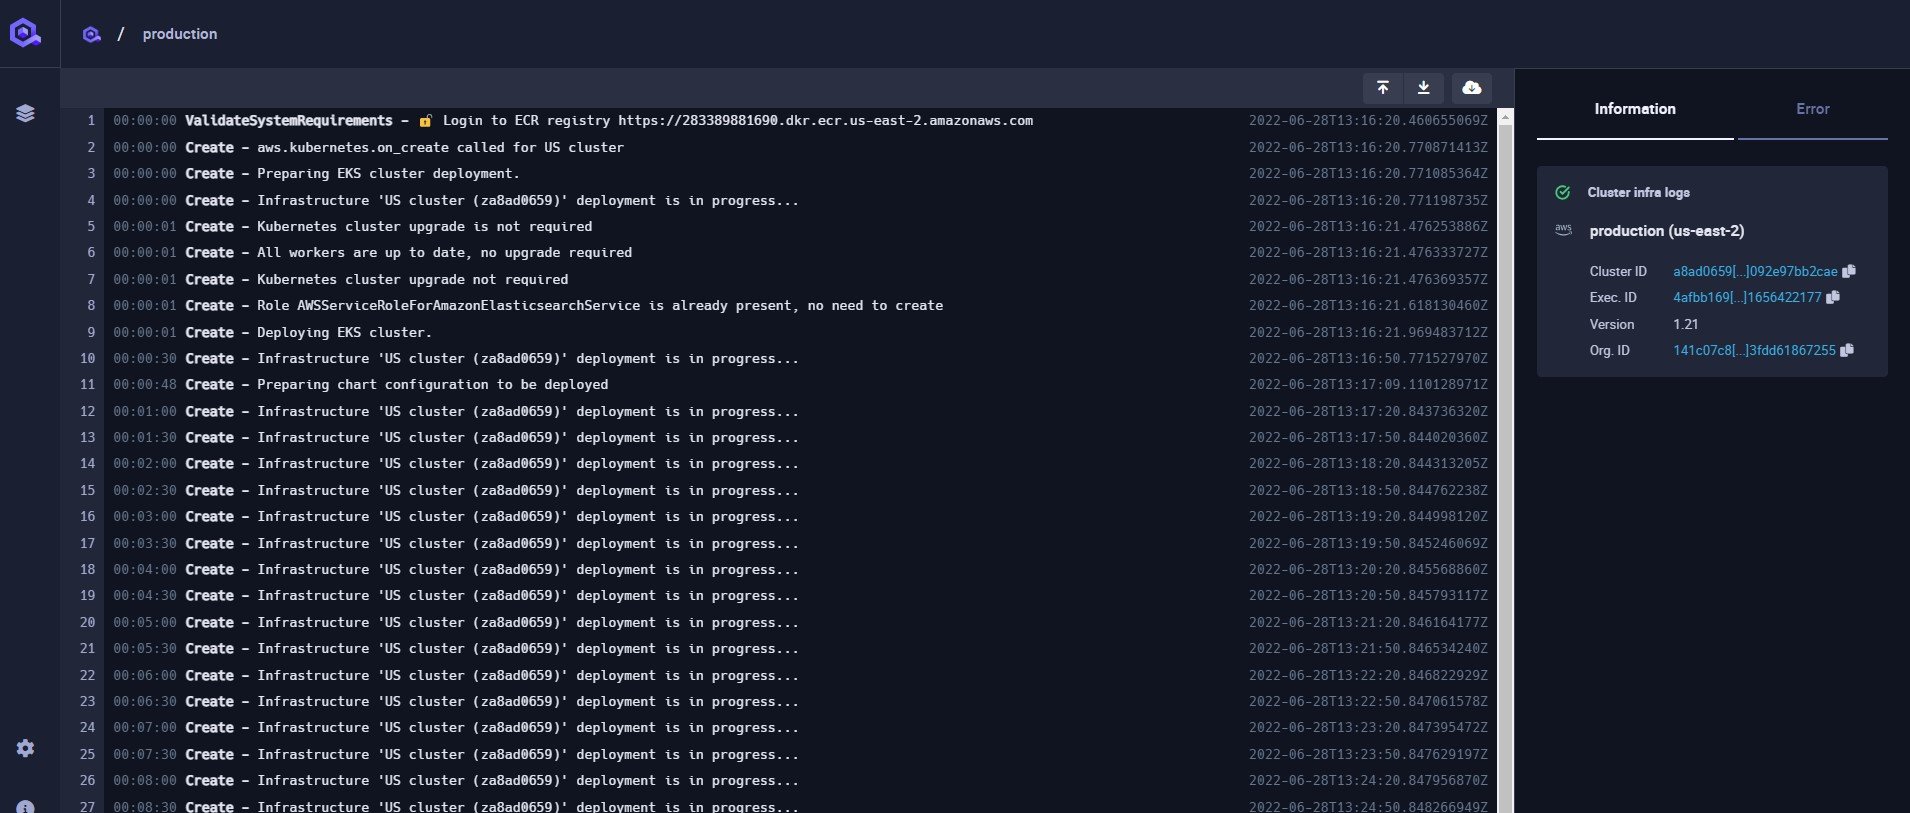
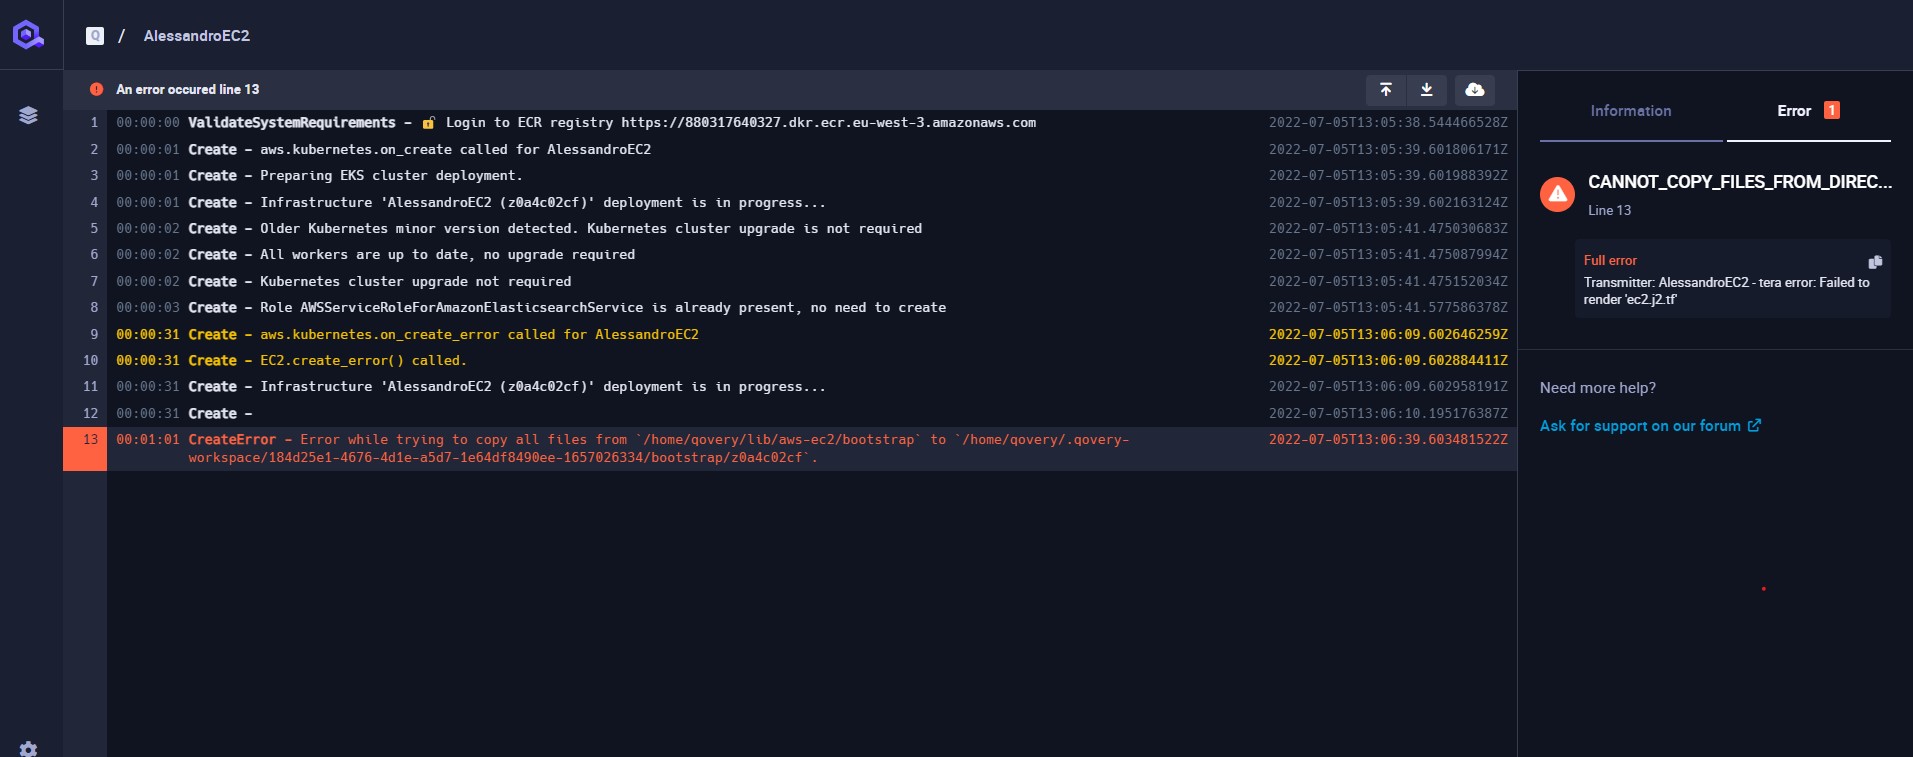
The tab system on the right allows you to access the cluster information and, if an error occurs, the detail of the error.
Use custom domain and wildcard TLS for the whole cluster (beta)
By default, Qovery provides a domain (ex bool.sh) on every deployed cluster. It is used to provide a DNS and TLS certificate to every application requiring external access on a cluster.
You can customize the domain for every application. However, when it comes to having more than 100 custom domains with the same domain you will hit Let's Encrypt quotas.
To overcome this issue, you can use a wildcard TLS certificate for the whole cluster. It will allow you to have as many DNS records for a single domain as you want on the same cluster with a single TLS certificate.
At the moment, Qovery only supports wildcard TLS certificates with Cloudflare. To use it, you need to have a Cloudflare account and a domain name managed by Cloudflare. If you don't have one, you can create a free account and transfer your domain to Cloudflare.
Once you have a Cloudflare account and a domain name managed by Cloudflare, you need to create a Cloudflare API token. Go into your Cloudflare account, click on your profile picture, then My Profile. In the API Tokens section, click on Create Token. In the Create Custom Token section, select the following permissions:
- API token a descriptive name: Qovery domain
your domain name - Permissions:
- Zone - DNS - Edit
- Zone - Zone - Read
- Zone Resources:
- Include - Specific zone -
your domain name
- Include - Specific zone -
To finish, click on Continue to Summary and Create Token. Save the token somewhere safe, you will need it later.
Prepare the Token, the Cloudflare account email and the domain to be set on your cluster. Now contact Qovery and request to use your domain.
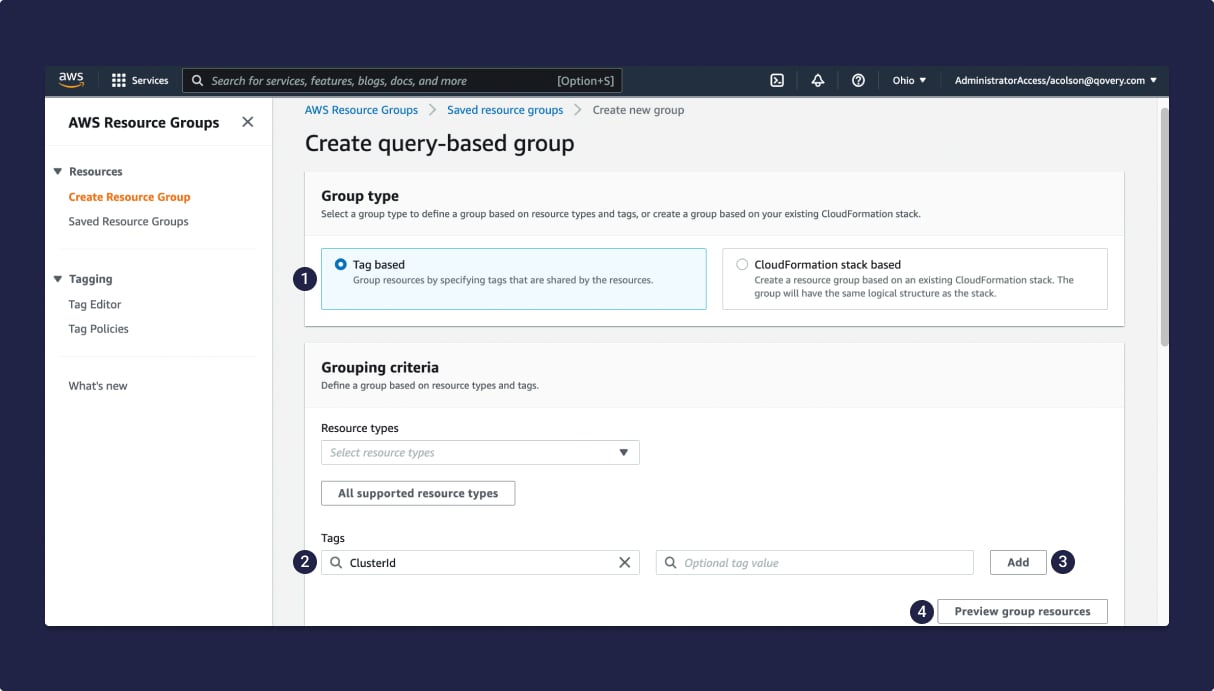
Cleaning up a Cluster from your AWS Account
To clean up a Qovery cluster from your cloud provider account, go to AWS Console>Services>Management & Governance>Resource Groups & Tag Editor> Create Resource Group:
| Step | Description |
|---|---|
| 1 | In the Group type area, select Tag based. |
| 2 | In the Tags field of the Grouping criteria area, enter ClusterId. |
| 3 | Click Add. |
| 4 | Click Preview Resources. All your Qovery clusters are now displayed in the Group resources table, and you can delete them by hand. |
FAQ
What is a cluster?
Please refer to the basic concepts section
Why do I need a cluster?
Qovery is built on top of Kubernetes, which means we need Kubernetes clusters to be able to deploy and run your applications.
Thanks to clusters, you can easily deploy several (and many) instances of the same application, so that if one fails, the others can instantly take over. Also, clusters can auto-scale, meaning that the number of worker nodes in a cluster can automatically go up or down as traffic fluctuates on your application(s), thus ensuring high availability and performance. Clusters are also extremely useful to isolate your production environment from your staging environment.
In short, through the use of clusters, Kubernetes provides you with a resilient, flexible and powerful infrastructure, fit for production environment needs and requirements. And with the help of Qovery, setting up and maintaining your Kubernetes clusters has never been easier.
What are the different instance types available when creating a cluster?
The range of instance types available at cluster creation depends on your cloud provider:
- AWS offers over 400 instance types. You can view their details on the official AWS website, as well as their pricing.
- Scaleway also offers a wide range of instance types, whose details and pricing you can view on the official Scaleway website.
- GCP clusters are deployed in auto-pilot mode so you will have access by default to every instance type available
How does Qovery handle Kubernetes version upgrades?
As far as cluster upgrades to a newer version of Kubernetes are concerned, our Qovery engineering team handles everything in due time, so you don’t even need to think about it!
Usually, we work on a given upgrade for one month of intensive testing on our end in order to make sure everything will be smooth for you. Once we are pretty confident our stack is stable, we move on with the following steps which last approximately 3 weeks:
- Notify users about new version coming in approximatively 1 month before
- Upgrade clusters for a handful of beta-tester customers (1 week)
- Make available the new version for all clusters (new or existing)
- Upgrade all non-production flagged clusters (1 week)
- Upgrade all clusters the production clusters (1 week)
If, somehow the planning or timeframe for the upgrade is clashing with your business needs, you will be able to trigger the upgrade of your cluster manually via the "Upgrade to XX.XX" action available from the Play menu of your cluster. This action will be available on your cluster once we will make the new version available globally (step 3), you will notice that the Play button of your cluster will be highlighted in yellow.
What do you do when a vulnerability is found?
Security is our main concern. When a vulnerability is found, here are the actions that we take:
- We quickly identify how significant is the impact of the vulnerability.
- We look at how we can solve or mitigate the vulnerability.
- We transparently communicate with our customers about the vulnerability to help them take the right actions.
What is a mirroring registry?
It's the registry used by Qovery to push the image built by the Qovery CI or mirror the images that you want to deploy from your own registry. Check this documentation for more information
Why is my status showing as unavailable?
When accessing the Clusters view from the Qovery Console, you may sometimes encounter the status Unavailable for one of your clusters.
The cluster has been manually stopped or is not running.
There is a technical issue preventing Qovery from communicating with your cluster (for example: misconfiguration, or network problems).
If you see this status and are unsure why it appears:
If everything seems fine on your side or you need help understanding the issue, feel free to reach out to our support team.